Connect eBay to QuickBooks Online
by Intuit•10• Updated 2 days ago
Learn how to connect your eBay account to QuickBooks Online.
Set up your QuickBooks Connector (OneSaas) integration between eBay and QuickBooks Online within minutes using our simple setup process. Here’s a step-by-step guide, highlighting some useful key points throughout the process.
Connect your eBay account
Begin the process by connecting your apps to QuickBooks Connector.
- Sign in to your QuickBooks Online account.
- Go to My integrations
 and find eBay Connector by Intuit.
 - Select Get app now and install the app.
- Select Connect.
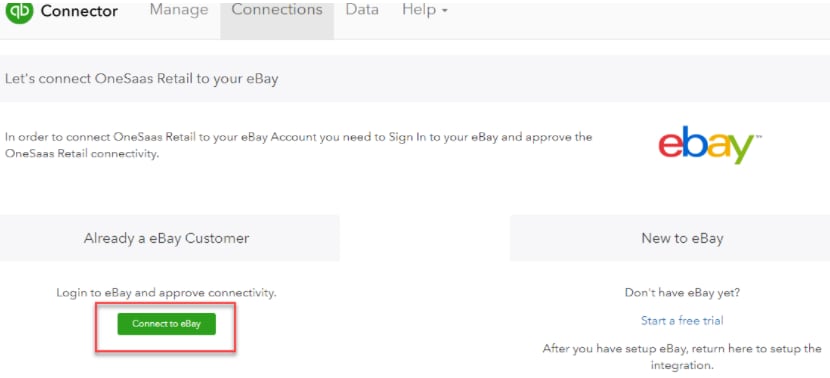
- You will then be redirected to the Connections tab in QuickBooks Connector (OneSaas). Select Connect to eBay.
- Enter your eBay credentials and sign in.
Your eBay account is now connected and authorised with your QuickBooks Connector file.
Note: You can either add another connection by selecting Add Connection, or move forward and configure your integration.
Configure settings
The configuration process below will present you with various options regarding exactly how you want your eBay and QuickBooks Online integration to work.
Note: You'll need to have some basic accounting knowledge to make sure that the integration settings are tailored to your business and accounting practices.
1. You’ll be required to set up your synchronisation options before you can start configuring your workflows. You will need to set up the following:
- Account timezone
- Integrations starting date
- Email sync report options
2. You’ll be presented with workflows that are all optional. In this guide, these workflows will be selected to demonstrate the full capabilities of the setup process.
- Sales from eBay will be sent to QuickBooks Online as an invoice.
- Products from eBay will be created in QuickBooks Online.
- Stock level updates from QuickBooks Online will be sent to eBay.
Sync your data
Your account is now ready to sync your data across your apps. When auto-sync is on, your account should sync every hour, but you can trigger a manual sync at any time. Just go to the Manage tab, then select Sync Now on the Synchronisation Options.
If you have any questions, reach out to our support team for help at any time.


