Learn how to merge accounts, customers, suppliers, and more in QuickBooks Desktop for Windows.
If you enter the same item twice with different names, you can merge them and keep your lists accurate. We'll show you how.
Before you merge make sure:
- Backup your QuickBooks Desktop for Windows company file.
- Switch your company file to "Single User" mode.
- Clear any pending accountant changes.
- To turn multicurrency off in QuickBooks Desktop for Windows.
- The suppliers you want to merge aren’t:
- Tax authorities
- Tax exempt
- Paid through online banking
- Direct deposit suppliers
QuickBooks Desktop for Windows
Merge entries in Chart of Accounts, Item List, Customer List, Supplier List and Employee List
- Go to Lists, then select the list that has the entries you want to merge.
- Copy the name of the entry you want to keep.
- Right-click the entry you don’t want to use, then select Edit.
- Paste the name you copied, then select Save & Close.
- Select Yes to merge the entries.
Note: If you get the message, “You cannot merge an account that has online information associated with it into another account”, you have an active bank feed on one of the accounts. Here’s how to turn off bank feeds.
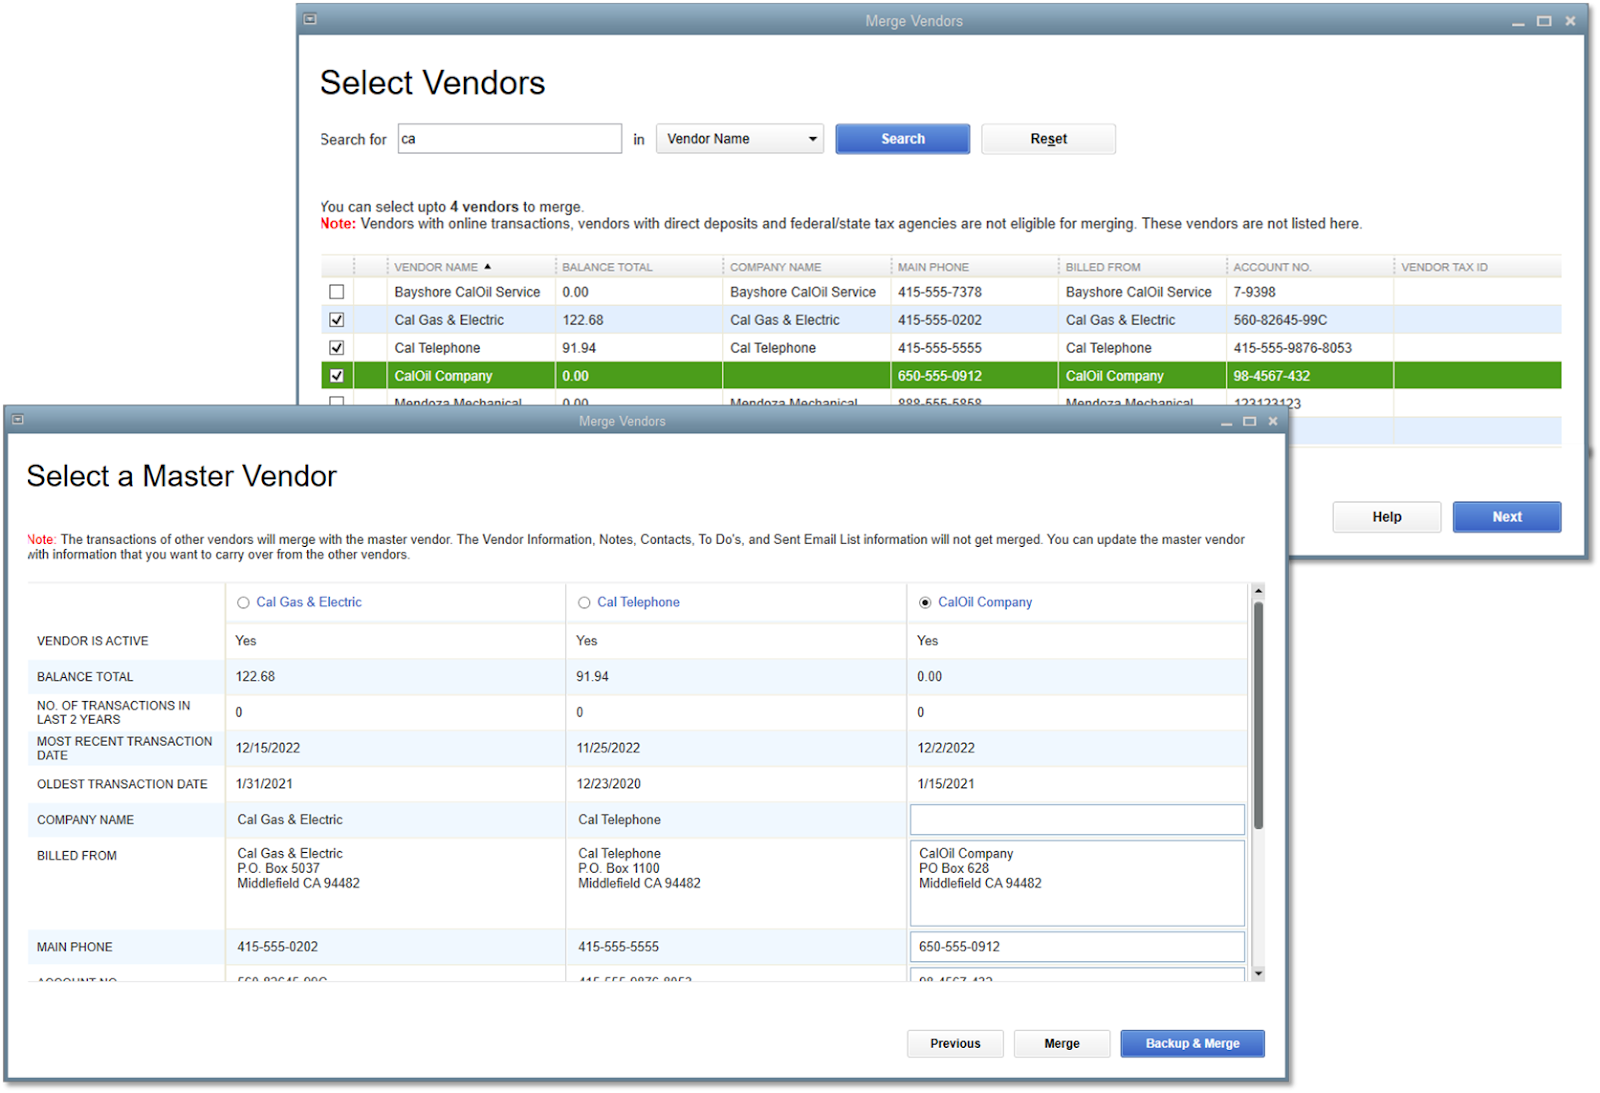
Use Merge Suppliers tool in Accountant and Enterprise editions
- Accountant Edition: Go to Accountant, select Client Data Review, then select Merge Suppliers.
Enterprise edition: Go to Company, select Accounting tools, then select Merge Suppliers. - Select the suppliers you want to merge, then select Next.
- Select a Primary Supplier, then Merge.
- Select Yes to merge the suppliers, then select OK.