Setup and use the Warehouse Manager in QuickBooks Desktop mobile
by Intuit•2• Updated 3 years ago
Get help with setting up and using the Warehouse Manager, so you can stay on top of your inventory movement.
Warehouse Manager integrates seamlessly with QuickBooks Enterprise Advanced Inventory. It helps you efficiently receive items from purchase orders, or pick and pack items collected from a warehouse to complete sales orders.
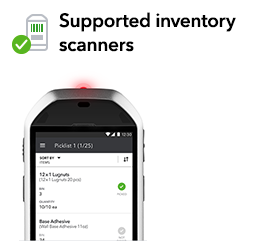
There are several supported mobile barcode scanner devices:
- Zebra TC21
- Zebra TC26
Discontinued by the manufacturer but still supported:
- Zebra TC20
- Zebra TC25
- Zebra TC51
- Zebra MC40
 |  |
Download and install the QuickBooks Desktop mobile app
Pair the device to your QuickBooks company file
| Note: You should be logged in to QuickBooks. If there is a prompt to sign in, enter your login credentials. |
- In the QuickBooks Edit menu, select Preferences.
- Select Items & Inventory, then go to the Company Preferences tab.
- Select Advanced Inventory Settings.
- On the Site Operations tab, select Add. QuickBooks gives you a passcode.
- On your mobile device, open the scanner/app, then enter the passcode.
- Select Link, then Yes.
- A success message appears indicating that the scanner is now linked to the QuickBooks company file.
- Select Next.
Your scanner or mobile device is now connected to QuickBooks. To start using the scanner, set up warehouse users (pickers). If the company file does not have pickers set up or sales orders that have been sent for picking, the scanner may display the error message “There are no users assigned to this company file."
Add Pickers
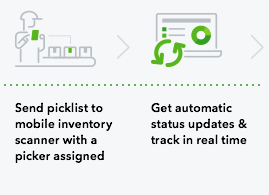
Each sales order contains inventory items. The warehouse worker who fills that order by collecting those items in the warehouse for packing and shipping is called a Picker. If the warehouse manager (or equivalent) has a sales order that needs to be filled, they create a Picklist and assigns a picker.
Note: With Advanced Inventory, you can assign a picklist to a picker, then send it to a mobile barcode scanner, (if you have one).
Once assigned, the Picker will:
- Go around the warehouse to collect all of the items that are on the Picklist.
- Scan the items using the mobile barcode scanner.
- Pack the items in a box for shipping.
To add a picker, you must create the picker as a vendor with the Type field set as Warehouse user.
Pickers can be both a vendor and an employee. To assign a Picklist to an employee, you need to make them a vendor.
| Note: To turn on the Warehouse user option in the drop-down list, check View Balances in the user’s role settings. |
Enable Warehouse User
- From the QuickBooks Company menu, select Users, then Set up Users and Roles.
- On the Role list tab, select the Role of the user, then Edit.
- Under Areas and Activities, select Centers and then select Vendor Center.
- Under Activity Access Level, check View Balance.
Add a Picker
- Under the Vendors menu, go to Vendor Center.
- From the New Vendor drop-down list, select New Vendor.
- In the Vendor name field, enter the name of the Picker.
- Select the Additional Info tab.
- From the Vendor Type drop-down list, select Warehouse user.
The names of all the pickers added in QuickBooks will appear on the scanner.
To update or remove a picker, update or remove a vendor.
Having some trouble with your app? Here's how to troubleshoot the Warehouse Manager for QuickBooks Desktop mobile.
Want to know more about Pick, Pack, Express pack, Cycle count, and purchase order management sheet? See here:
More like this
- Use the purchase order management worksheetby QuickBooks
- Site Operationby QuickBooks
- System requirements for QuickBooks Desktop 2024by QuickBooks
- Get started with the new Shipping Manager in QuickBooks Desktopby QuickBooks