Turn on Advanced Inventory
by Intuit•7• Updated 4 months ago
If you are using QuickBooks Desktop Enterprise, you can purchase or subscribe to Advanced Inventory which enables you to use:
- FIFO costing
- Multiple location inventory
- Bar code scanning
- Bin or lot tracking
- Serial or lot numbers
- Sales order fulfillment process (Site Operations)
To Turn on Advanced Inventory:
- From the Edit menu, select Preferences.
- On the left pane, choose Items & Inventory then go to the Company Preferences tab.
- Check the Inventory and Purchase Orders are Active box.
- Select the Advanced Inventory Settings button. If the button is grayed out even though you have purchased the feature, you will need to sync license data online so that QuickBooks recognizes it.
- In QuickBooks, select Help then Manage my License and then Sync License Data Online.
- Check that Advanced Inventory Settings is no longer grayed out.
- Close and re-open the QuickBooks program.
In case of sync failure
If Syncing fails on some but not all computers, there may be system-specific problems. Follow these troubleshooting steps.
Note: These steps are for the Windows operating system, which is not an Intuit product. They can become complex if errors occur while repairing or uninstalling the .Net Framework. If you are not comfortable doing these steps on your own, Intuit recommends you consult with your computer's manufacturer.
Step 1: Download and install the QuickBooks Tools Hub
The QuickBooks Tool Hub helps fix common errors. You'll need to close QuickBooks to use the tool hub. For the best experience, we recommend you use Tool Hub on Windows 11, 64-bit.
- Close QuickBooks.
- Download the most recent version (1.6.0.8) of the QuickBooks Tool Hub. Save the file somewhere you can easily find it (like your Downloads folder or your Windows desktop).
Note: If you've installed Tool Hub before, you can find out which version you have. Select the Home tab. The version will be on the bottom. - Open the file you downloaded (QuickBooksToolHub.exe).
- Follow the on-screen steps to install and agree to the terms and conditions.
- When the install finishes, double-click the icon on your Windows desktop to open the tool hub.
![]()
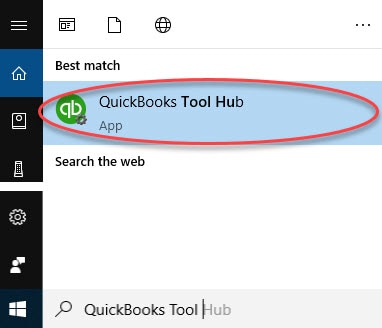
Note: If you can't find the icon, do a search in Windows for QuickBooks Tool Hub and select the program.

Step 2: From the Tools Hub, run the Quick Fix my Program
The Quick Fix will shut down any lingering background processes QuickBooks may be using. It will run a quick repair on your program.
- In the tools hub, select Program Problems.
- Select Quick Fix my Program.
- Select the QuickBooks Program Diagnostic Tool.
More like this