Create an Automated Welcome Email on Mobile
by Intuit• Updated 1 year ago
Set up an automated welcome email to make sure new contacts get a warm welcome when they join your audience.
Here, you’ll learn how to use the Mailchimp app to create an automated welcome email on your phone or tablet.
Before you start
To create an automated welcome email on our mobile app, your account needs to meet a few requirements.
- Currently, you can only create an automated welcome email on the mobile app if you don’t have this type of automation in your audience yet.
- This article uses a Nexus 5 and an iPhone 6 to demonstrate Mailchimp's features. Other Android or Apple devices may render the same features slightly differently.
If you’ve set up your audience but haven’t tried an automated welcome series yet, you’re good to go.
How it works
Design your welcome email with a few quick taps and then activate it, all from your mobile device. We’ll automatically send your welcome email to each new person who signs up for your audience through Mailchimp signup form or landing page. Imported contacts won’t get the email.

Create on iOS
Here’s how to do it on your iPhone or iPad.
- Open Mailchimp’s mobile app for iOS, and tap the Audience tab.
- Tap Send automated welcome emails.

- Tap Review And Start to create a draft email.
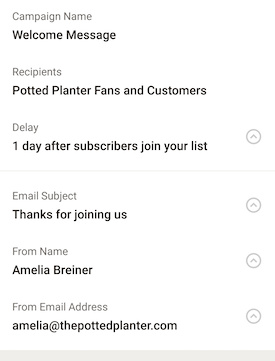
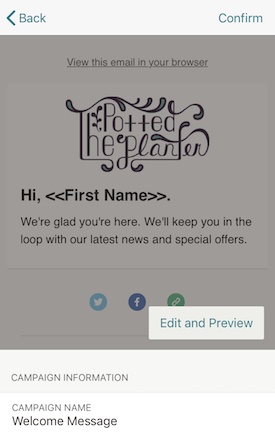
- To edit your Campaign information, tap the field you want to edit: delivery delay, subject line, preview text, from name, and from address. We’ll automatically fill out campaign information from your account.

- To change the design, tap Edit and Preview. You can add images, customize the wording and font, and more.

- When you’re done with the design, tap Save & Exit.
- Tap Confirm.
- On the next screen, touch and hold the button to start the automation.
Create on Android
Here’s how to do it on your Android phone or tablet.
- Open Mailchimp’s mobile app for Android, and tap the Audience tab.
- Tap Start sending a welcome email.

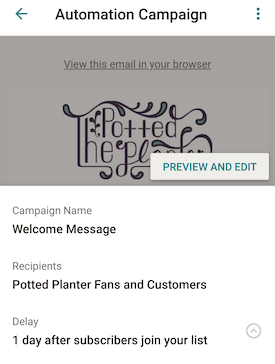
- Tap REVIEW AND START to create a draft email.

- To edit your Campaign Details, tap the field you want to edit: delivery delay, subject line, preview text, from name, and from address. We’ll automatically fill out campaign details from your account.

- To change the design, tap PREVIEW AND EDIT. You can add a logo, customize the wording and font, and more.

- When you’re done with the design, tap Save & Exit.
- Tap the Send button.

- On the next screen, touch and hold the button to start the automation.
Pause, edit, or resume your automation
To pause, edit, or resume your welcome email from your mobile app, follow these steps.
- Navigate to the Campaigns tab.
- Tap your automation.
- Depending on what you’re doing, tap Pause All Emails or Resume All Emails.
If you need to make changes to your automation after you pause it, you can edit most parts of it from the mobile app.
More like this
- Create an Automated Welcome Emailby QuickBooks
- Create an Abandoned Cart Email on Mobileby QuickBooks
- Send a File to New Subscribersby QuickBooks
- Use Creative Assistant for Emailby QuickBooks


