Design Your Website in Mailchimp
by Intuit•6• Updated 1 year ago
Mailchimp’s website builder helps you create beautifully designed web pages to suit your style and personality. Choose a design theme, create a custom color palette, and upload images to match your brand and help visitors immediately identify you and your content.
In this article, you’ll learn how to design your website in Mailchimp.
Before you start
Here are some things to know before you begin this process.
- To help you get started, take a moment to learn About Your Website in Mailchimp and how to Create Your Website in Mailchimp.
- After designing a web page, you can duplicate it to avoid starting from scratch. To learn how to duplicate a web page check out Manage Your Website in Mailchimp.
- Custom HTML, iframes, and merge tags aren’t compatible with your Mailchimp website.
Edit styles
When you set up your website, you can apply the same colors, fonts, and button style to every page you create. This helps you streamline your site creation process and maintain a consistent brand identity.
Edit colors
To define color, font, and button styles for your website, follow these steps.
Click the Website icon, then click Website.

On your website dashboard, click Edit Site.

In the Manage Site menu, click Styles.

In the Colors section, click the arrow to select a color scheme for your button, text, or background.

- Click the Palette drop-down to select the colors for your site.

- Click Create New Palette to design your own palette or start from one of our predesigned color palettes.
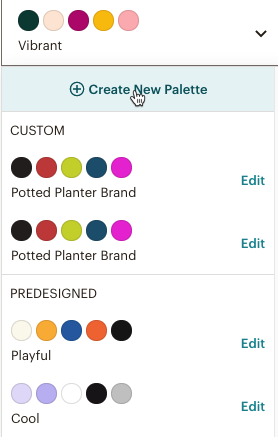
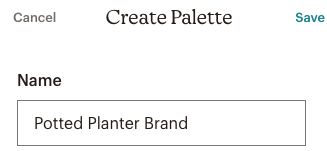
- Type in the name of your new palette.
Click a color swatch to use the color picker.

You can click colors within the color picker, or enter values in the HEX or RGB fields to save a color to the palette.

- After you select colors for all 5 swatches, click Save.

In the Scheme section, click each color scheme to preview how those colors will look on your web pages and select the one you like best.
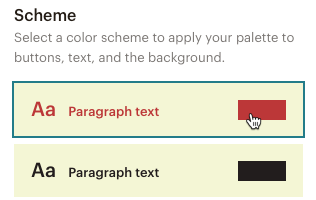
The color choices you set inline will override the default scheme.
Edit themes
To choose a theme for your website, follow these steps.
- On your website dashboard, click Edit Site.

- In the Manage Site menu, click Styles.

- In the Themes section, click the arrow to start making selections.
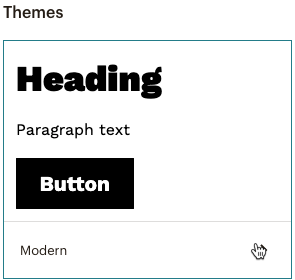
On the Themes page, preview and select the font and button theme you would like to apply to your web pages.
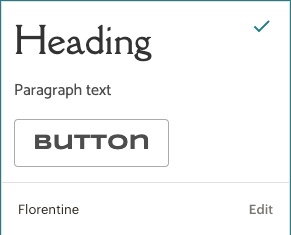
In the website preview, you'll see the heading and paragraph fonts change based on your selections.
If you want to make changes to the theme, click Edit. Here, you can select a name for your theme, update your Fonts, adjust the Spacing and Size of the text, or enable Animation for your pages.
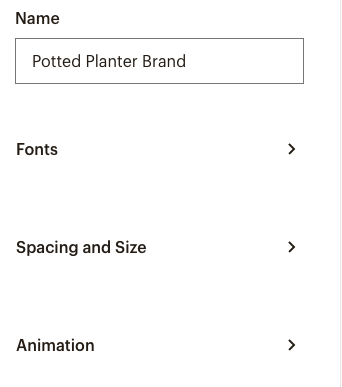
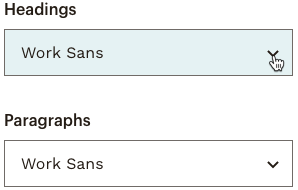
- Click the Fonts arrow, then click the drop-down to select a font for your Headings and Paragraphs.
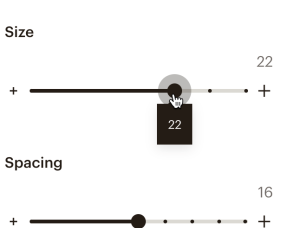
- Click the Spacing and Size arrow, then adjust the spacing and size of your text.
- Click the Animation arrow to customize how your site animates when a visitor scrolls down the page.
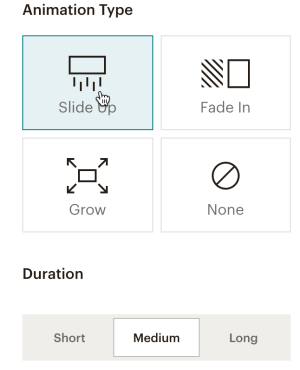
- Select the animation type, then choose how long you’d like the animation to last. Your theme is automatically saved and added to your Custom themes list. You can remove a theme at any time by selecting the Delete Theme icon.
Excellent! You’ve set the basic look and feel of your website. The styles you chose will apply to each new page you create.
Edit content
Use the editor to add sections, images, and text. Share your story, contact information, a product for purchase, and anything else you want your visitors to know about.
In this section, we'll show you how to edit or add content to your website.
Access the web page editor
To access the web page editor, follow these steps.
- On your website dashboard, click Edit Site.
- Hover over the page you want to work with and click Edit Page.

Add and edit sections
Sections allow you to organize and design your web page quickly. Choose the layout of text, images, and buttons, as well as other elements like signup forms, navigation bars, and your web page footer.
To add a section from your Sections panel, follow these steps.
On your web page, click the Sections panel.

The panel will expand to show you the sections in your web page.Hover your cursor below the name of the section where you'd like to add a new section, then click Add Section.

- On the Add Section step of the Sections panel, choose the section type you'd like to add.

- Choose a layout for your new section.

- If you select a Video section, click the Link icon, then enter the YouTube or Vimeo URL you want to share. Click Save then Preview to play your video.

To add a section from your Page Layout, follow these steps.
In your page layout, hover your cursor over the plus (+) icon where you’d like the new section to go.

Click Add Section.

On the Add Section step of the Sections panel, choose the section type you'd like to add.

Choose a layout for your new section.

- If you select a Video section, click the Link icon, then enter the YouTube or Vimeo URL you want to share. Click Save then Preview to play your video.

Nice work! You’ve added a new section to your page design and can now customize it with your own content.
If you need to make changes, hover over the section to access the editing toolbar. Here, you can click the icons to delete a section, move a section, choose a different layout, or make style edits.
![]()
For more information on page sections, check out Add and Edit Page Sections.
Edit header or paragraph text
To edit header or paragraph text on your website, follow these steps.
- Click the text area you want to edit.

- In the editing toolbar, click the paragraph alignment icon to align your text to the left, center, or right.
- Click the font color icon, bold icon, italics icon, or underline icon to change some basic text attributes.
- Click the paragraph styles icon to choose the heading or paragraph style for your text area.

- If you’re working with paragraph text, you’ll also have the option to insert a link, create a bulleted or numbered list, or change the background color.

Edit images
Click any image in your layout to edit it. You’ll also see a toolbar with specific formatting options.
To edit an image on your page, follow these steps.
- Click the image you want to work with.

- Click Replace to choose a different image from the content studio.

- To resize the image, click and drag the white circle until the desired size is achieved. Click and drag the handles on the right and bottom side of the image to crop and adjust what is shown in the image.
- To add a link to the image, click the Link icon.

- From the drop-down menu, choose External URL, Page, or Section. In the space provided, either enter the URL, select a page, or section of the current page you want to link to. Click Save. To remove the link, click Remove link.
- Click Alt to add alt text to the image.

- Click the Rounded Corners icon and type in a number between 1 and 300 to adjust the shape of your image.

Undo and redo changes
When you’re designing your website, you might accidentally remove something you've written or made other changes you want to revert. With the undo and redo buttons, you can recover the previous versions of your page.
To undo a change, click the Undo icon.

To redo a change, click the Redo icon.

Undo and redo buttons only work within the same editing session. If you close your window, or navigate away from the editor, previous versions of your web page will no longer be available.
Preview and exit
Good work! Once you're done adding content to your website, click Preview to see how it looks or click Done to go back to the Manage Site page.
When you’re ready, click Publish Changes to update all of your visible web pages with your new content and styles.

Next steps
Now that you’ve added your personal design touches, let's look at a few ways to optimize your Mailchimp website.
- Customize your website favicon
Change your site icon to a custom image that matches your brand style and adds a polished look to your website. To learn how to customize your website favicon, check out Customize the Favicon of Your Mailchimp Website or Landing Page. - Add more pages
Grow your website with new content and additional web pages. When you keep your website up to date, you’ll build your audience and encourage repeat visits. To learn how to add, duplicate, and manage web pages, check out Manage Your Website in Mailchimp. - Set up appointments
Add scheduling tools to grow your business. If you offer professional services, you can use Mailchimp Appointments to set up the details of your services, including pricing and availability. Customers will be able to book appointments with you on your website. To learn more, check out Use Mailchimp Appointment Scheduling. - Promote your website
Promote and share your new website through marketing campaigns in Mailchimp. Run an ad for your website. Link to your website from a regular email campaign. You can also share your website URL on social media. - View reports
We’ll start to compile reporting data as people visit your site. You can see who visits your website, clicks links on your web pages, and subscribes to your emails.
More like this
- Create Your Website in Mailchimpby QuickBooks
- About Your Website in Mailchimpby QuickBooks
- Manage Your Website in Mailchimpby QuickBooks
- Manage the Mailchimp Badge on Your Landing Pageby QuickBooks


