Create a delayed charge in QuickBooks Online
by Intuit•21• Updated 1 month ago
Learn how to create delayed charges for your customers in QuickBooks Online.
Delayed charges are non-posting transactions, which let you bill your customers at a later date. You can track these charges and later add them to your customer’s invoice. Here’s how.
Set up a delayed charge
- Select + Create.
- Select Delayed charge.
- Select a customer from the Customer ▼ dropdown.
- Enter the date in the Delayed Charge Date field.
- Enter the details of the customer’s transaction.
- Select Save and close.
Add a delayed charge to an invoice
- Select + Create.
- Select Invoice.
- Select a customer from the Customer ▼ dropdown.
- Under Add to Invoice,
- Select Add all to add all delayed charges in the list.
- Select Add to choose a delayed charge from the list.
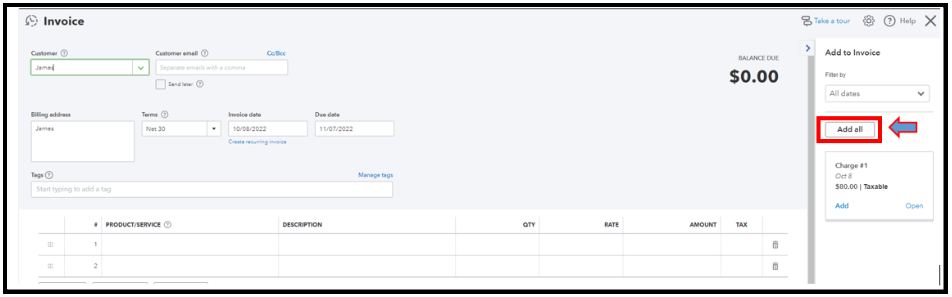
- Select Save.
More like this