| QuickBooks Commerce is no longer available for purchase as a stand-alone product. The features referred to in this article are only relevant for customers who still have QuickBooks Commerce bundled with their QuickBooks Online subscription. If you want to learn more about e-commerce accounting features that are part of QuickBooks Online, check out Accounting for e-commerce FAQ. |
QuickBooks Commerce makes it easier than ever to manage your WooCommerce store, from order to fulfillment. As your business grows, use QuickBooks Commerce to manage your price lists, inventory, orders, fulfillment, accounting sync, and more for all of your sales channels.
Step 1: Prep your WooCommerce store
Review your product SKUs in WooCommerce
QuickBooks Commerce uses SKUs to identify and link inventory between WooCommerce and QuickBooks Commerce to facilitate inventory updates and streamline order management.
Before you proceed to the next step, log on to your WooCommerce account and make sure each product and variant have unique SKUs.
QuickBooks Commerce only works with two of the four product types in WooCommerce:
Learn about SKUs and why you need to start using them today.
(Optional) Review your existing installed apps
Note: If you use any multi-currency plugins or product bundle plugins for your WooCommerce store, reach out to us via Help in the app so that we can advise you on the best setup approach.
One of QuickBooks Commerce's main benefits is to provide your business with centralized inventory control and automation.
If you use any apps or integrations that update your inventory levels, we recommend that you uninstall them before you integrate QuickBooks Commerce and WooCommerce. If you’re having trouble uninstalling them, contact us via Help in the app.
Confirm your WooCommerce account settings
To ensure a successful integration experience, turn on the Public SSL Certificate on your website.
Step 2: Install your WooCommerce store in QuickBooks Commerce
The installation process
Sign in to your QuickBooks Commerce account. To go to the QuickBooks Commerce App Store, select Browse Apps on the sidebar.
Location mapping
Set up your fulfillment and inventory locations in QuickBooks Commerce.
If you created all of your locations when configuring your settings, you can map them now. If not, you can create a new location instead.
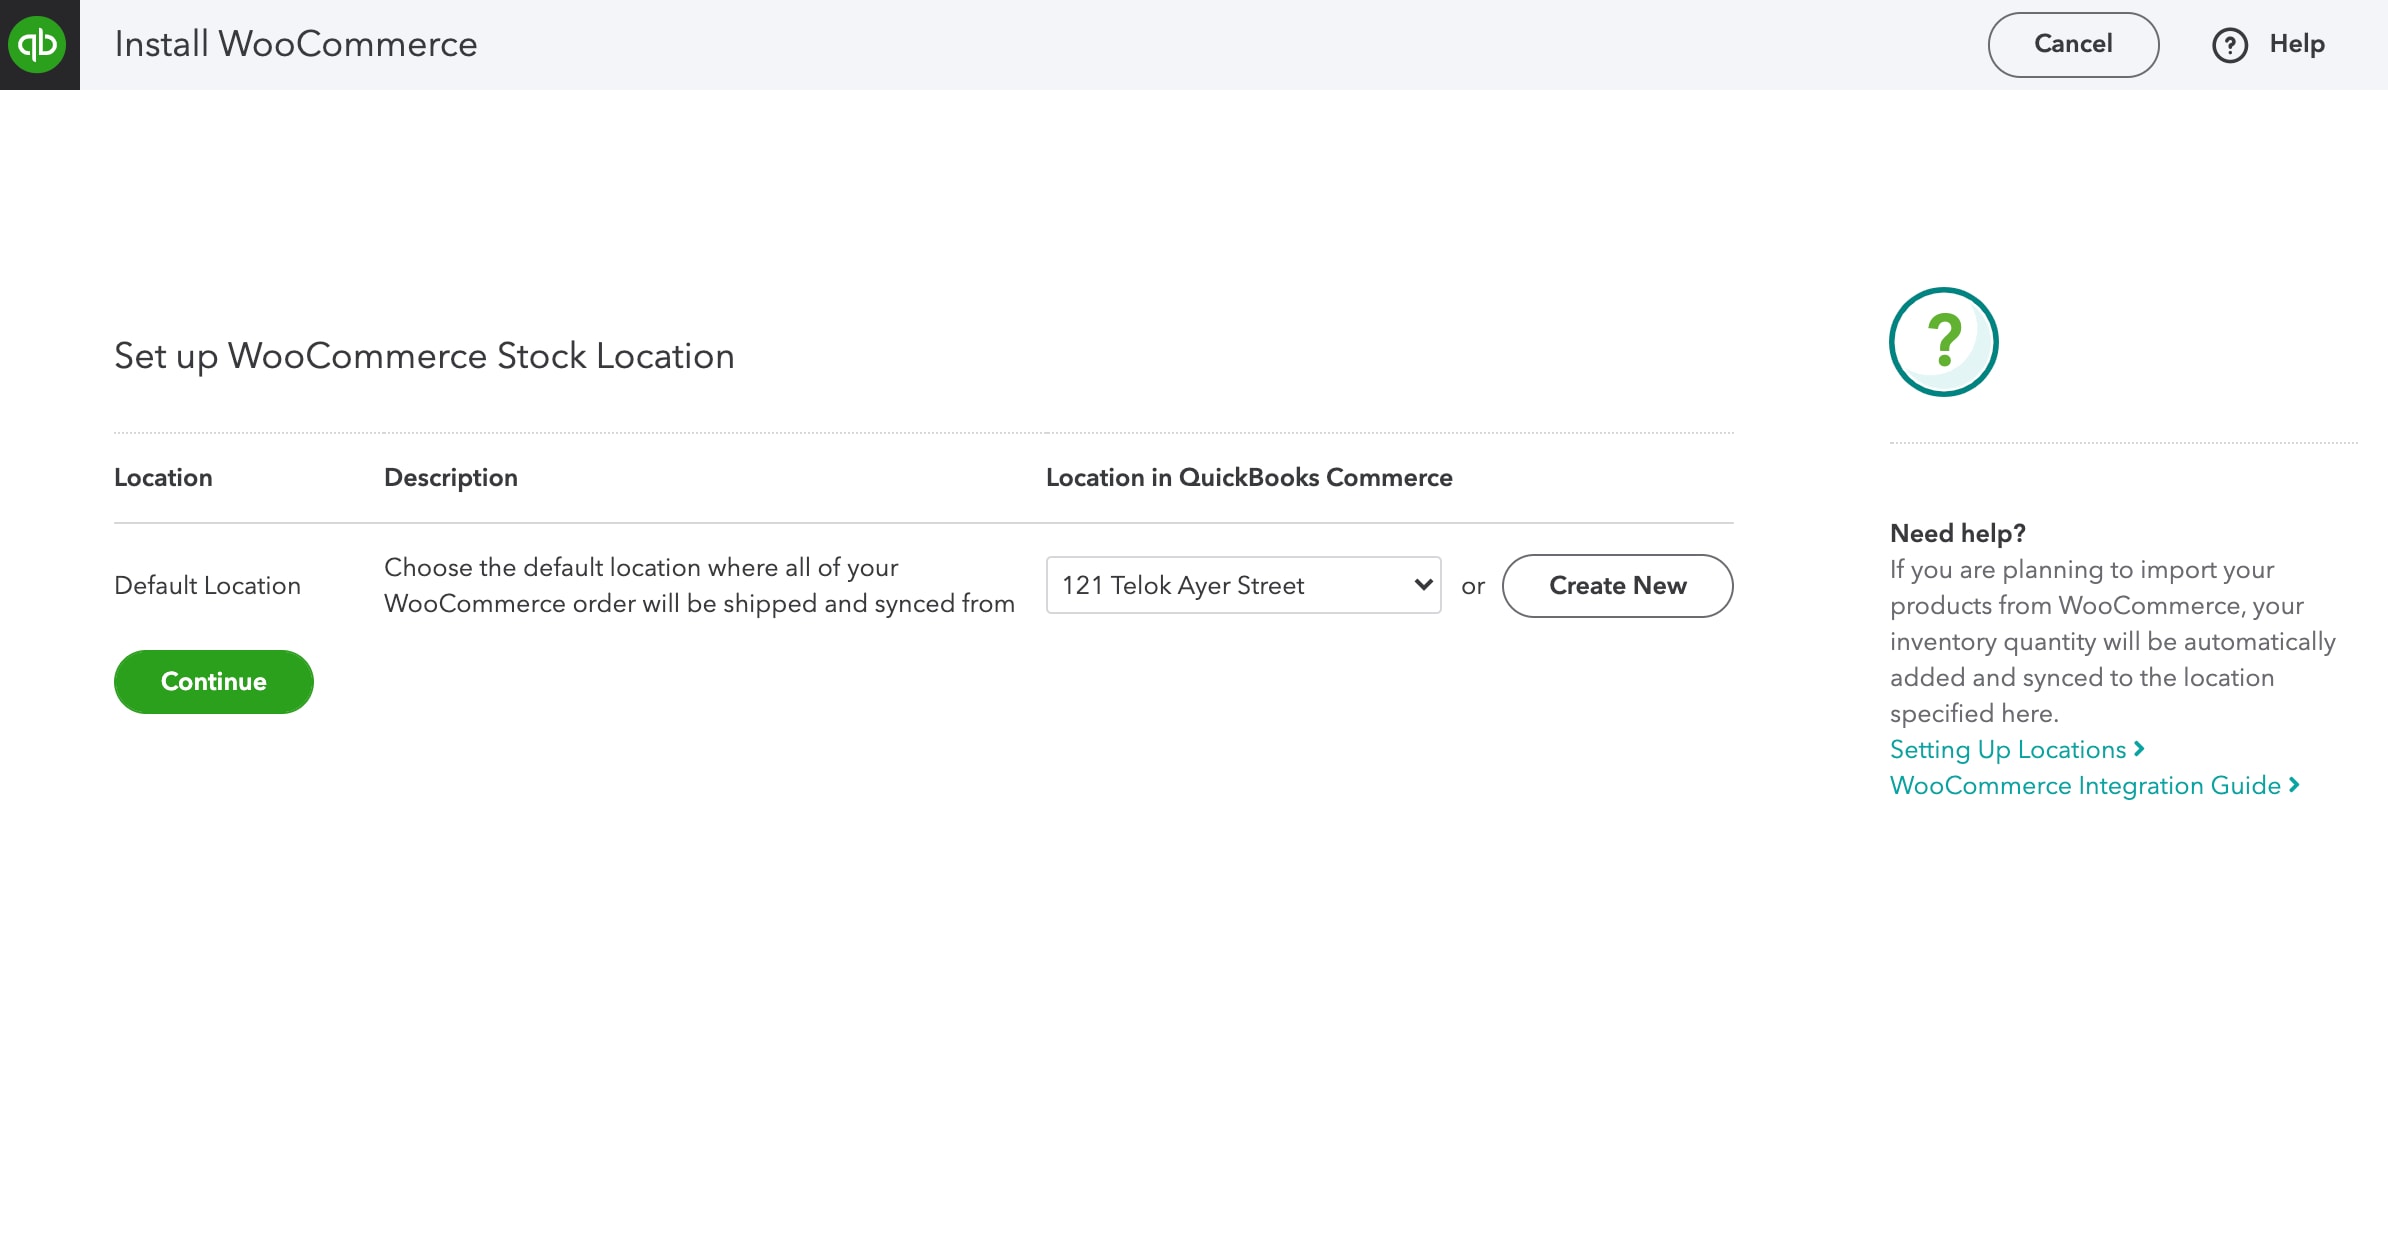
Once you’ve mapped all of your locations, select Continue.
Price list mapping
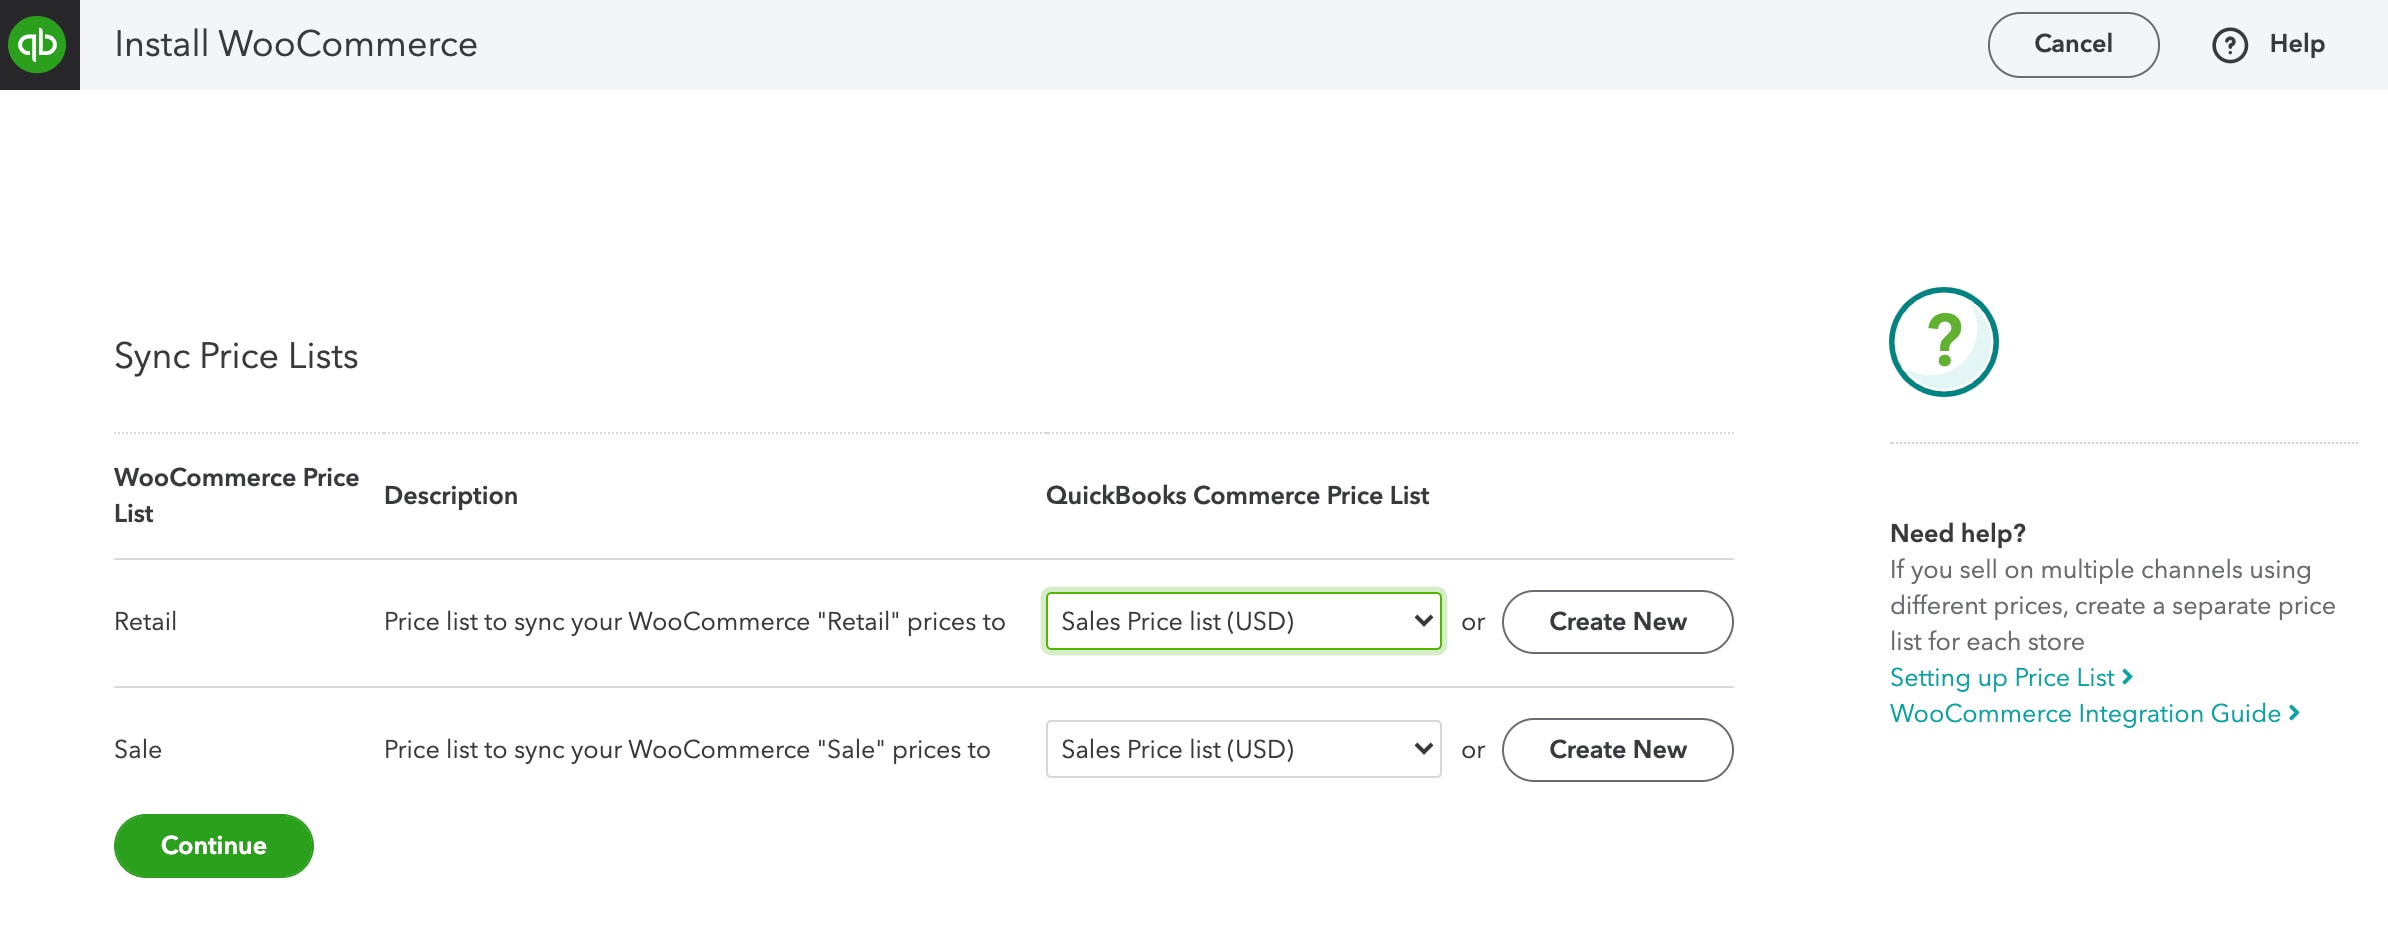
Set up your price lists by either mapping to an existing price list in QuickBooks Commerce, or creating a new one by selecting Create New.
For each product price list in WooCommerce, we will only import variant prices. We will not create an equivalent price list in QuickBooks Commerce.
When a product price changes, we will update the variant prices from QuickBooks Commerce to WooCommerce and vice versa.
Initial product import
In the installation wizard, choose how you would like your product information to be imported from WooCommerce into QuickBooks Commerce.
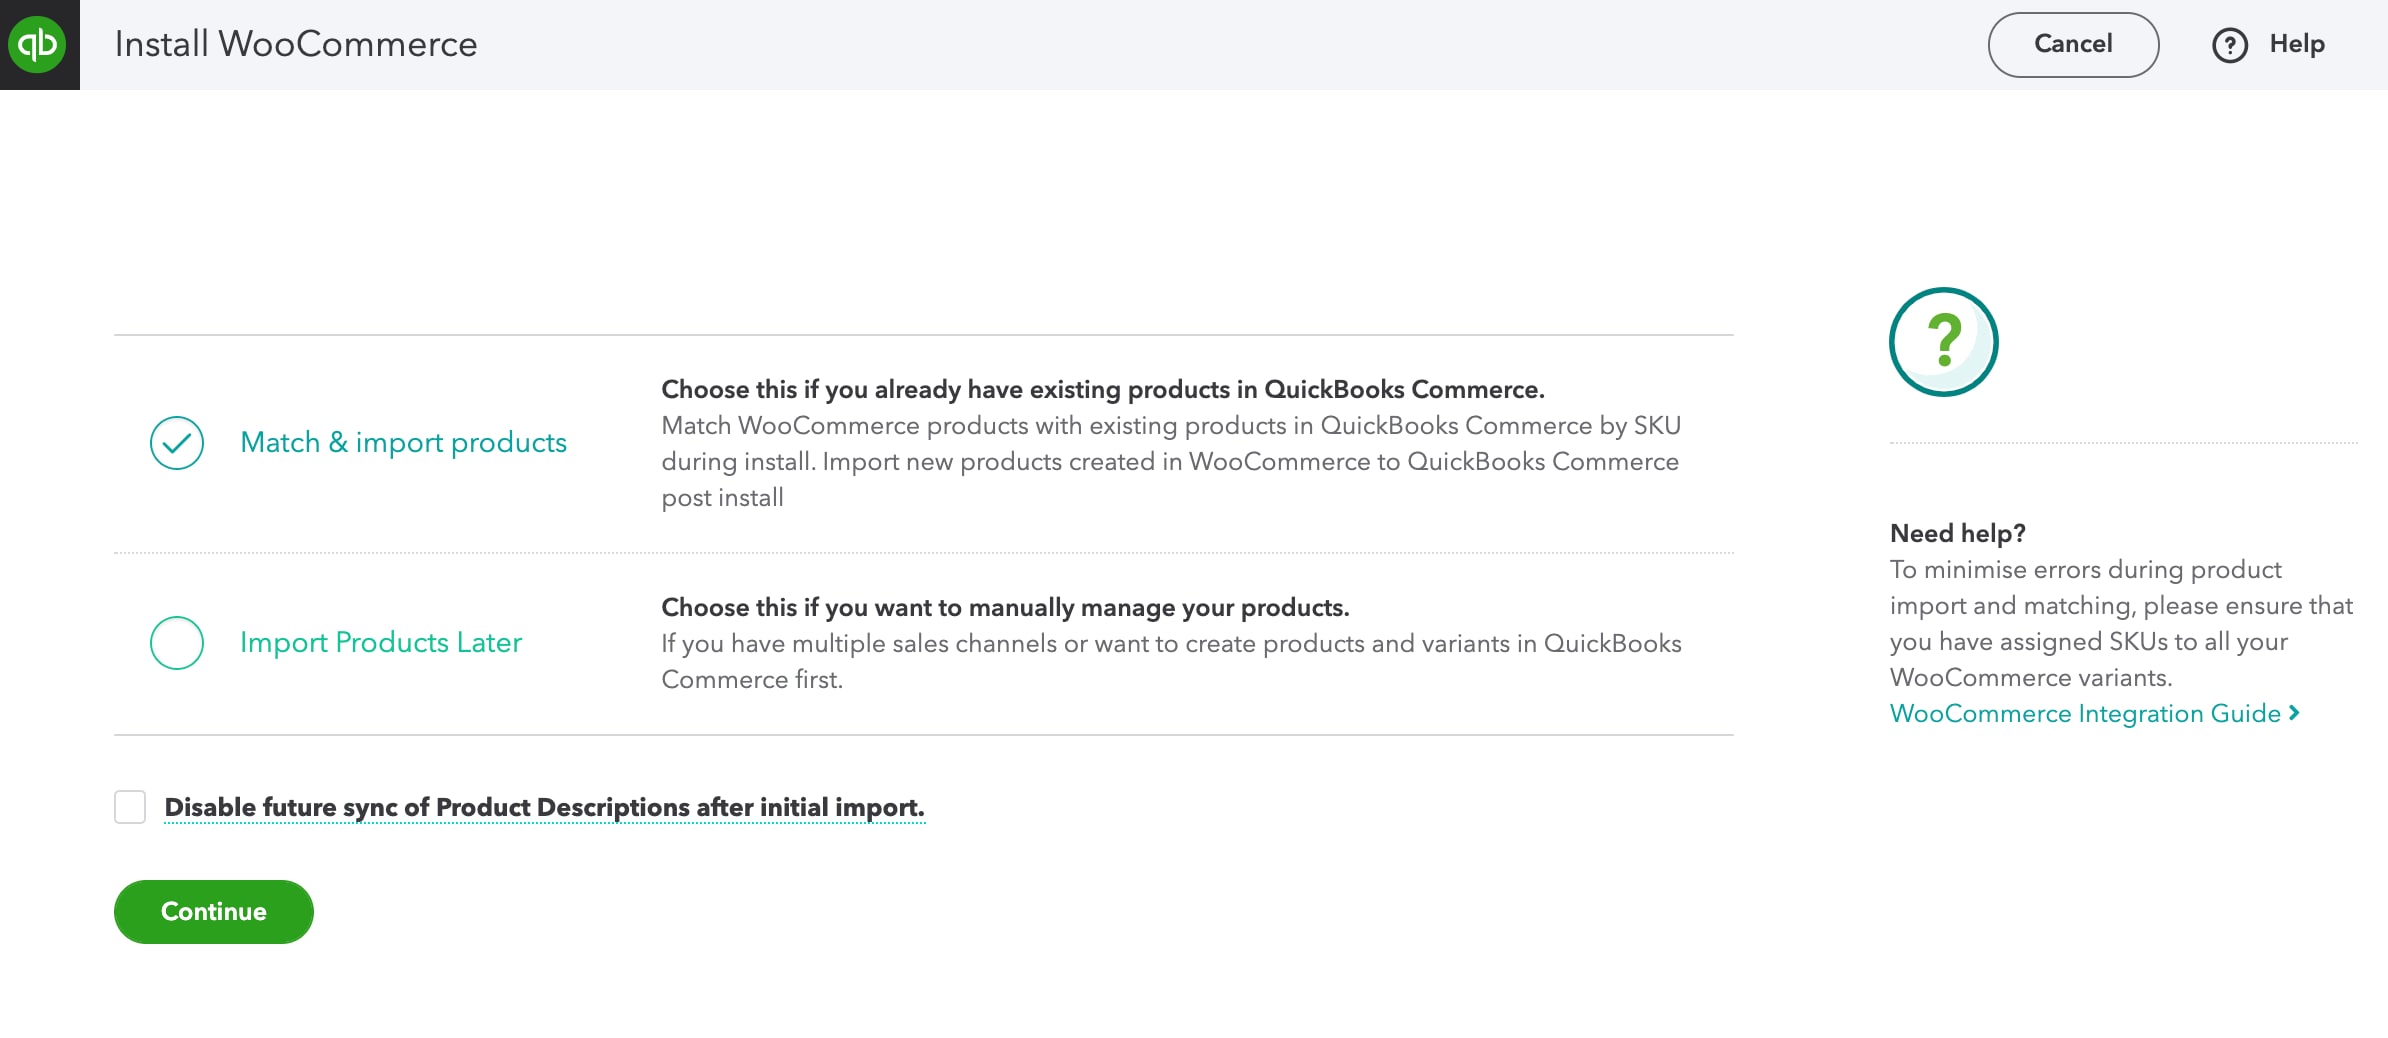
| Options | What it does | Recommendation |
| Match and import products | If selected, we will attempt to find a matching QuickBooks Commerce variant. If we fail to, we will try to import the WooCommerce variant. After installation, if you create a new product in WooCommerce, QuickBooks Commerce will import the product as a new product. Any future updates that you want to make to your WooCommerce products should be done in QuickBooks Commerce. This could include stock levels, prices, or product information. | Regardless of whether you have products set up or not, QuickBooks Commerce customers can select this option. By doing steps 1.1 and 1.2 of this guide, you would have minimized any issues with product imports. |
| Import products later | If selected, QuickBooks Commerce will not import or match any products from WooCommerce during the installation. Products will need to be manually imported and linked via the diagnostics in the QuickBooks Commerce channel dashboard After installation, if you create a new product in WooCommerce, QuickBooks Commerce will import the product into the system. | QuickBooks Commerce's customers select this option if they have some products they do not wish to import into QuickBooks Commerce or if they wish to review their WooCommerce products before linking and importing. |
Review integration settings
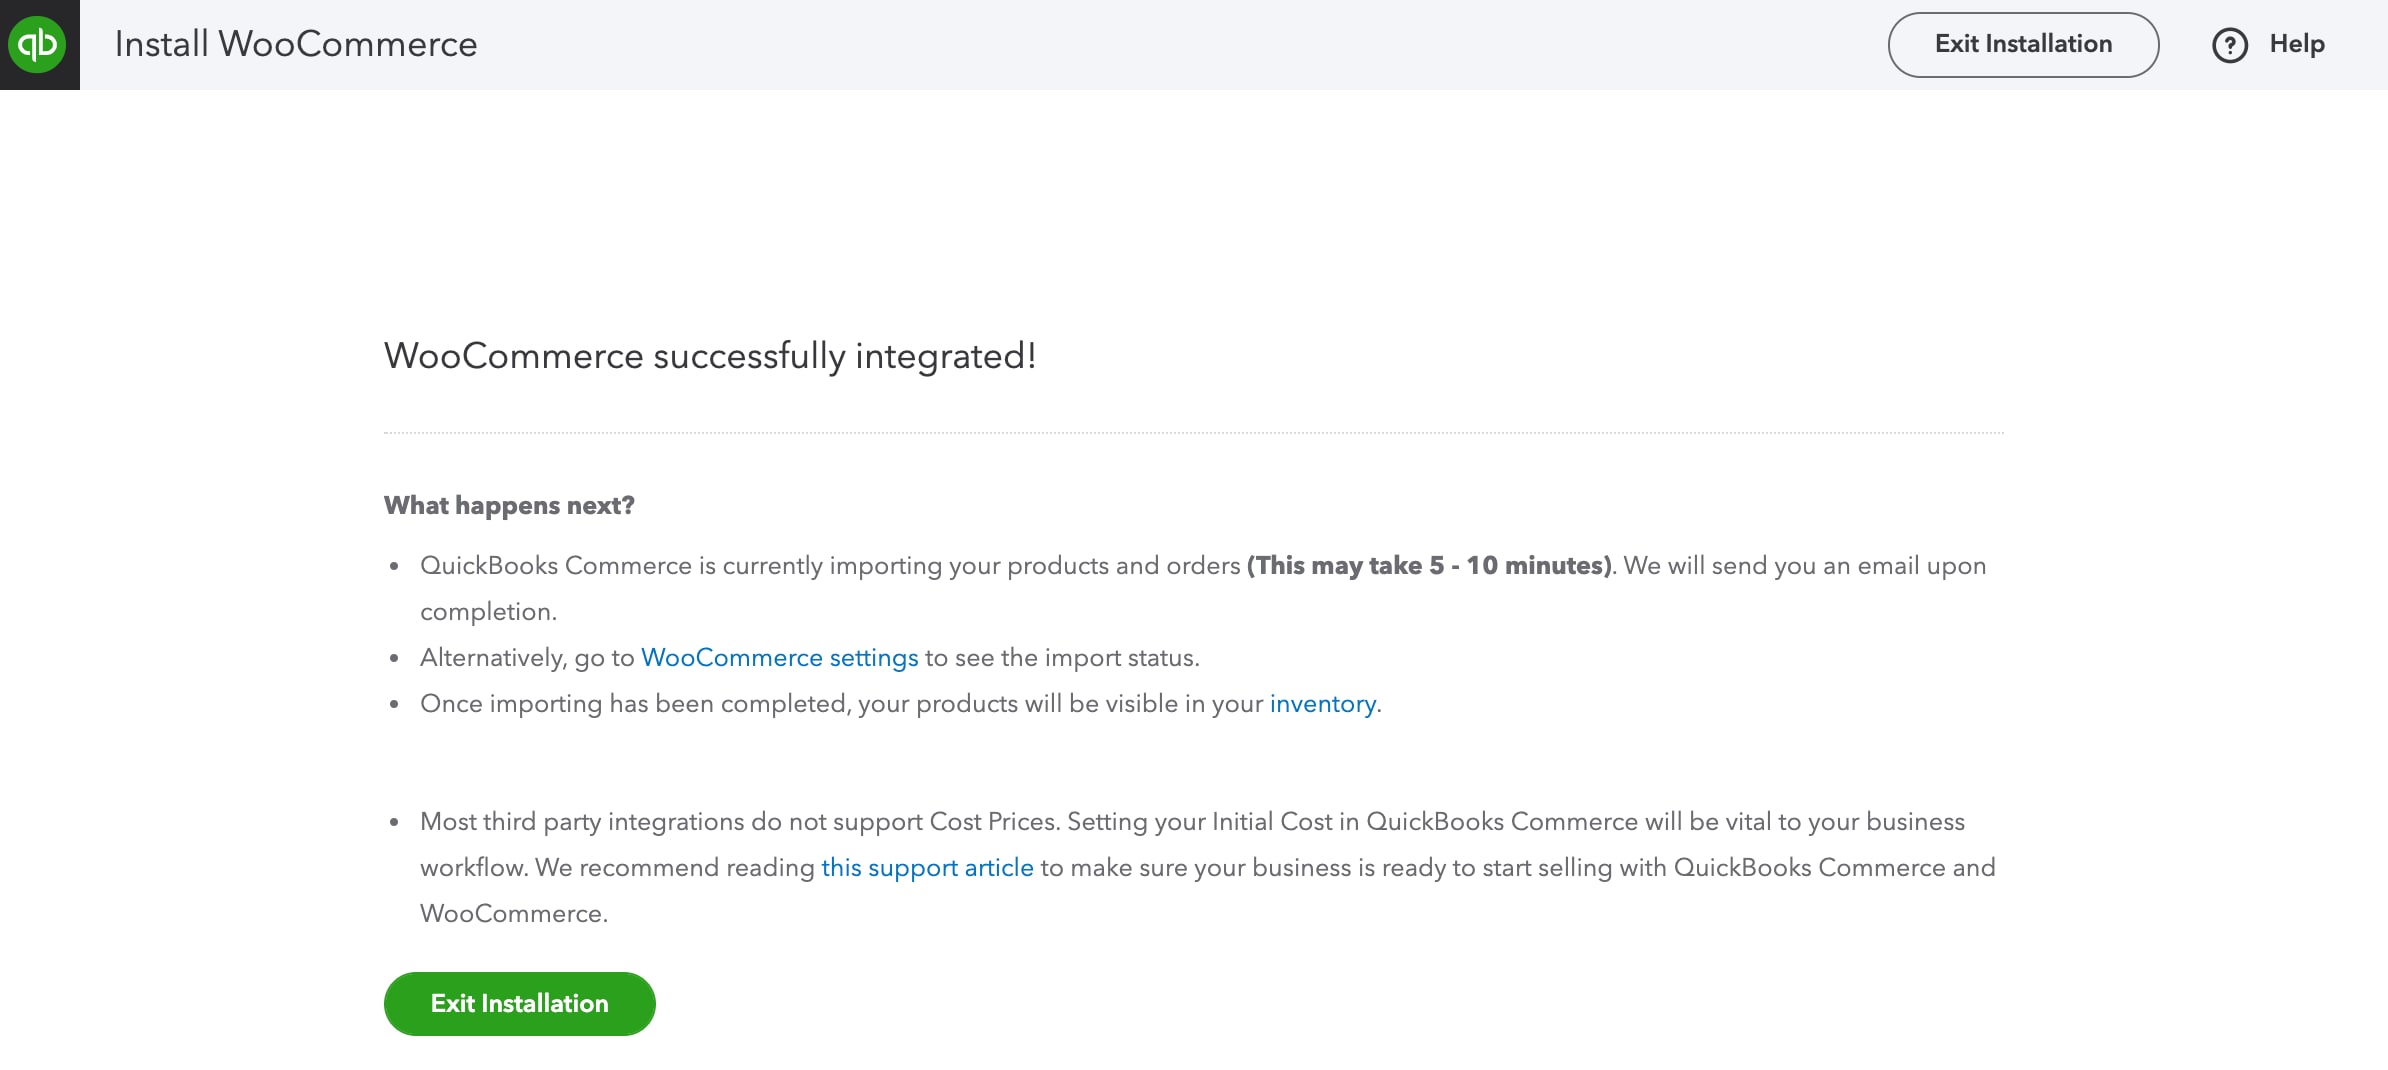
When you complete the installation, depending on the sync options selected, QuickBooks Commerce will begin to:
With the installation complete, QuickBooks Commerce will now be your business’s master of inventory. QuickBooks Commerce will update your WooCommerce products whenever there are changes made to stock levels, prices, or product information.
Note: If your store has a large number of products (more than 10,000 variants), it may take between 3-6 hours for the import process to complete. Do not change any settings until the import process is completed. You will receive an email when the import is done.
Step 3: Review and test your integration settings
Review your products
Go to the My Apps section, select your WooCommerce store, and select the Dashboards tab where you will see the diagnostics checker.
From this screen, you can view items that passed our check successfully. You will also see highlighted issues with self-actionable details (e.g. unlinked/unimported products/products mismatches) as shown below.
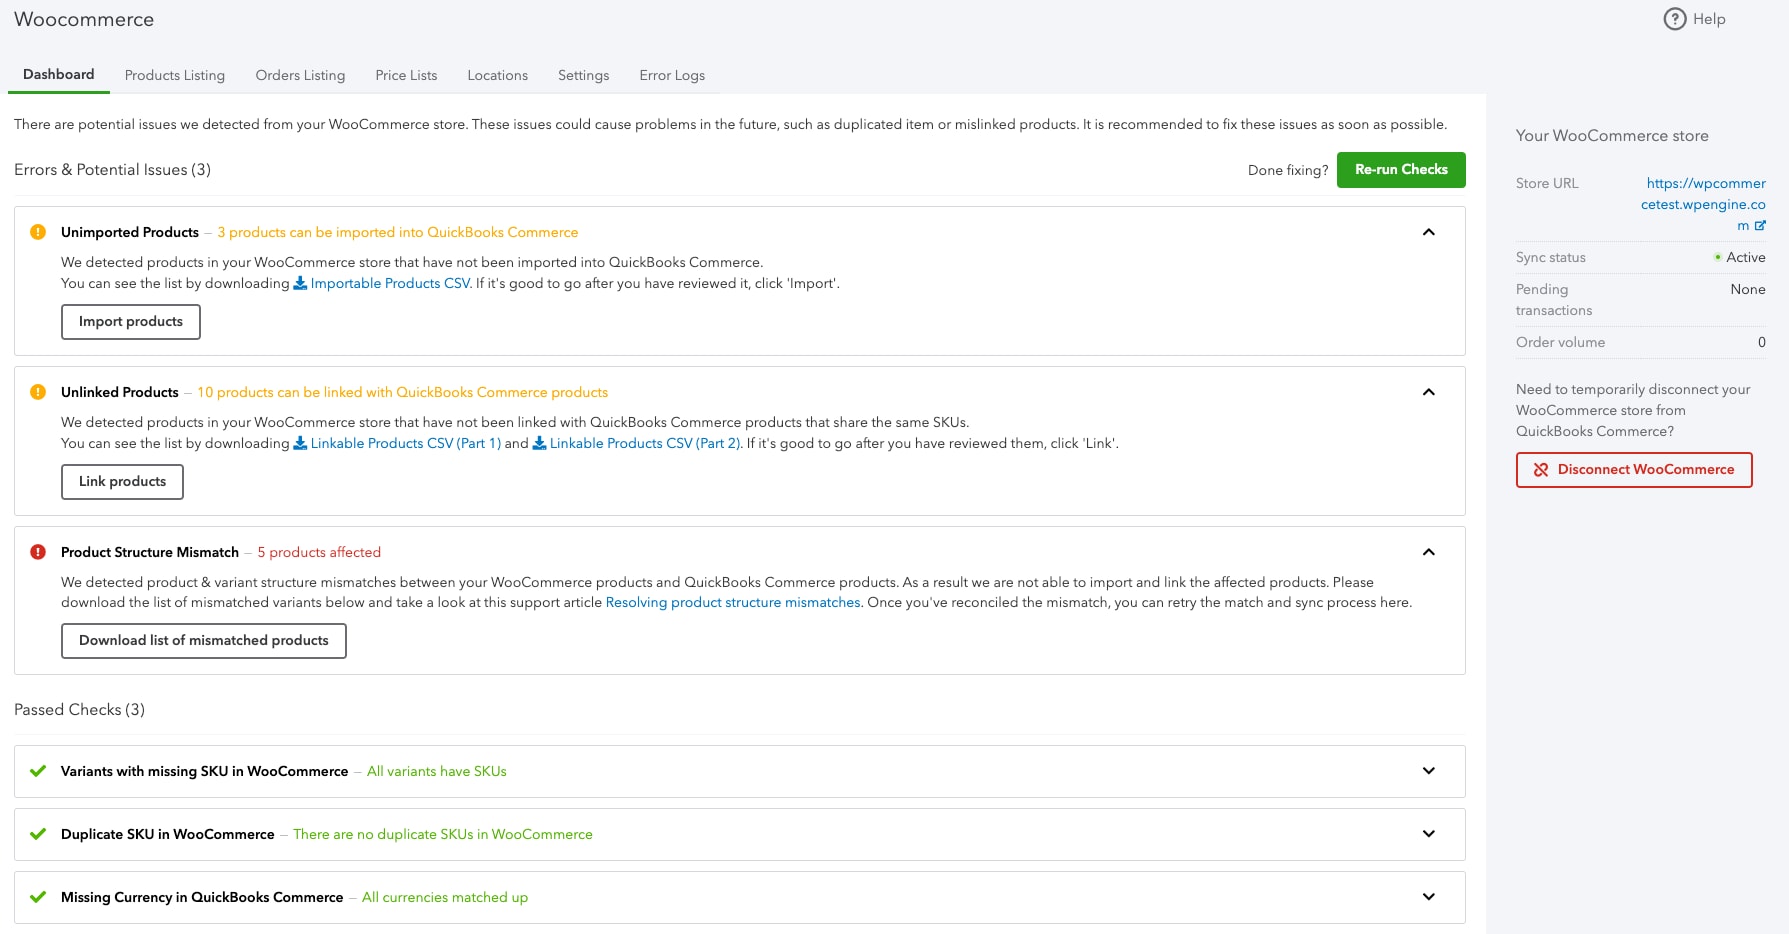
Follow the instructions accordingly and click on the Re-run Checks button.
Tip: QuickBooks Commerce advises to regularly check your Diagnostics Dashboard and action on errors to keep your integration in good health.
If you still need further assistance, contact us via the 'Help' button in the app.
Review your orders
To see if there are any orders that aren’t imported successfully, go to the My Apps section, select your WooCommerce store, then select the Orders Listing tab.
If there are any discrepancies, ensure that the order statuses are correctly set up on the WooCommerce settings page.
| Note QuickBooks Commerce does not import historical orders (orders created before the channel integration). |
Review order import status
To manage your WooCommerce orders in QuickBooks Commerce, you need to:
Orders have five statuses in QuickBooks Commerce:
Orders have seven statuses in WooCommerce.
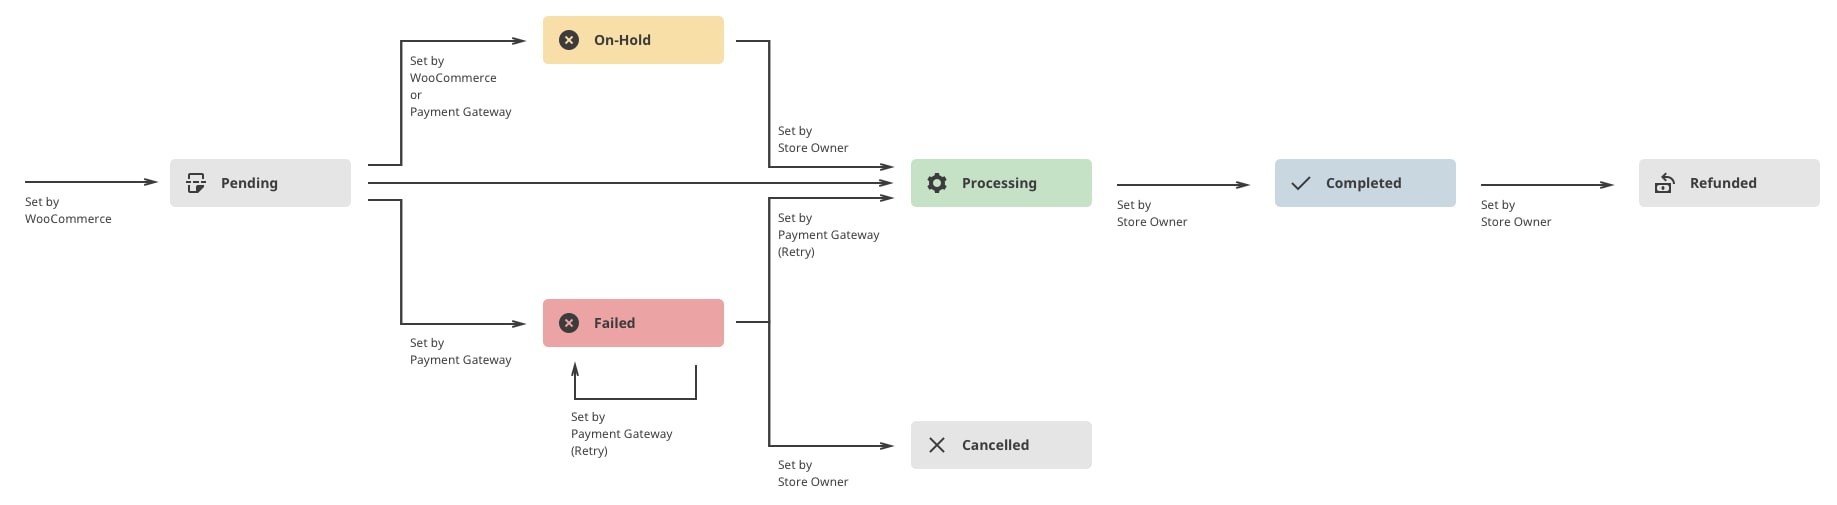
Note: QuickBooks Commerce doesn't have copyrights to the image above. If you need help with WooCommerce's order processing, contact their Support professionals.
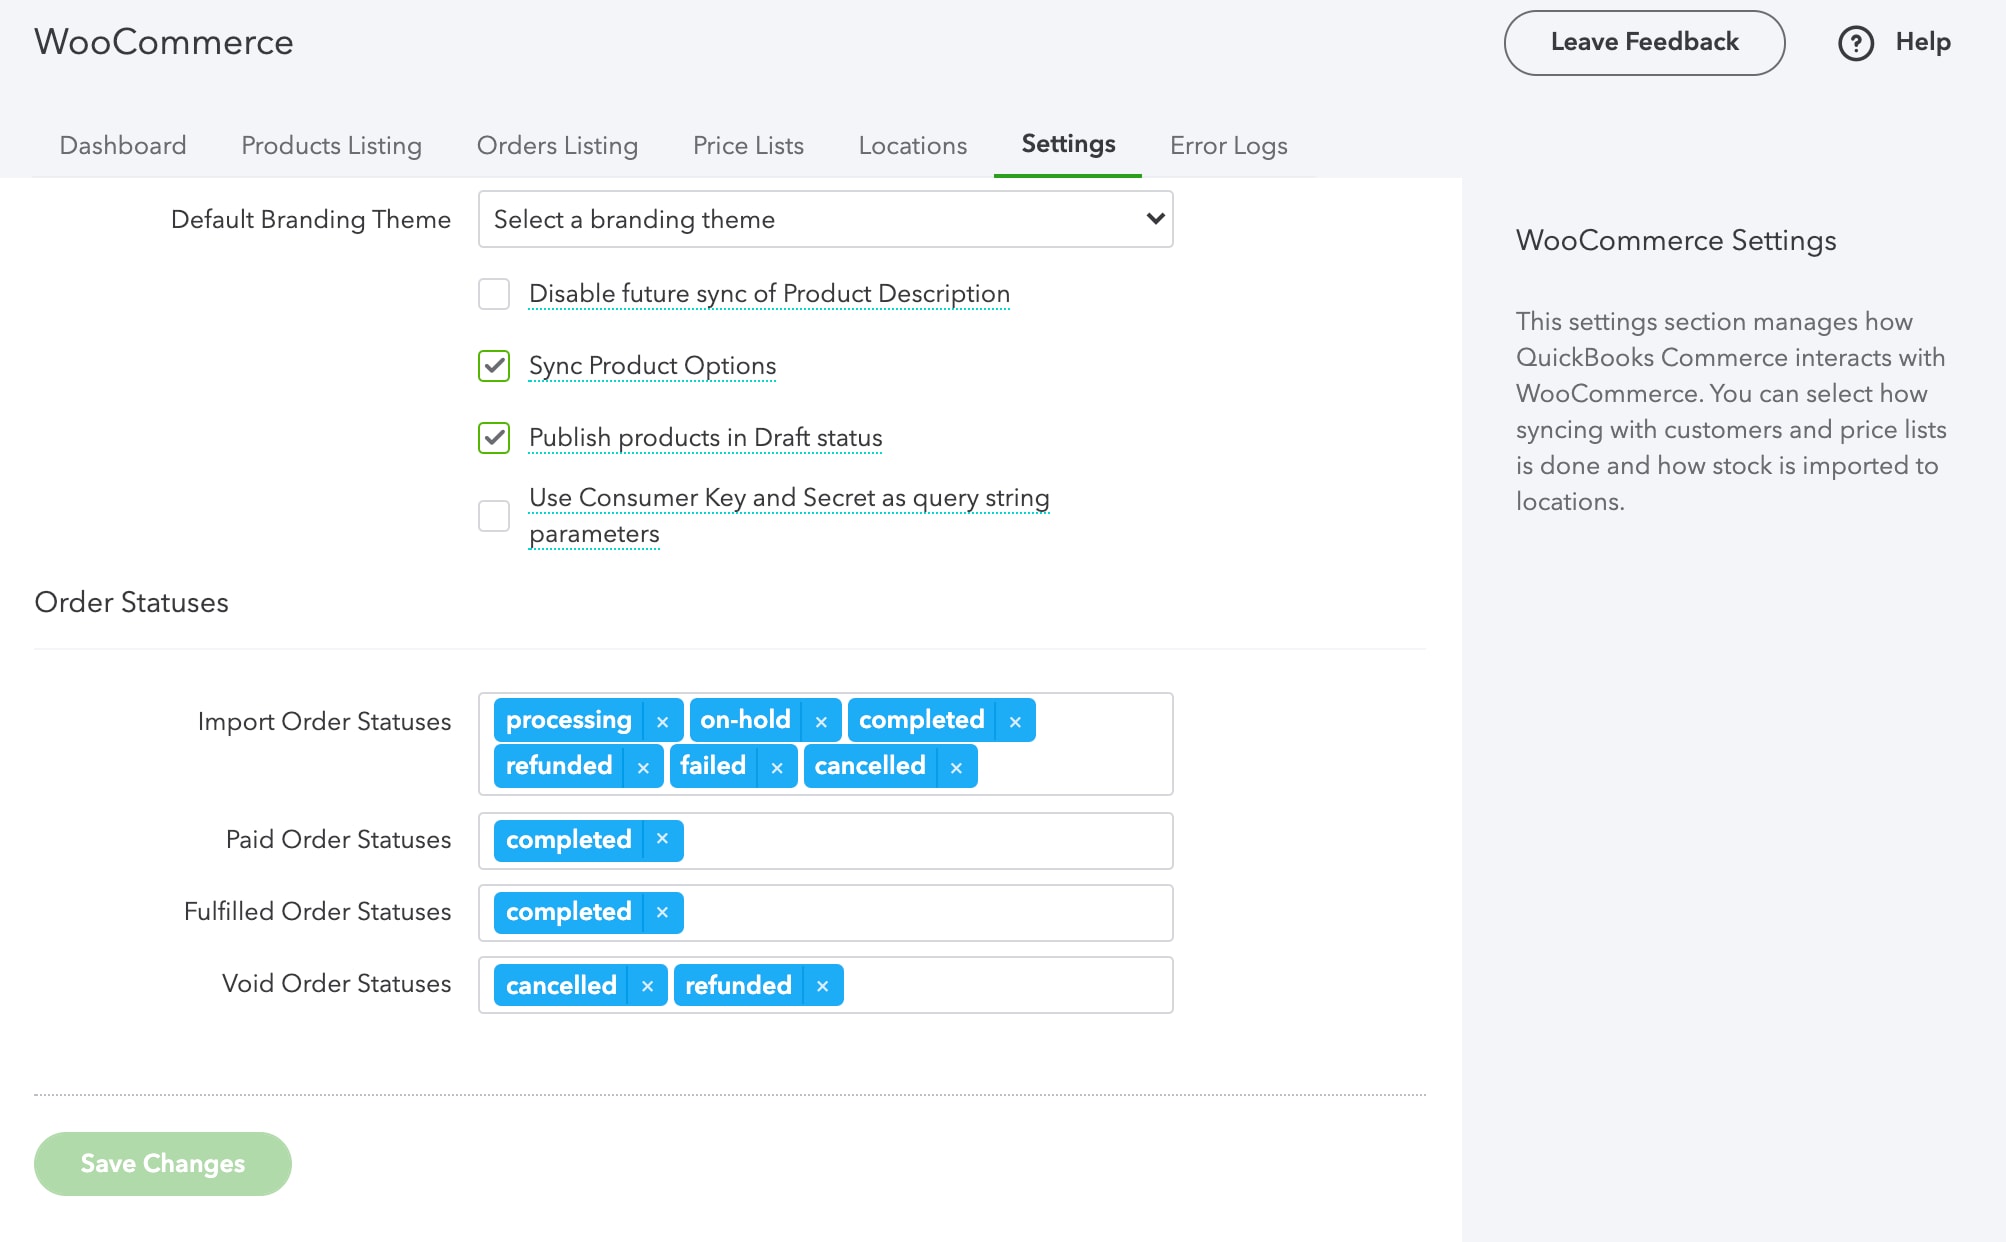
In QuickBooks Commerce, go to the My Apps section, select your WooCommerce store, then select Settings.
Select the statuses you want to import, then map the appropriate order statuses to QuickBooks Commerce's order statuses.
(Optional) Create a test order from your WooCommerce store
To test the order sync between WooCommerce and QuickBooks Commerce, follow these steps to create a test order from your WooCommerce store.
(Optional) Update a product’s price
To test the price sync, we recommend that you complete this test with a product that’s not marked as “available” in your WooCommerce store because the integration between QuickBooks Commerce and WooCommerce is now live.
(Optional) Publish a test product from QuickBooks Commerce to WooCommerce
To test the product sync, follow these steps to create a new product in QuickBooks Commerce.
After the installation and integration are complete, your products are now imported successfully into QuickBooks Commerce.
If you see any discrepancies, use the Help button in the app to contact us.