Fix activation, license, and product numbers issues
by Intuit• Updated 1 month ago
Learn how to fix errors when you enter your product and license numbers, your activation code, or you get an error after you subscribe or sync your data in QuickBooks Desktop.
We'll walk you through how to fix these issues so you can get back to work. In this article, you'll learn what to do if:
- Your product number doesn't match what's on screen
- You have entered incorrect license/product numbers
- You cannot use Online Banking because QuickBooks is not registered.
- You must subscribe to the accountant's copy file transfer service
- The validation code is incorrect or This service is temporarily unavailable
- You see a blank screen when you try to activate
- Validation code screen not appearing
Your product number doesn’t match what’s on the screen
This can happen if you make a change to your license number. To fix this, change your product code.
Fix Error: You have entered incorrect license/product numbers errors
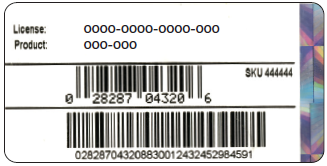
Make sure the license number and product code match.
- If you bought QuickBooks Desktop from our website: Check your purchase confirmation email for your license number and product code. If you can't find them, you can sign in to your Customer Account Management Portal to get them.
- If you bought QuickBooks from a retail store: Look for the sticker on the original CD envelope.

Fix other activation or registration errors
Solution 1: Run Quick Fix from the QuickBooks Tool Hub
QuickBooks might not activate because of a problem with its background processes. Download the QuickBooks Tools Hub and run a Quick Fix to close any open background processes. It'll run a quick repair on your program.
Step 1: Download the QuickBooks Tool Hub
The QuickBooks Tool Hub helps fix common errors. You'll need to close QuickBooks to use the tool hub. For the best experience, we recommend you use Tool Hub on Windows 10, 64-bit.
- Close QuickBooks.
- Download the most recent version (1.6.0.8) of the QuickBooks Tool Hub. Save the file somewhere you can easily find it (like your Downloads folder or your Windows desktop). Note: If you've installed Tool Hub before, you can find out which version you have. Select the Home tab. The version will be on the bottom.
- Open the file you downloaded (QuickBooksToolHub.exe).
- Follow the on-screen steps to install and agree to the terms and conditions.
- When the install finishes, double-click the icon on your Windows desktop to open the tool hub.
![]()
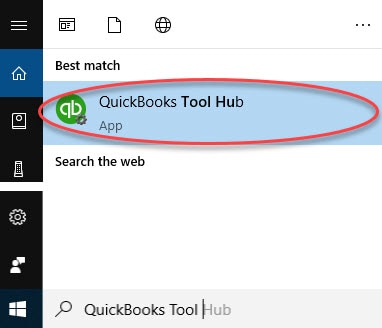
Note: If you can't find the icon, do a search in Windows for QuickBooks Tool Hub and select the program.

Step 2: Run Quick Fix from the Tool Hub
- In the QuickBooks Tool Hub, select Program Problems.
- Select Quick Fix my Program.
- When the tool finishes, start QuickBooks Desktop, then open your data file and try to activate.
If you still get the error, move on to Solution 2.
Solution 2: Run the 3371 error fix from the QuickBooks Tool Hub
- Close QuickBooks.
- In the QuickBooks Tool Hub, select Installation Issues.
- Select 3371 Error Fix and then OK.
- Start QuickBooks Desktop and open your data file.
Fix Error: The validation code is incorrect or This service is temporarily unavailable
Solution 1: Check your date and time settings
- Close your QuickBooks Desktop.
- Right-click the time display on the Windows taskbar, then select Adjust Date/Time.
- Check if your date and time settings are correct. If they are, move on to the next solution. If not, continue with the steps 4 to 8.
- Select the Date & Time tab, then set the date for the current year.
- Select Apply, then OK.
- Open your QuickBooks Desktop, then go to Help.
- Select Activate QuickBooks Desktop, then Begin Activation.
- Enter the validation code, then select Next.
Solution 2: Manage your QuickBooks license
- Go to Help, Manage my license, then Change my license number.
- Enter the license number as all 0s and select next.
- Don't enter a validation code and then select Finish.
- Go to Help, Manage my license and then Change my license number.
- Enter your License number, select Next and then Finish.
Your QuickBooks is now activated.
If you need help finding your license number, you can do so from the account management self-service tool.
You see a blank screen when you try to activate
Your antivirus software might be in the way. Disable your antivirus software and try again. You can turn it back on when you’re done.
Reach out to your antivirus provider if you need help to get it to work with QuickBooks. They’ll have the best advice on what to do next.
Validation code screen doesn't appear
If you don't get asked to enter your validation code, there are a couple things you can try.
Solution 1: Manually activate QuickBooks
- With QuickBooks open, navigate to the Help menu and select About QuickBooks.
- Press <Enter> + R + P when the QuickBooks logo displays. A manual activation window opens.
- Enter your validation code in the window. Contact us if you need to get a validation code.
If you encounter an error stating that you have entered an incorrect license or product number, you have likely downloaded the incorrect installer for your product (for example, you downloaded the US installer for your Canadian product).
If you still can't enter your validation code, go to Solution 2.
Solution 2: Manage your license
- Go to Help, Manage my license, then Change my license number.
- Enter the license number as all 0s.
- Don't enter the validation code and then select Finish.
- Go to Help, Manage my license, then Change my license number.
- Enter your license number. When prompted enter the validation code, and select Finish.
Sign in now for personalized help
See articles customized for your product and join our large community of QuickBooks users.
More like this
- Fix Error 3371: Could not initialize license propertiesby QuickBooks
- Activate a QuickBooks Online subscription using License and Product numbersby QuickBooks
- Change a QuickBooks Desktop license number or product codeby QuickBooks
- Find your QuickBooks Desktop license info within the softwareby QuickBooks