QuickBooks HelpQuickBooksHelpIntuit

Recover from your standard feed outage - St. George Bank

by Intuit2 Updated 4 months ago

As you may have seen on our page, Financial Institutions that support QuickBooks Online, we’ve received confirmation from Westpac Group that they’re no longer supporting the standard feed connection to QuickBooks Online from certain subsidiaries.

Therefore, if your business banking account is with the St. George Bank, you'll experience an error on your standard feed.

You will need to disconnect your impacted account, and either upgrade to a direct feed or use manual uploads (depending on your account type) to get your transactions into QuickBooks Online. Follow the guides below to move forward with your banking.

Before you start, note that this doesn’t impact any Westpac customers or subsidiary customers with personal bank accounts.

Move forward with your business banking

If your impacted account was a business savings or checking account, you can upgrade to a direct feed connection.

We recommend you accept any transactions that are still in the For Review tab to avoid losing any transactions. Once completed, you can disconnect the account.

  1. In Business view, go to Bookkeeping, select Transactions, then select Banking (Take me there) or in the Accountant view, go to Banking and select the Banking tab.
  2. Select the tile for the bank account.
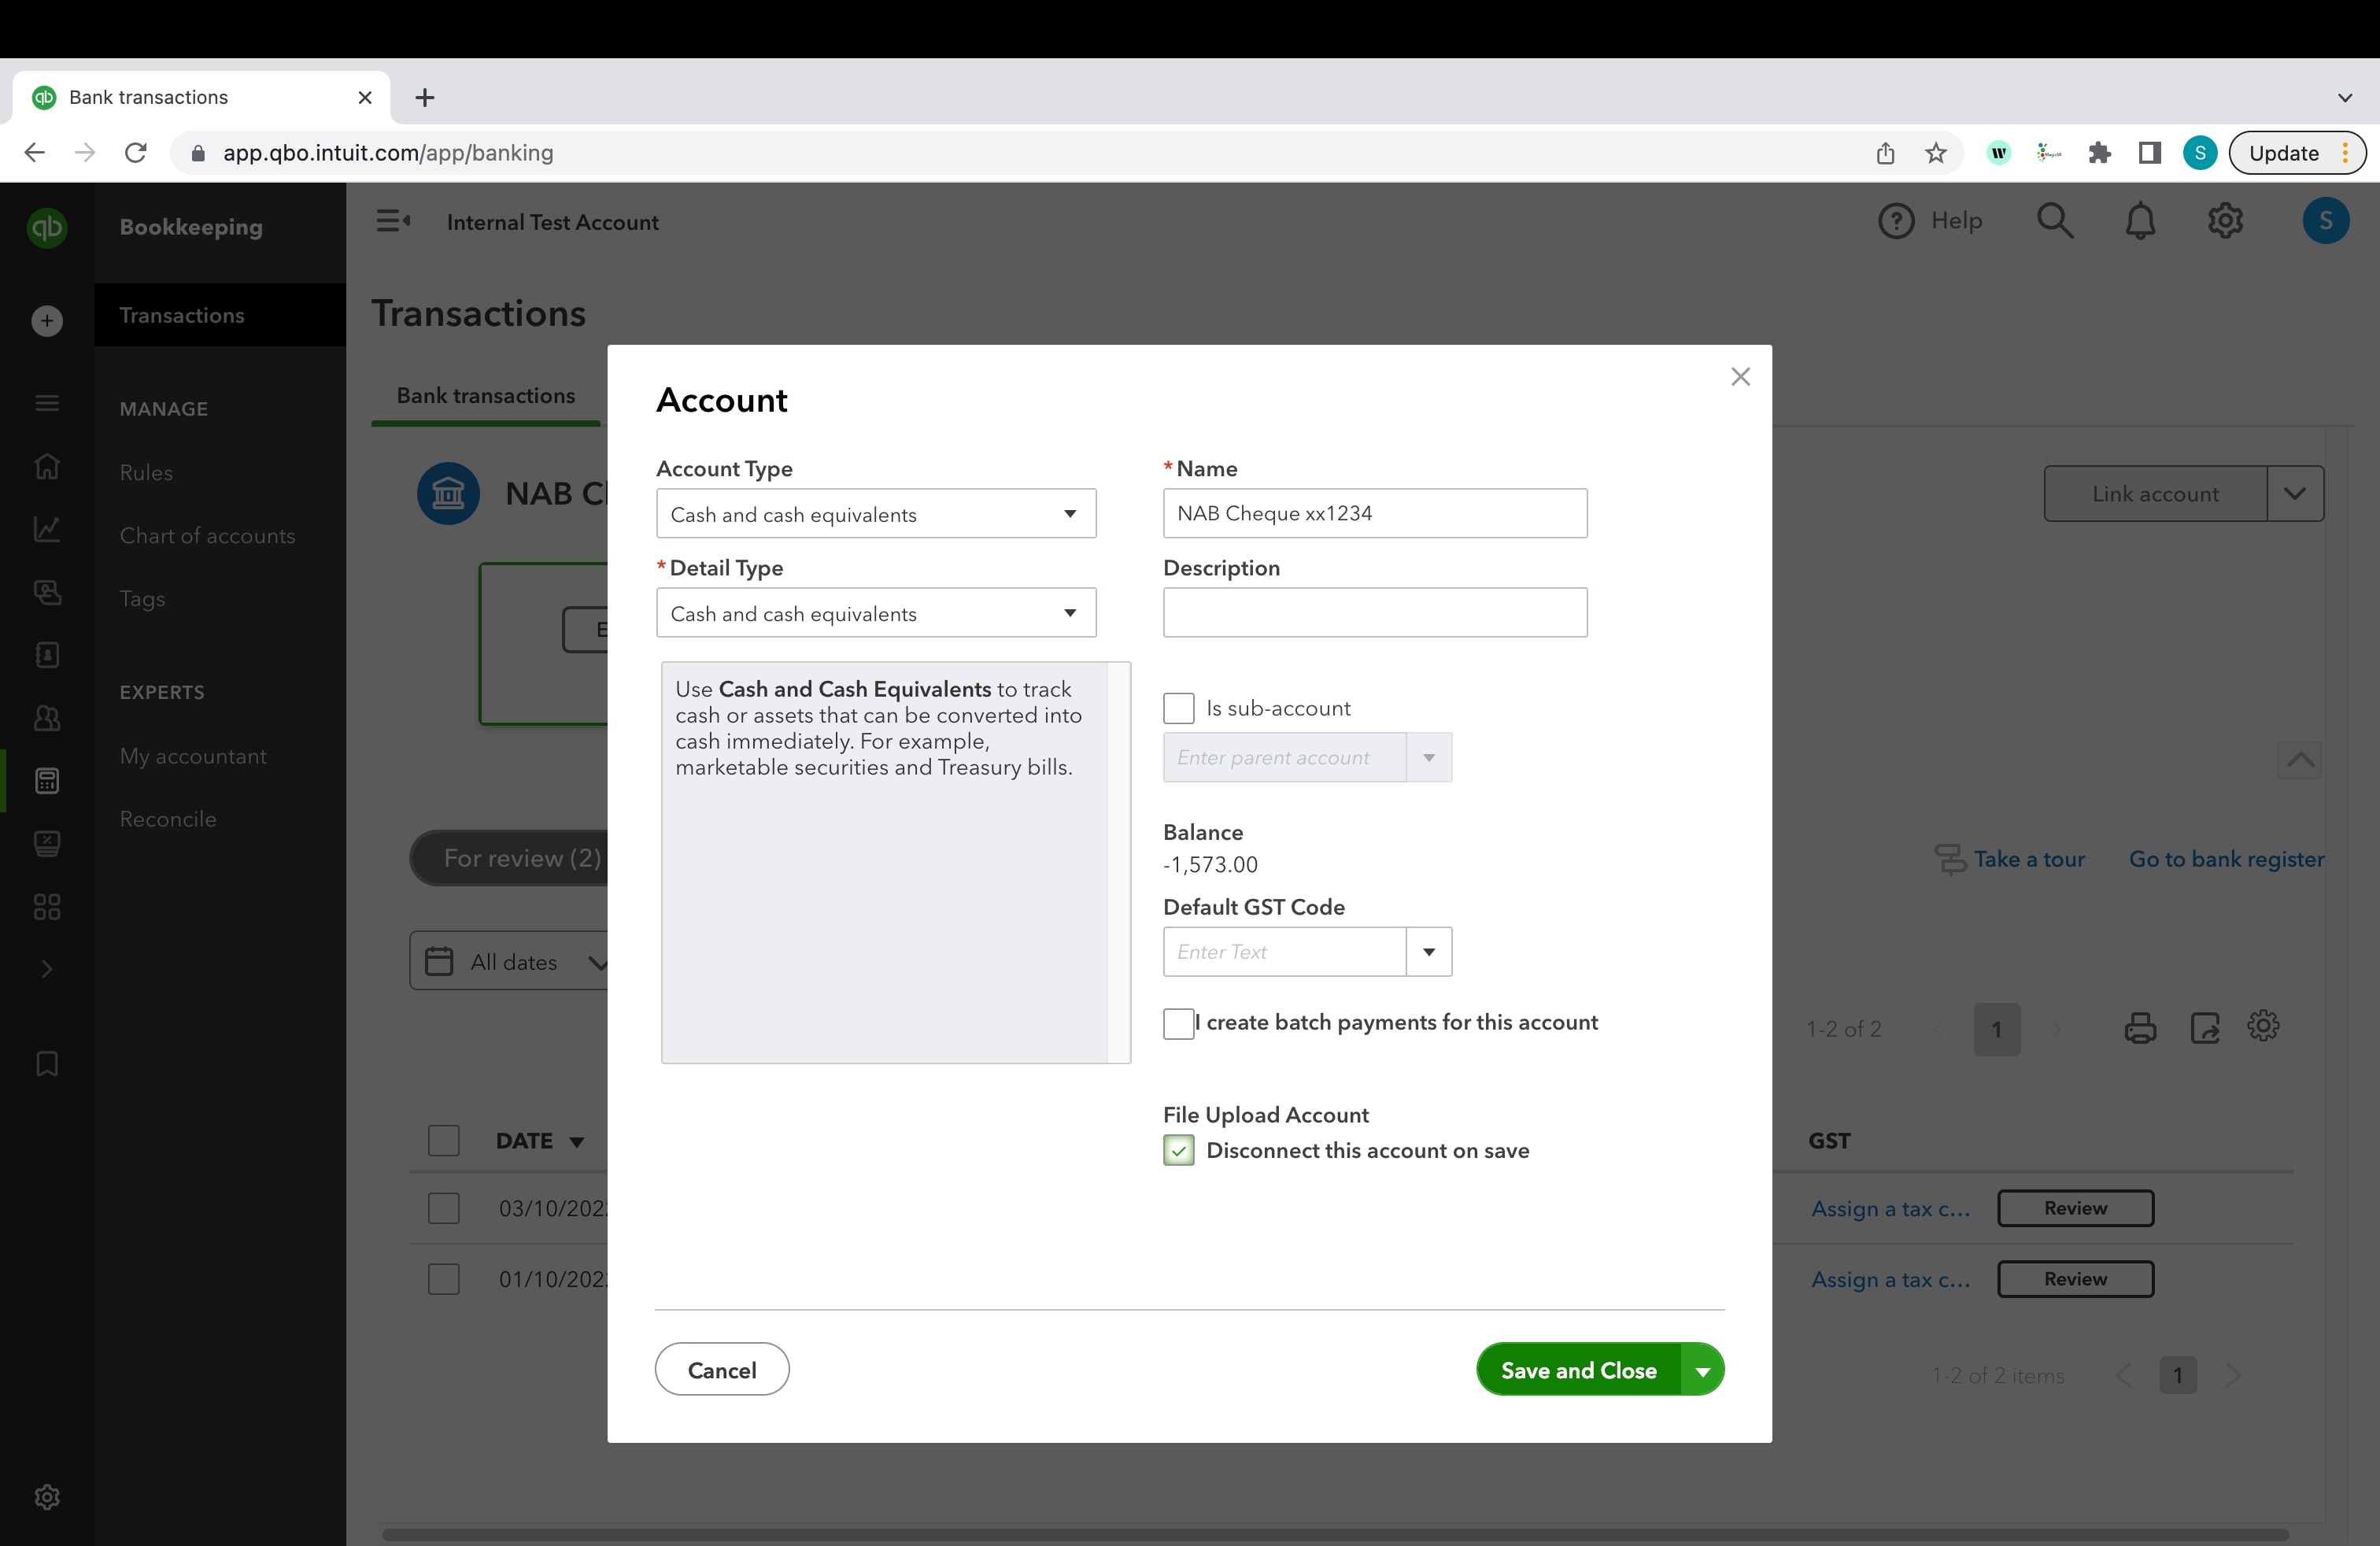
  3. Select the pencil ✎ icon, then select Edit account info.
  4. Tick the Disconnect this account on save box. Note: If QuickBooks is downloading new transactions, you won't see this option. Wait a few minutes for the update to finish and try again.
  5. Select Save and Close.
  6. The bank account will disappear from your banking screen.
image
  1. Go to Transactions and select Bank transactions (Take me there).
  2. Select Connect Account if this is your first time connecting, or Link account if you've created one in the past.
  3. Search for your bank.
  4. Select Get direct bank feeds.
  5. Read the steps on connecting the bank feeds, then select Get direct feeds.
  6. Enter your account details. It's important that these fields match what the bank has on file for you.
    1. Please note that for Credit Card accounts, you need to enter your 9-digit Account Number, not your actual credit card number.
  7. Select the bank account you want to connect to, select Connect and an authorisation form will be created.
  8. Select Preview form.
  9. Print the form and hand-sign it. If there are two signatories, both signatories will need to sign the form. If there are more than two, then all signatories need to sign the form.
  10. Email or post the form using the following details:
    • Email: intuitforms@siss.com.au
    • Subject: QuickBooks Bank Feed Request
    • OR
    • Mail: SISS Data Services Pty Ltd
    • Locked Bag 3060
    • Crows Nest, NSW, 1585

Direct feeds aren't currently available for credit card or loan accounts. We are working with the Westpac Group to resolve this issue, but for now, you'll need to be manually uploaded via a csv. file and imported into QuickBooks Online. 

We recommend you accept any transactions that are still in the For Review tab to avoid losing any transactions. Once completed, you can disconnect the account.

  1. In Business view, go to Bookkeeping, select Transactions, then select Banking (Take me there) or in the Accountant view, go to Banking and select the Banking tab.
  2. Select the tile for the bank account.
  3. Select the pencil ✎ icon, then select Edit account info.
  4. Tick the Disconnect this account on save box. Note: If QuickBooks is downloading new transactions, you won't see this option. Wait a few minutes for the update to finish and try again.
  5. Select Save and Close.
  6. The bank account will disappear from your banking screen.
image

To avoid entering duplicates, you need to know the date of the most recent existing transaction currently in the account:

  1. In QuickBooks, go to Bookkeeping and select Chart of accounts (Take me there).
  2. Find the bank or credit card account you want to upload the transactions into.
  3. Select Account history.
  4. Find and write down the date of the most recent transaction.
  1. Sign in to your financial institution’s website.
  2. Follow your financial institution’s instructions for how to download CSV files of your transactions to your computer. Every financial institution has different steps.
  3. Make sure the date range for the download starts after the last transaction.
  4. Download your transactions. 
  5. Save the file somewhere you can easily find it, like your computer's desktop.
Tip: Your bank may offer a few file formats. Pick the .CSV option as this will be the simplest to upload to QuickBooks Online.
  1. Select to Bookkeeping from the left-hand menu, select Transactions, then select Bank Transactions (Take me there) .
  2. Select Upload transactions.
  3. Select Drag and drop or select files, then upload the file you downloaded from your bank. Then select Continue.
  4. In the QuickBooks account dropdown, select the account relating to the one you disconnected earlier. Then select Continue.
  5. Follow the onscreen steps to match the columns on the file with the correct fields in QuickBooks. Then select Continue.
  6. Select the transactions you would like to import. Then select Continue.
  7. Select Yes.
  8. When you accept your transactions, select Done.

If you see an error message, don't worry. Here's how to fix errors while uploading your transactions.

For more information, read the full article on manually uploading your transactions to QuickBooks Online using a .CSV.

We're here to help

If you need additional help or have questions, or you require assistance at any point in this process, our Customer Success team is happy to help.

Sign in to QuickBooks and start a discussion in our QuickBooks Community or join one of our Facebook Groups to connect with other like-minded QuickBooks customers. 

QuickBooks Online EssentialsQuickBooks Online PlusQuickBooks Online Simple Start

Sign in now for personalized help

See articles customized for your product and join our large community of QuickBooks users.

More like this