Set up the Clock Me In kiosk app
by Intuit•2• Updated 1 month ago
Clock Me In is an iPad Tablet app used to operate time and attendance (kiosk) activity, and is connected to QuickBooks Online Advanced Payroll.
Important information about Clock Me In:
- Clock Me In can be run on any version of iPad that runs at least iOS 9.3.
- Both full access and restricted access payroll users can log in to the Clock Me In app.
- A restricted access user will need to have access granted by a full access user before they can log in. This can be configured in the Manage Users section of Payroll Settings.
Step 1: Configure Clock Me In access
Go to All apps ![]() , select Payroll, then select Employees (Take me there).
, select Payroll, then select Employees (Take me there).
- Select Payroll Settings.
- Select Manage Users under Business Management.
- Select Add and create a new full access login or restricted access login to gain explicit access to Clock Me In.
- To create a restricted access login, select Restricted access, then select the Clock Me In tab to configure kiosk access. Then, select Save.
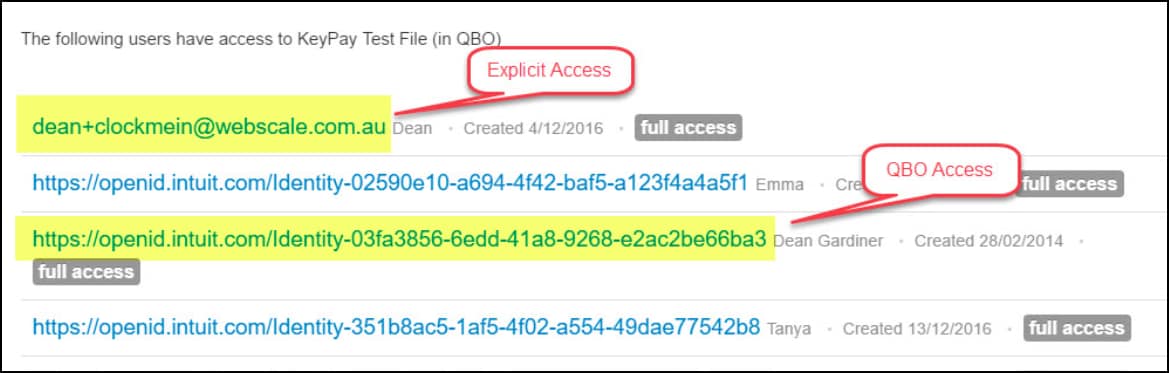
You will notice from the screenshot below the difference between a user with QuickBooks Online (QBO) access and a separate, explicit user that is set up using the instructions above - i.e. when you set up a separate user the actual email address is shown:
Step 2: Log in to Clock Me In
To log in follow these steps:
- Download and open Clock Me In on the iPad to be used as your kiosk.
- Enter your username/password.
- Tap the Login button.
Note: If you have trouble with the login process, select Forgot Password and follow the prompts.
Once you have logged in you will need to enter your 'admin pin'. The admin pin allows you to enter admin mode and perform additional functions from within the Clock Me In kiosk.
The admin pin setup screen will display as soon as you have logged in. To enter the admin pin follow these steps:
- Enter a 4 digit pin number in the Create PIN screen.
- Confirm your 4 digit pin number.
Your admin pin will now be set.
Step 3: Set up a new kiosk (full access users only)
Once you have logged into Clock Me In, a full access user can set up a new kiosk for Clock Me In to connect to. Restricted access users with Kiosk access are NOT able to add new kiosks.
- Select the + icon on the top right of the screen.
- In the Create Kiosk window, enter the following information:
- The name of the kiosk
- The kiosk location
- The kiosk timezone
- Allow higher classification selection
- Capture a photo when clocking on/off
- Restrict employees to approved locations only
- Make this kiosk available to all restricted users with Clock Me In access
- Select Save.
Your kiosk is now set up and your employees will be able to start recording shifts using Clock Me In.
Note: Clock Me In is not available for offline use.
More like this
- Set up QuickBooks Time Kioskby QuickBooks
- Turn on QuickBooks Time Kiosk photo captureby QuickBooks
- Get started with QuickBooks Timeby QuickBooks
- Track time on the QuickBooks Time Kioskby QuickBooks