Create new T1, T2, T3, and FX returns in Pro Tax
by Intuit•30• Updated 1 month ago
New to Pro Tax? We have a training hub to help you get started.
Table of contents:
| ‣ Managing permissions |
| ‣ Add a new client tax return |
| ‣ For T1 returns |
| ↳ For T1 Personal returns |
| ↳ For T1 Self-employed returns |
| ‣ For T2 returns |
| ‣ For T3 returns |
| ‣ For FX returns (Forms expert) |

Add new clients in a flash, with the same fields from QuickBooks Online Accountant.
Fill in the info to finish the QuickBooks Online Accountant client profile, or use the client name to create the client and start their return.
You'll only need to enter a first and last name. This saves time if you don't want to fill in the other fields, or if the taxpayer doesn't have an email address.
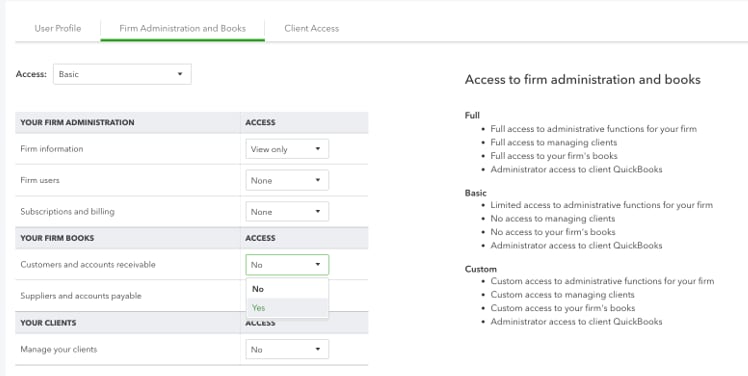
Managing permissions
This feature is available only to users who have been granted permission through their user profile by the account administrator.
The account administrator can review the level access they wish to grant by navigating to the Team tab in the left navigation pane, selecting the user, and then changing their permissions.
Users can have any level of permissions and are able to add new returns if the Customers and accounts receivable, under Your Firm Books, is set to Yes:
Add a new client tax return
In Pro Tax, select your module (for example, T1, T2, T3 or FX) and select Create new return.
If you've already added your client, select their name from the dropdown menu.
For T1 Returns
Under the Create new return dropdown, select T1 Personal or T1 Self-employed:

For T1 Personal returns
- Select the tax year.
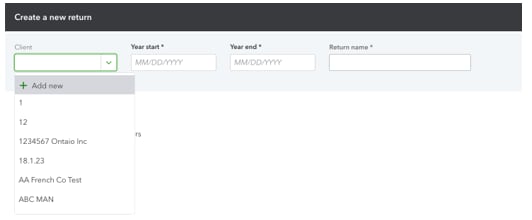
- To add a new client, select + Add new under Select a client.

A window displays, prompting you to complete your client’s information.
Note: Only the client name is a required field.

For T1 Self-employed returns
- Enter the return name:
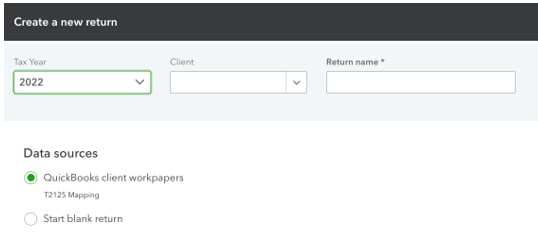
- Select your data source:
- If you’re creating a new return from a client in QBOA, you may choose Workpapers to import the data from their books to the tax return.
- You can start your return from scratch.
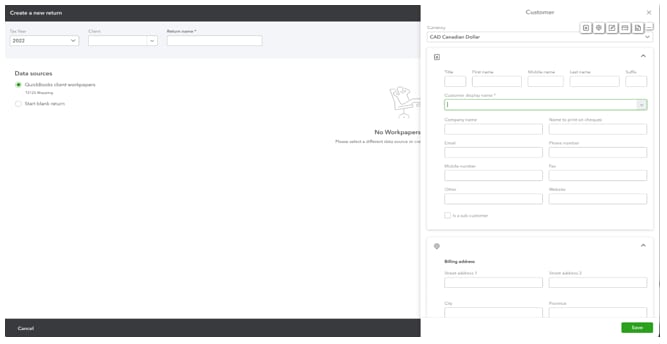
A window displays, prompting you to complete your client’s information.
Note: Only the client name is a required field.
For T2 returns
- Select the T2 tab and select Create new return:

- Enter the Year start, Year end, and Return name values.
Note: Pro Tax will automatically set your year-end date. For example, if your start date is January 1st, your year-end date will be December 31st.
You can change the year end to match your corporation’s actual date.
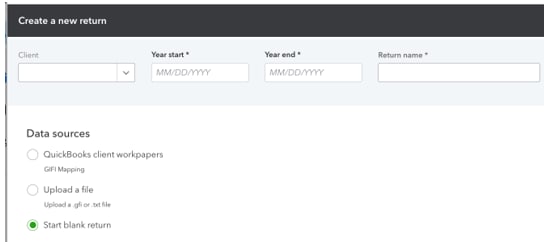
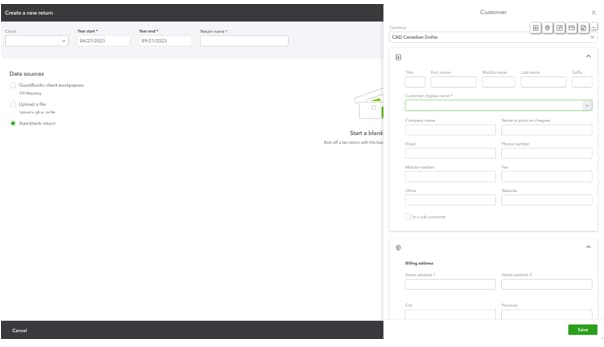
Select your data source.
- If you’re creating a new return from a client in QBOA, you may choose workpapers to import the data from their books to the tax return.
- You can use a GIFI file import from other sources such as QuickBooks Desktop or QBO.
- You can start your return from scratch.
- Select your client and select + Add new:
- Just fill in the Customer display name field.
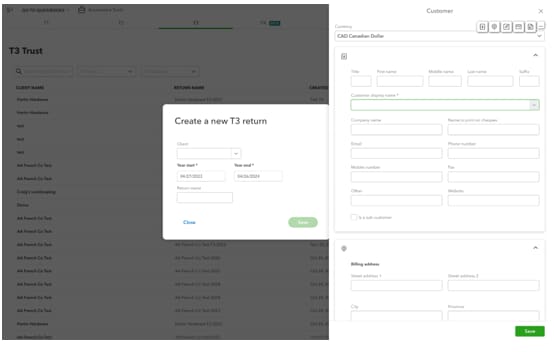
For T3 returns
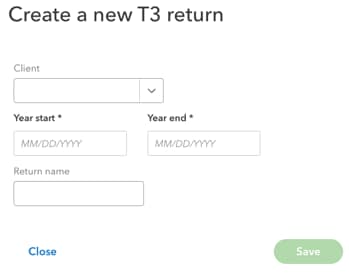
- Select the T3 tab.
- Select Create new return:

- Enter the Year start and Year end values.
Note: Pro Tax will automatically set your year-end date. For example, if your start date is January 1st, your year-end date will be December 31st.
You can change the year end to match your trust’s actual date.
- Select the tax year.
- To add a new client, go to Select a client, then select + Add new.
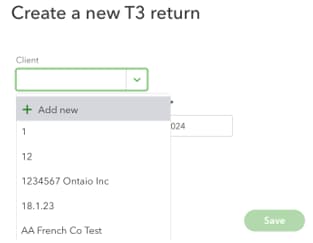
A window displays, prompting you to complete your client’s information.
Note: Only the client name is a required field.
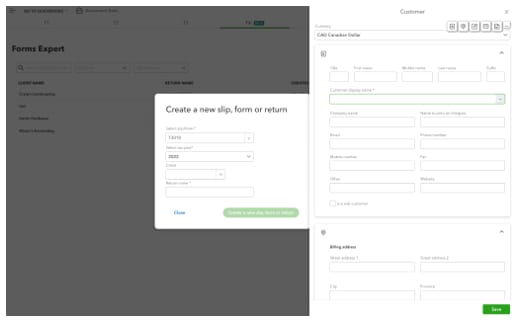
For FX returns (Forms expert)
- Select the FX tab.
- Select Create new:

- Select the slip or return to create.
- Select the taxation year:
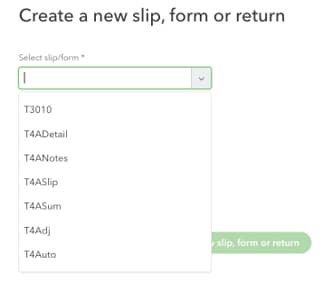
- Select + Add new:
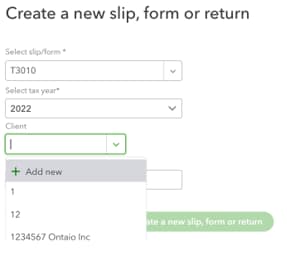
A window displays, prompting you to complete your client’s information.
Note: Only the client name is a required field.
More like this
- QuickBooks Online Accountant Pro Tax Billing FAQby QuickBooks
- Setting up Tax Settings in Pro Taxby QuickBooks
- Pro Tax bundlesby QuickBooks
- Pro Tax release notesby QuickBooks