Process payments with the QuickBooks Card Reader
by Intuit•11• Updated 3 months ago
Learn how to quickly take payments with the latest QuickBooks card reader.
The QuickBooks card reader has a LED display that lets customers and clients see payment and tip amounts. With the QuickChip internal processors, the card reader makes it fast for customers to receive payments. If you're not sure which card reader you have, get more info about your QuickBooks Payments card reader and its features.
If you're not using GoPayment, find out which product you can use to Take and process payments in QuickBooks Online with QuickBooks Payments
Note: The QuickBooks Card Reader is compatible with the QuickBooks Power Stand.
Connect your card reader to QuickBooks Desktop
If you need to connect your card reader to QuickBooks desktop, check out take and process payments in QuickBooks Desktop.
Connect your card reader to your GoPayment app
- Make sure the bluetooth on your mobile device is turned on.
- Turn on your card reader.
- Sign in to your GoPayment app on your device.
- Select your card reader after GoPayment automatically finds it.
- Your device might ask for permission to pair with the reader.
Your card reader is now connected! You’ll see it listed in My Card Readers. You can select the arrows on the reader to check the battery level and to make sure it's connected.
Process payment for a new sale
- Go to your GoPayment app.
- To create a new sales receipt, tap (+), then select New Sale.
- On the keypad, enter the amount and description. Or, if you have items entered in GoPayment, you can select one.
- If you have more items to enter separately, you can select Add to enter this item and move to the next one.
- When you’ve entered all of the items, select Review Order.
- Make sure your amounts are correct and select Charge then pick your card reader.
Note: You can make changes like adding sales tax, discounts, or details about the items or customer.
You and your customer both see the sale amount. Your customer completes the sale on the card reader.
Note: If you get a processing error, the GoPayment app will let you know why.
QuickBooks Payments payment methods
The reader takes chip-enabled cards, tap-enabled cards, and tap-to-pay digital wallets such as Apple Pay and Google Pay.
Use a chip-enabled card on the reader
- Use the reader display facing up.
- Insert the card with the chip facing up so the chip goes in the reader.
Note: This is different from the older QuickBooks readers, where the chip faced down.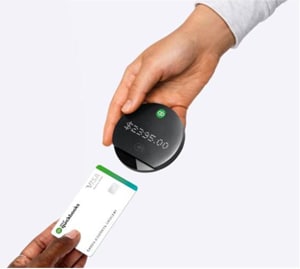
Use the reader with tap-to-pay card or digital wallet
- Tap the payment card or mobile device to the front of the reader.
- For best results, aim for the center of the LED display.
If your card has a tap symbol, use that to place at the center of the display.
You can’t use a swipe card with the QuickBooks card reader. You'll need to manually key-in the card number in the app. The fee for manually entered cards is different. For more info, check out how to process other payments with the GoPayment App.
Turn the QuickBooks Payments reader on and off
Hold the power button on the side of the reader near the QuickBooks logo. You’ll know it’s on when the reader beeps and the LED display turns on. When you want to turn off the reader, hold the power button until the LED display turns off.
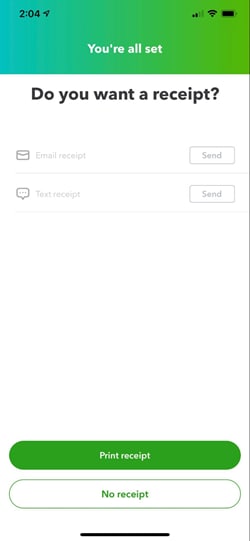
Give a receipt with the QuickBooks Card reader
After you make a sale, you have a few choices for how to give your customer a receipt:
- Email or text - Enter your customer's info to send.
- Print receipt - From your Android or iOS device, connect to an available printer.
- No receipt - Close the app if your customer doesn't need a receipt.
Charge and check the battery level of your card reader
The reader charges with the USB-C to USB-cable that's included. The reader can fully charge in about two hours.
As the battery recharges, the battery level indicator on the reader displays an animation of the battery filling up.
With the reader connected to the GoPayment app, you can check the battery level in the app by tapping on the battery icon when you create a new sale. You can check the battery level on the reader screen when in idle mode. Select an arrow one or two times until the battery level indicator displays.
The battery level icon uses 6 indicator levels, from nearly empty to fully charged.
More like this
- Set up a card readerby QuickBooks
- Process payments in the QuickBooks mobile and QuickBooks GoPayment appsby QuickBooks
- Use the new card reader with QuickBooks Desktopby QuickBooks
- Card reader features and compatibilityby QuickBooks