Add or Remove Transactional Email
by Intuit•1• Updated 11 months ago
Transactional Email is a powerful delivery service by Mailchimp that allows you to send one-to-one e-commerce emails and automated transactional emails.
In this article, you'll learn how to add, change, and remove Transactional Email in your account.
Before you start
- Transactional Email is designed for developers and requires HTML and API knowledge to create and send email. To learn more, check out our Mailchimp Transactional Email guides.
- Your Mailchimp Marketing plan includes automated transactional email options such as order notifications and abandoned cart emails. To learn more about how this is different from the Transactional Email add-on, check out About Transactional Email.
- Transactional Email is available as an add-on to Standard and higher monthly Marketing plans. To learn more, check out About Mailchimp Pricing Plans and Transactional Email Pricing.
- The Transactional Email page can be accessed by Owner or Admin user levels.
Add Transactional Email
You can add Transactional Email at any time. If you aren't currently on a Standard or higher monthly plan, we'll add the Standard plan to your purchase automatically.
To add Transactional Email to your Mailchimp account, follow these steps.
- Click Automations, then click Transactional email.

- Click Pick a Plan.
- Select your Transactional Email plan. Plans come in blocks of 25,000 emails and are automatically purchased at the beginning of each monthly billing cycle. Blocks expire at the end of each month, with no rollover to the next month.
 If you need more than 3 blocks per month, click the What if you need more than 3 blocks? drop-down to display the custom block selector. Then, click the I would like to purchase a custom amount radio button and enter the number of blocks you'd like to purchase. Note the discount pricing shown.

- Set your preferences for when you run low on emails. To learn more about these settings, check out Purchase Top-Off Emails for Transactional Email.

- In the sidebar, click Next.
- On the Payment step, enter your contact, billing, and payment information.
- Review your Purchase Summary and click Pay Now to complete your purchase.
Next steps
Click Launch App to open the Transactional Email platform. Here are some resources to help you get started.
Transactional API Quick Start guide
API client libraries
Transactional Email FAQs
Transactional Email is a paid add-on available only for the Standard plan or higher. We automatically choose this plan level for you when you sign up for Transactional Email. To learn more about pricing, check out About Mailchimp Pricing Plans.
Change your Transactional Email plan
Once you’ve added Transactional Email to your account, you may find that you want to adjust the number of blocks you purchase each month. You can make changes at any time and we'll let you know when the changes go into effect.
If you need additional emails for just one month, check out Purchase Top-Off Emails for Transactional Email.
To change the number of Mailchimp Transactional blocks you buy each month, follow these steps.
- Click Automations, then click Transactional email.

- Click Edit plan.

- Select your new Transactional Email plan. Remember that blocks expire at the end of each month, with no rollover to the next month.
 If you need more than 3 blocks per month, click the What if you need more than 3 blocks? drop-down to display the custom block selector. Then, click the I would like to purchase a custom amount radio button and enter the number of blocks you'd like to purchase. Note the discount pricing shown.

- Set your preferences for when you run low on emails. To learn more about these settings, check out Purchase Top-Off Emails for Transactional Email.

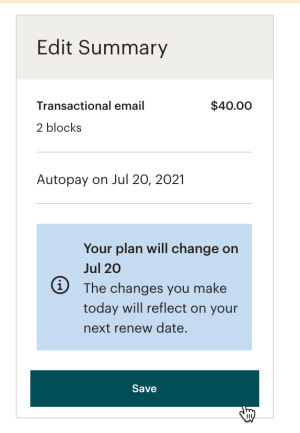
- In the sidebar, we'll show you the estimated price for your new Transactional Email plan and when the new plan takes effect. Click Save to continue.

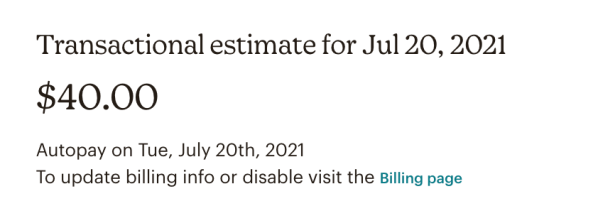
That's it! You’ll see the Transactional Email usage page with a summary of your new plan and when it takes effect.

Remove Transactional Email
If you decide you no longer need to use Transactional Email, you can remove it from your billing plan at any time. Removing Transactional Email will not change your Marketing plan.
To remove Transactional Email from your plan, follow these steps.
- Click your profile icon and choose Account.
- Click Billing, and then click Monthly plans or credits.

- Scroll to Transactional Email Plan.
- Click Manage Plan.

- Choose Disable, and then on the pop-up modal, click Disable Transactional.

More like this
- Email sales forms, invoices, and statements in QuickBooks Desktopby QuickBooks
- Add, edit, and remove authorized usersby QuickBooks
- Create, Add, or Remove Tagsby QuickBooks
- Remove duplicate transactions in QuickBooks Desktopby QuickBooks

