Connect or Disconnect Google Business Profile
by Intuit•2• Updated 1 year ago
If you want to connect your Mailchimp account with your Google Business profile, use the Google Business Profile app. This lets you add information from your Google Business profile to email campaigns you create. For example, you can add your hours, a map to your business, or photos of your business from your Google Business profile directly to your email campaign without having to upload anything to your Mailchimp account.
In this article, you’ll learn how to connect and disconnect Google Business Profile and how it works with Mailchimp.
Before you start
- You'll need a Google Business profile for your business.
- You must be using the new email builder to use this app. For more information about the new builder, check out Design an Email with the New Builder
- Once you’ve used the app to add information to an email, it remains the same even if you update your Google Business profile.
How it works
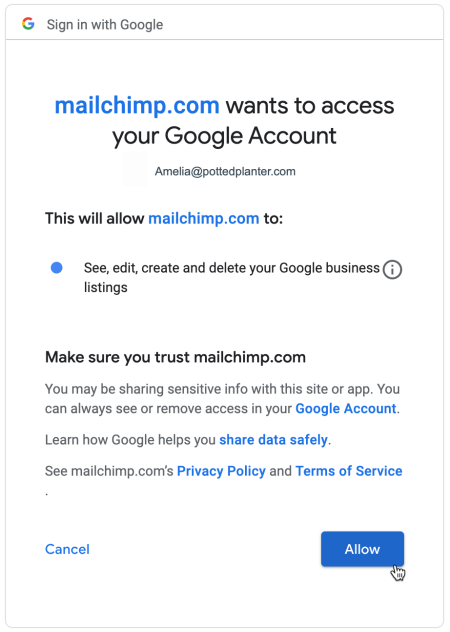
Once you begin the connection process, you’ll be prompted to sign into your Google Business account and authorize Mailchimp’s access to the account.
After your accounts are connected, you can choose which information in your Google Business profile you want to add to your email. You can customize the information you’re sharing for each email campaign you build.
Connect Google Business Profile
You can connect the Google Business Profile app to your Mailchimp account through its app detail page as well as the App content block in the new email builder.
From the app detail page
To connect Google Business Profile, follow these steps.
- Navigate to the Google Business Profile app detail page.
- Click Connect.

- If you’ve never authorized your account in Mailchimp, you’ll see Google's authentication module. Complete the authentication process.
- If you have more than one Google account, you’ll choose which account you want to connect to your Mailchimp account.
- Review the authorization details and click Allow.

That’s it! Your Google Business profile is connected to your Mailchimp account. When you add the Google Business Profile app content block to an email you’re creating in the new builder, you’ll select what information from your Google Business profile you want to share.
From the new email builder
To connect your Google Business profile from the new email builder, follow these steps.
- Within the new email builder, Select the Apps content block. Click and drag it onto your email template.

- In the Select App sidebar, click the plus sign to expand the Google Business Profile option.

- If you’ve never authorized your account in Mailchimp, you’ll see Google's authentication module. Complete the authentication.
- If you have more than one Google account, choose the Google account you want to connect to your Mailchimp account.
- Review the authorization details and click Allow.

- Once your accounts are connected, choose the information from your Google Business profile you want to add to your email.

That’s it! You’ll see your chosen information in your email design.
If you change any information in your Google Business profile, you’ll need to return to the campaign for the app to update the email.
Next steps
After you connect your Google Business account, check out how to work with the new email builder and campaign reports with the following articles.
Disconnect Google Business Profile
When you disconnect the Google Business Profile app from your Mailchimp account, any information you may have added to a campaign using the app remains until you remove the content block.
To disconnect Google Business Profile, follow these steps.
- Navigate to the Google Business Profile app detail page.
- Click Disconnect.

More like this
- About the Apps Content Block in the New Builderby QuickBooks
- Connect or Disconnect Google Lead Adsby QuickBooks
- Connect or Disconnect Yelp for Businessby QuickBooks
- Connect or Disconnect the Meta Business Extensionby QuickBooks
