Upgrading from QuickBooks Self-Employed to QuickBooks Online
by Intuit• Updated about 5 hours ago
Learn how to move your QuickBooks Self-Employed data to QuickBooks Online.
Thank you for choosing to switch to QuickBooks Online. This guide will cover the key things you need to know when moving your data from QuickBooks Self-Employed and getting started with a new QuickBooks Online subscription.
This guide will take you through the following steps:
- Save your QuickBooks Self-Employed historical financial reports.
- Set up your QuickBooks Online subscription.
- Move your customer data.
- Connect your bank account.
- Move your transactions.
- Review and categorise your transactions.
- Download the QuickBooks mobile app.
- Cancel your QuickBooks Self-Employed subscription.
- Invite your accountant or bookkeeper.
- Check and fix missing transactions.
To complete this process, you will require:
- A laptop or desktop computer (recommended).
- An active QuickBooks Self-Employed subscription.
- A new QuickBooks Online subscription.
- Access to your online banking accounts.
- Excel or Google Sheet.
See here for a QuickBooks Online discount for QuickBooks Self-Employed customers impacted by ANZ’s standard feed change. We will cover the initial setup process of your new QuickBooks Online subscription in Step 2 of this guide.
Once you’ve moved your data across; you can choose to use QuickBooks Online at home or in the office on a web browser, or on the go with the free iOS and Android mobile apps.
Before you cancel your QuickBooks Self-Employed subscription, please make sure you have completed the steps below. Including saving the data you wish to keep for your records and moving your relevant data over to QuickBooks Online.
You may consider signing in to your QuickBooks Self-Employed and QuickBooks Online accounts at the same time. To do this, you can sign in to one account on one browser (such as Chrome, Safari or Edge) and the other on a different browser. Alternatively, you could sign in to the second account in a private window. Use these keyboard shortcuts to launch a new private window depending on your browser.
- Google Chrome (Windows): press Ctrl + Shift + N.
- Microsoft Edge (Windows): press Ctrl + Shift + N.
- Mozilla Firefox (Windows): press Ctrl + Shift + P.
- Safari (Mac): press Command + Shift + N.
Before we start, sign in to QuickBooks Self-Employed and make sure everything is up to date. Record any transactions that are outstanding.
It is recommended that you close off the previous financial year in QuickBooks Self-Employed, so you can begin your current financial year in QuickBooks Online. This will mean that your new QuickBooks subscription has everything for the current financial year and make it easy for you to complete your books for this coming year.
After all of your data is up to date in QuickBooks Self-Employed, you can download your records from QuickBooks Self-Employed for safe keeping. This is optional, but it's a good idea to download your historical records.
- In QuickBooks Self-Employed, go to the Reports.
- In the Tax details section, select a tax year.
- Select Download to get a Tax Details report.
- Download a report for each tax year you have in QuickBooks.
- Repeat the following actions above for your Profit and loss, Mileage log, and Receipts.
Signing up for a new QuickBooks Online subscription only takes a few minutes. If you haven’t already, consider redeeming the offer referenced at the beginning of this guide. Alternatively, see all subscription options on the pricing page here.
Once you have your new subscription, sign in and complete the new user flow. You will be asked to:

- Enter your business name.
Note: Don’t tick the I’m moving from Excel, Reckon, MYOB or Xero and want to bring in my data box. - Select your industry, revenue, and business years.
- Select your business structure.
- Select what you want to do in QuickBooks.
- Once you have completed the above, select Let’s go and your company will be created. Next, move on to Step 3.
This step is easiest to complete when you are signed in to both your QuickBooks Self-Employed account and your QuickBooks Online account at the same time.
See We recommend you complete this move through a web browser on a laptop or desktop section for more details.
Let’s start by getting your customer information into QuickBooks Online, we can do this by importing your invoices over. If you select to start fresh from 1 July, then there are two lots of invoices to import, Open Invoices and Invoices created since 1 July.
Open Invoices tracks who still owes you money for services rendered and you can accept payments against the invoice when your customer pays.
Invoices created since 1 July track your business activity for this financial year.
The best way to do this is by importing your QuickBooks Self-Employed customer data into your QuickBooks Online subscription via .CSV file.
Note: One aspect of your invoice will be recording GST, learn how to set up your GST here.
- In QuickBooks Self-Employed, go to the Invoices.
- Select the export icon
 and .CSV file will start downloading.
- Open the .CSV file and sort by Invoice Date and highlight all rows with invoices since 1 July, highlight invoices created on 1 July.
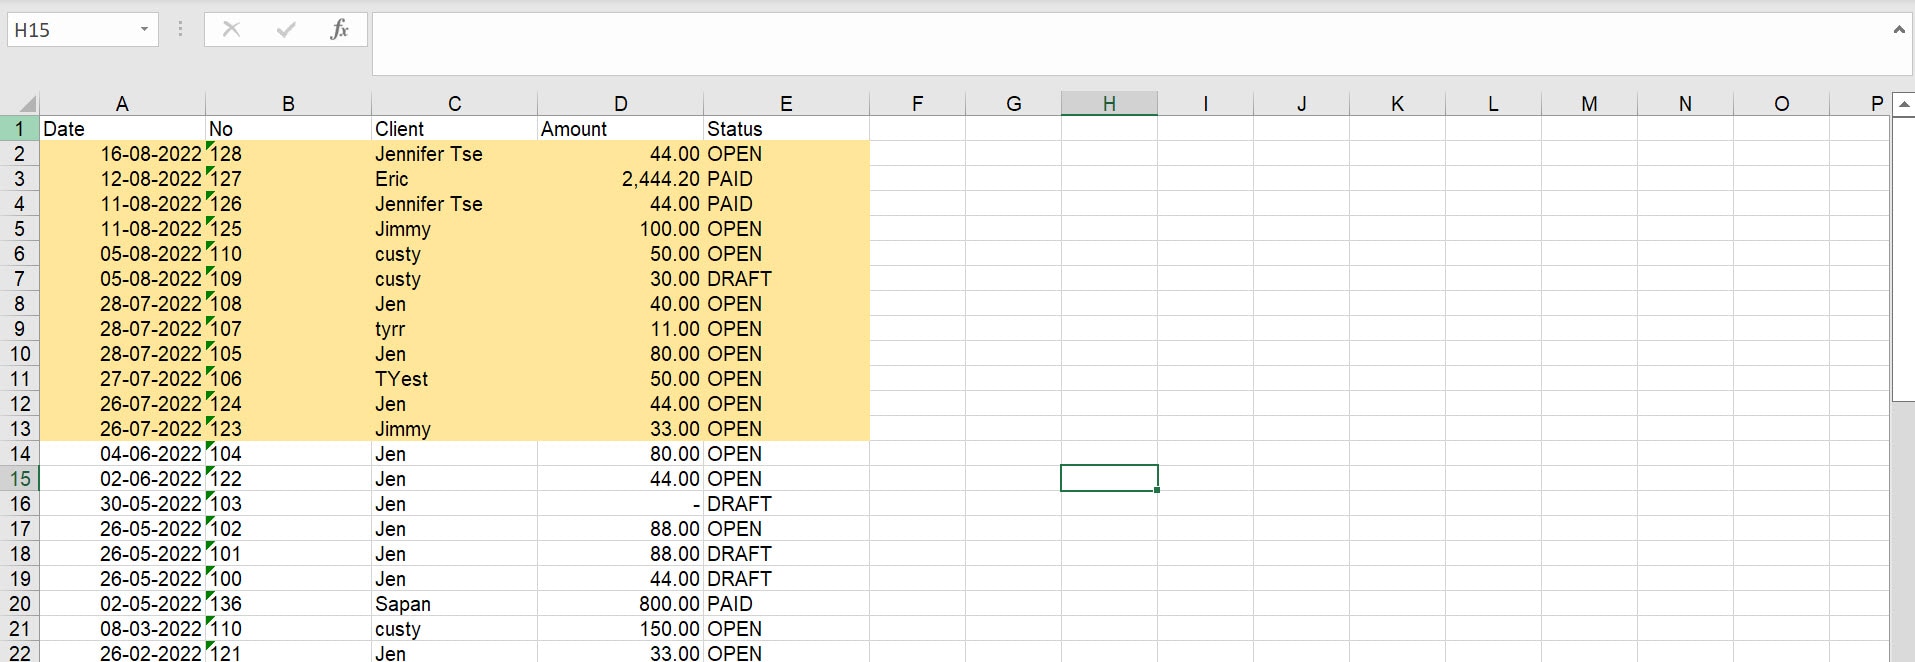
- Sort by Status and highlight all rows with invoices with status as Open.
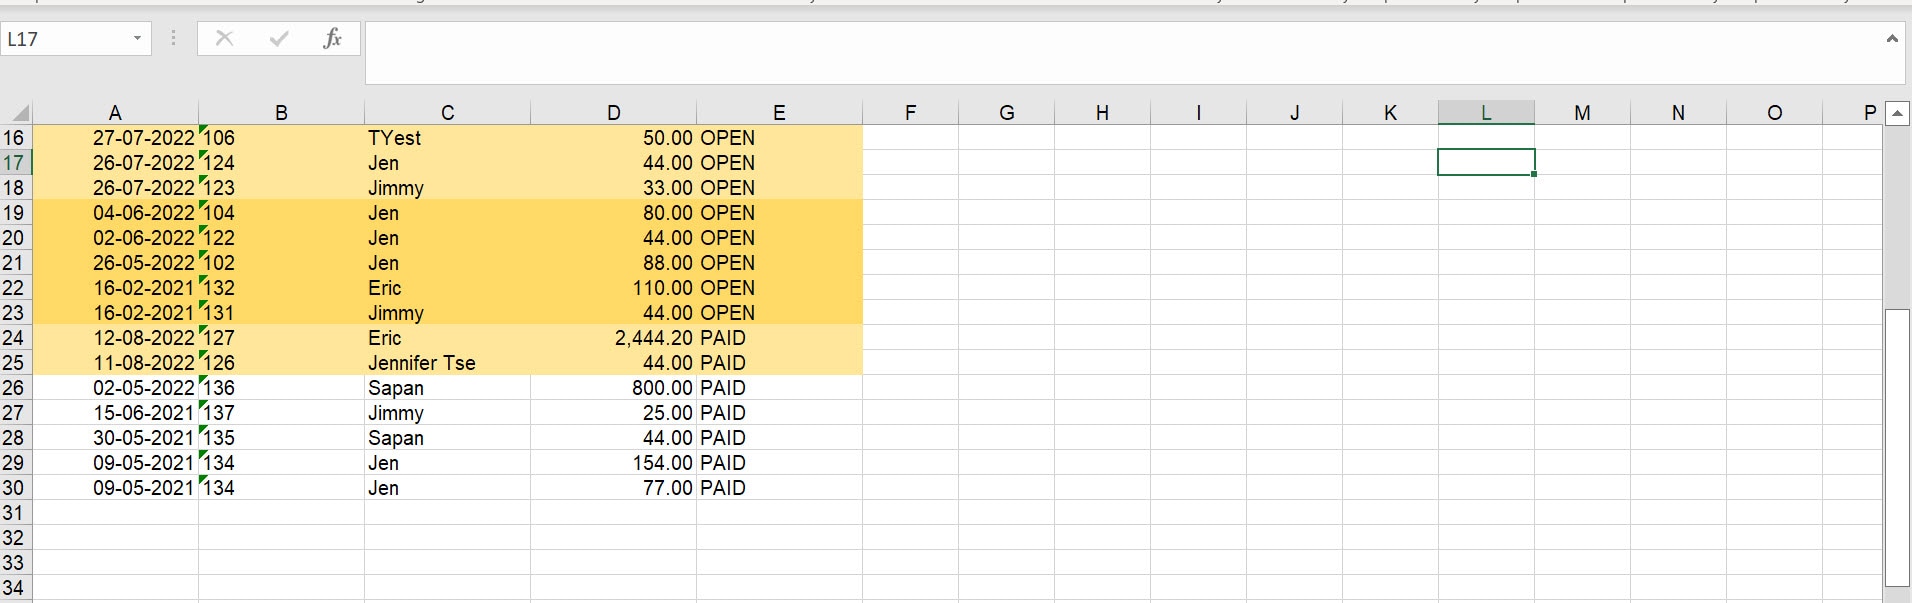
- Delete any row that is not highlighted and you now have a list of invoices that are either Open or post 1 July.
- Add a column called Due Date and depending on your invoice terms, fill in the information accordingly.
- Add a column called Tax Code and on each invoice, fill in GST, GST free or Out of Scope depending on the GST code added on the QuickBooks Self-Employed invoice. If your QuickBooks Self-Employed invoice has multiple line items with a mix of GST codes, mark the invoice as Out of Scope, and add GST later.
- For the import process to map correctly, rename your columns.
| Rename From | Rename To |
|---|---|
| No | Invoice No |
| Client | Customer |
| Date | Invoice Date |
| Amount | Item Amount |
You now have a spreadsheet with 7 columns and information filled out below each column and save this updated .CSV file. A compatibility checker may pop up advising that formatting will not be saved, press continue and save as a .CSV file. 
- In QuickBooks Online, it is easy to import .CSV files and you can import your prepared invoice .CSV file.
- Go to Settings ⚙ and select Import data.
- Select Invoices.
- Select Browse, then find and select your prepared .CSV file from the step above.
- (Optional) Tick the boxes to add new customers or products and services that don't already exist in QuickBooks.
- Select Next.
- Select the date format you used, like D/M/YYYY.
- Select Inclusive of tax as your tax option, then select Next.
- Select the GST codes to match. Select Next.
- Select Start import.
- Select OK if all your invoices are imported. If some invoices fail to import, note why, then select Done. You can now view your invoices on Invoices page.
You now have your open invoices and current invoices entered into your QuickBooks Online subscription. For your paid invoices, after you complete Step 5, in Step 6, you will be able to allocate payment against those invoices.
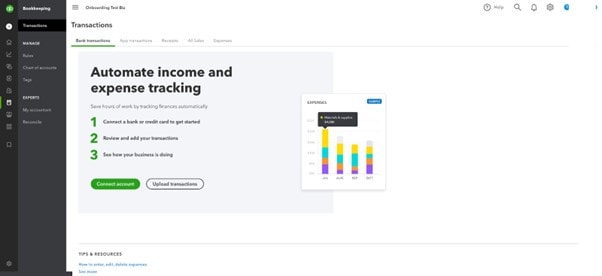
By upgrading to QuickBooks Online, you can connect your ANZ bank account using direct bank feeds to automatically download your transactions. Here’s how:
- Sign in to your QuickBooks Online subscription.
- Go to All apps
 , select Accounting, then select Bank transactions (Take me there).
 - Select Connect account.
Note: If you’ve already connected to an account, select Link account.
- Search for ANZ and your relevant bank account type.
- Please note that most ANZ accounts, for both business and personal customers, can be linked to QuickBooks. These include loan, transaction, savings, and funds management accounts. Unfortunately, asset finance products, ANZ Smart Choice super and foreign currency accounts aren’t eligible for bank feeds.
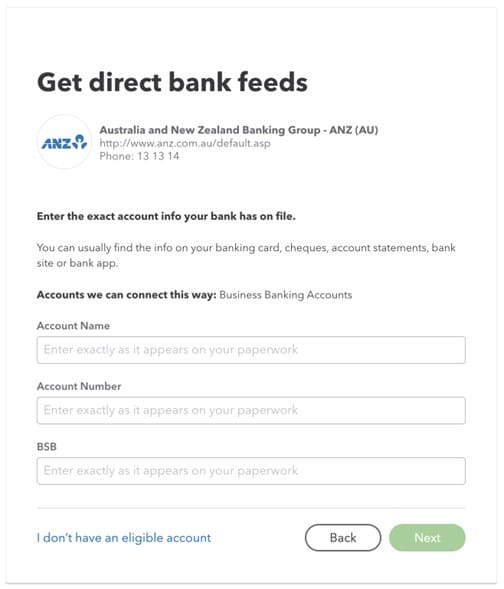
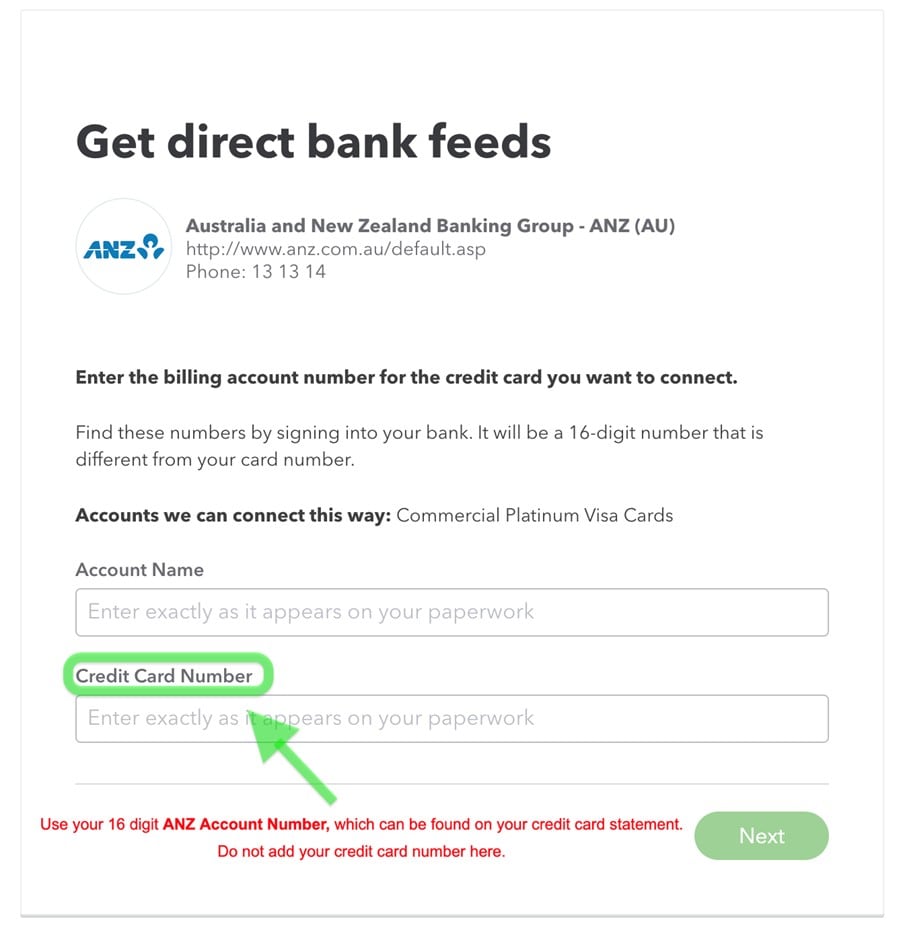
- Enter your account details and select Next.
Important: If connecting to an ANZ credit card account, ensure you enter the ANZ Account Number which is associated with your credit card, in the Credit Card Number field. You can find your 16-digit account number on your ANZ bank statement. - A screen with your account with the last 4 digits showing will load. Select the dropdown, and select Add New.
- Select the Account type, whether it is a cash bank account or a credit card accordingly. You may wish to rename the account in the Name field. When you are done, select Save and Close.
Note: If you have more than two bank accounts to connect, you can rename this one ANZ. - If asked to enter the date you would like to pull transactions from, select Today, then select Connect.
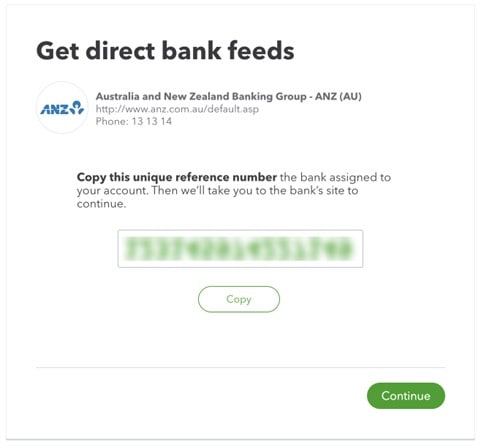
Note: Historical transactions are not available from ANZ direct bank feeds. - Select the Copy to copy your Unique reference number (this is your Company ID), then select Continue.
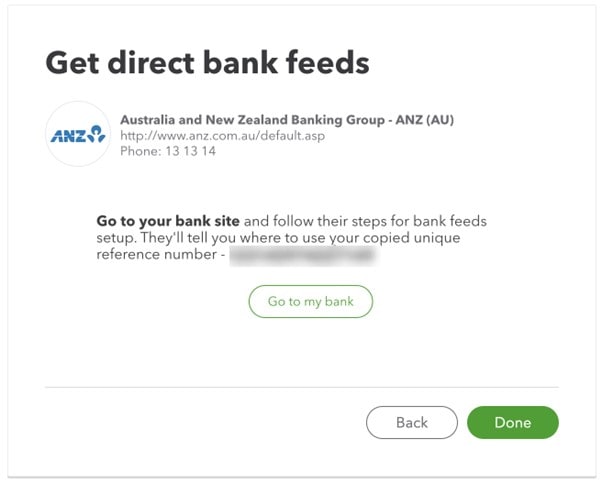
- Select Go to my bank to travel to the ANZ Internet Banking site.
Tip: See the ANZ bank feed guide for more information.
- You will need to sign in to your ANZ banking account. Then, go to the Settings tab.
- Select Manage Bank Feeds.
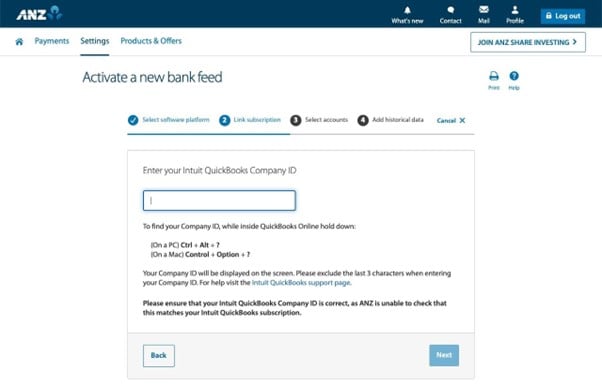
- From Activate a new bank feed page, select Intuit QuickBooks and select Next.

- In the Company ID field, paste the unique reference number you copied from Step 6, then select Next.
Note: ANZ calls to 'Exclude the last 3 characters when entering your Company ID'. For a successful connection, enter your entire Company ID and do not exclude any digits.
- Select all of the account(s) you would like to connect with QuickBooks, then select Next.
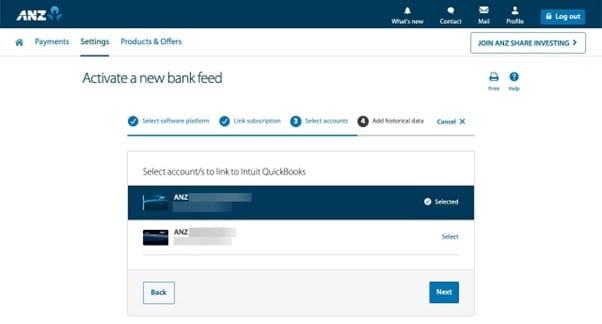
- Select Next again.
- On the Review and Confirm window, check the bank account details are correct, accept the terms and select Submit to finish setup.
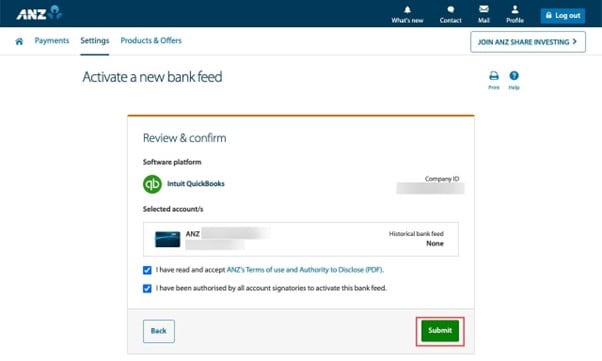
Your data will start syncing within 1-2 business days.
QuickBooks Online can handle multiple bank accounts. If you have more than one bank account you wish to connect, you can repeat the first two steps, and search for the relevant bank account then follow the onscreen instructions.
It is recommended that you start fresh from 1 July for the current financial year in your QuickBooks Online subscription. A clear date means you can refer to your saved QuickBooks Self-Employed reports for previous financial data and going forward use your QuickBooks Online subscription to run your business. It’s easy to import your transactions for the current financial year from QuickBooks Self-Employed to QuickBooks Online, here's how:
- In QuickBooks Self-Employed, go to the Transactions.
- Select the export icon and .CSV file will start downloading.
- Delete transactions in the .CSV file prior to 1 July so you are left with transactions on 1 July and after. Save the .CSV file.
- Go to All apps , select Accounting, then select Bank transactions (Take me there).
- Select the ▼ dropdown next to Link account, then select Upload from file.
- Select Drag and drop or select files and select the appropriate .CSV file from your computer that you downloaded earlier, select Open, then select Continue.
- From the Select account ▼ dropdown, select the appropriate account, then select Continue.
- Map the statement fields according to your .CSV file's format, then select Continue.
- Tick the boxes on the transactions to import, then select Continue.
- Select Yes, then select Done.
Note: If you connected more than one bank account to your QuickBooks Self-Employedsubscription, your downloaded .CSV file will have all transactions on the one list. You will need to filter out each bank account’s transactions onto a separate .CSV file and upload them separately to match them to the correct bank account.
If you need more support with importing and exporting transactions using .CSV files, learn more here.
You are now ready to start reviewing and categorising your transactions in your new QuickBooks Online subscription. QuickBooks Online is powerful and can track more details on your transactions than QuickBooks Self-Employed.
- Go to All apps , select Accounting, then select Bank transactions (Take me there).
- Select the transaction to expand the view.
- Review the recommended category. This is the account QuickBooks wants to categorise the transaction into. For example, for a petrol expense, QuickBooks may suggest categorising it under expenses related to travel. You can always change the category and put it in a different account.
Note: In QuickBooks Self-Employed you can categorise transactions as personal, to do this in QuickBooks Online, categorise your transaction as personal. - Change the supplier or customer as needed.
- Review and add any other information that may be mandatory or missing.
- When everything looks good, select Post. QuickBooks uses this info to create and add a new transaction to your accounts.
QuickBooks Online is convenient on the go, you can download the mobile app and learn more about the app here.
To download QuickBooks Mobile App:
- Open the App Store on your device and search for QuickBooks Online.
Note: It may not be available in some countries. - Select Free, then select Install.
- If you are already signed up for QuickBooks Online, use the same user ID and password to sign into the app.
- You may be asked to confirm a one-time confirmation code to confirm your identity. Once confirmed, you can continue into your account.
To download QuickBooks Mobile App:
- Open Play Store on your device and search for QuickBooks Online. This app works on smartphones and tablets.
Note: It may not be available in some countries. - Select Install.
- If you are already signed up for QuickBooks Online, use the same user ID and password to sign in to the app.
- You may be asked to enter a one-time code to confirm your identity. Once confirmed, you can continue into your account.
Once you have all your data in QuickBooks Online, you can cancel your subscription. Follow the steps based on where you purchased QuickBooks Self-Employed.
Note: Uninstalling the QuickBooks Self-Employed app on your mobile device won't cancel your subscription. Learn more about cancelling subscriptions on iOS and Android.
- Open QuickBooks Self-Employed in a web browser on your laptop or desktop. You can't cancel from the QuickBooks mobile app.
- Go to Settings ⚙ and select Billing info.
- Select Cancel and follow the onscreen steps.
- On your iPhone or iPad, open Settings for your device.
- Select iTunes App Store.
- Sign in to your apple account. Then select your Apple ID.
- Select View Apple ID.
- Under Active, select Manage.
- Select QuickBooks Self-Employed and select Cancel Subscription.
- On your phone or tablet, open Play Store.
- Sign in to your Google account.
- Select your profile.
- In the Subscriptions section, look for QuickBooks Self-Employed.
- Select Cancel and follow the onscreen steps.
Congratulations on upgrading to QuickBooks Online from QuickBooks Self-Employed. To explore the full suite of features of QuickBooks, check our Getting Started Guide.
One of the benefits of QuickBooks Online is that you can invite your accountant to your subscription. With this access, your accountant can review your books, make corrections, and collaborate on any issues. If you have one, this is a good time to engage them and send an invite. If you would like to find a ProAdvisor to help, you can find one here.
When your direct feed is connected, check when the new transactions began downloading. There may be a gap between the connection date and the last transaction imported from QuickBooks Self-Employed. You can check this by comparing your bank statement to the transactions around the connection date. If there are missing transactions, you can download your bank statement as a .CSV file and import the additional transactions in.
You can find instructions on how to download your ANZ transactions here, under “Download your transactions”.
When you ANZ transaction .CSV file is ready, follow these steps to upload your transactions in QuickBooks Online:
- Go to All apps , select Accounting, then select Bank transactions (Take me there).
- Select the ▼ dropdown next to Link account, then select Upload from file.
- Select Drag and drop or select files and select the appropriate .CSV file from your computer that you downloaded earlier, select Open, then select Continue.
- From the Select account ▼ dropdown, select the appropriate account, then select Continue.
- Map the statement fields according to your .CSV file's format, then select Continue.
- Tick the box on the transactions to import, then select Continue.
- Select Yes, then select Done.
For additional help on importing your bank transactions you can check common errors here or contact our support team to guide you through the process.
More like this
- Switch from QuickBooks Self-Employed to QuickBooks Onlineby QuickBooks
- Workarounds for bank error 102 and 105 in QuickBooks Online and QuickBooks Self-Employedby QuickBooks
- I'm getting billed for more than one QuickBooks Self-Employed subscription through iTunesby QuickBooks
- QuickBooks Self-Employed Overviewby QuickBooks
- Categorise transactions in QuickBooks Self-Employedby QuickBooks