In this article, QuickBooks Advanced Payroll customers will learn how to use the PensionSync dashboard.
PensionSync dashboard explained
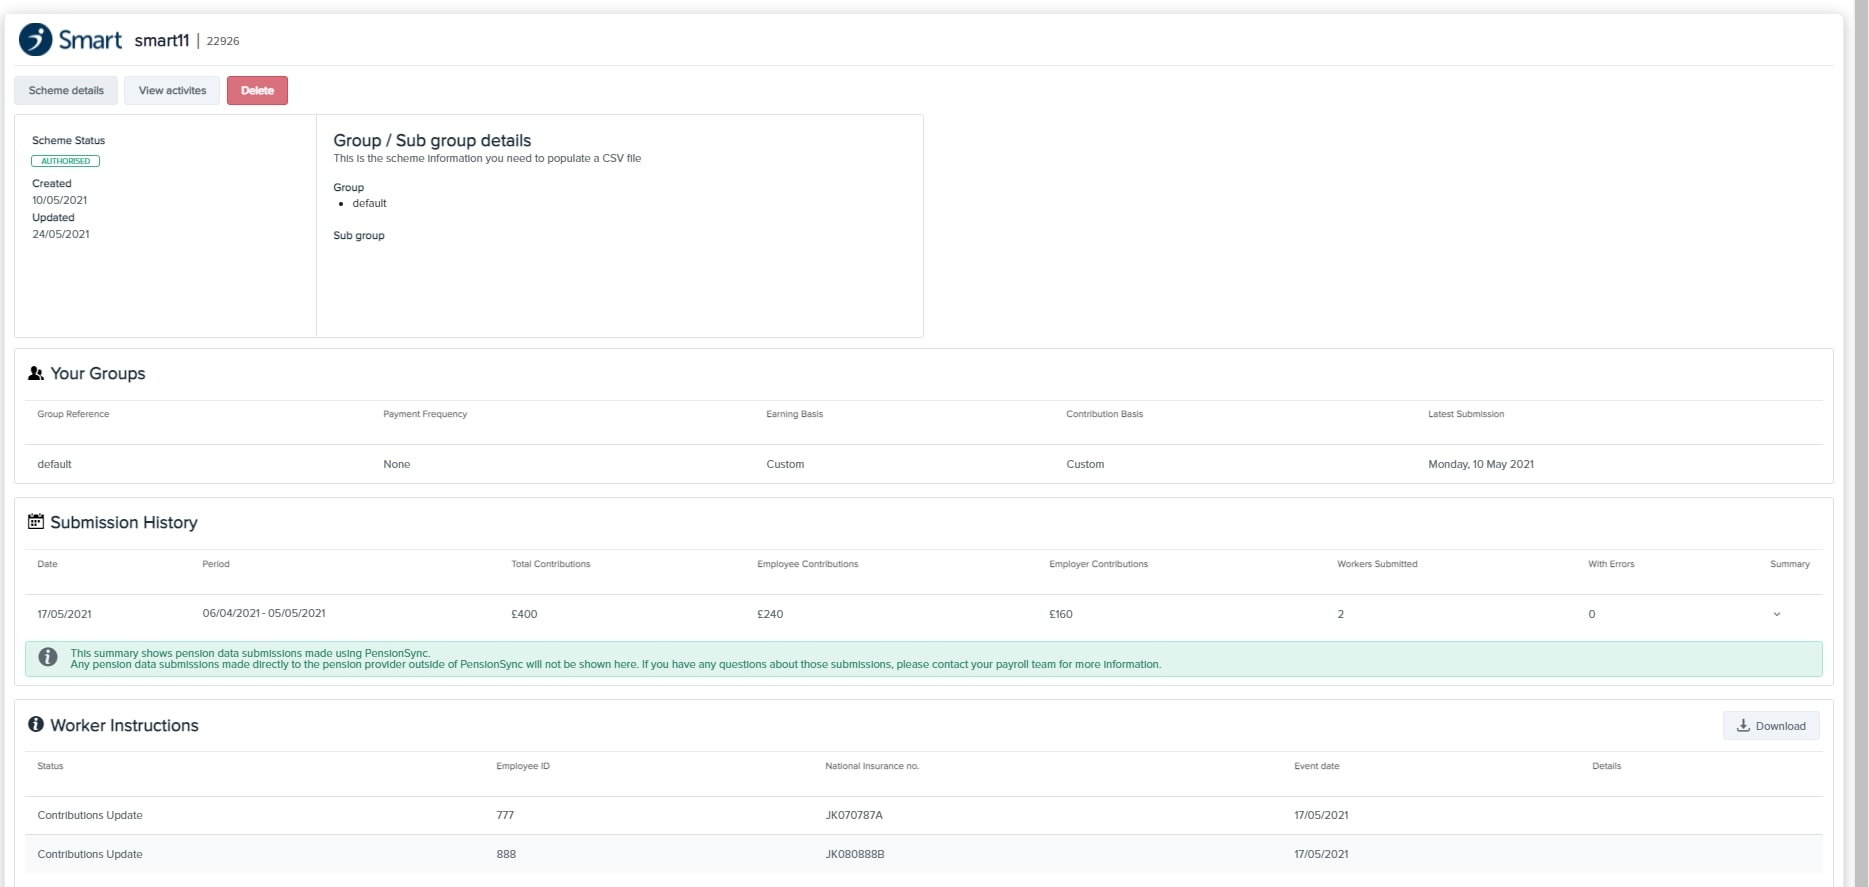
Scheme Expanded tab
Find more details about a particular scheme in the Scheme Expanded page. To view the complete breakdown, click the green chevron icon for the following information:
- Scheme summary - this includes the Company name, Employer ID, Pension provider, date of when the pension scheme was added to PensionSync, Scheme status and a summary of the group/sub group.
- Scheme details - this is a detailed breakdown of the contributions plans applicable to the scheme, including both tax relief and pensionable earnings basis.
- You groups - groups within a pension scheme will be listed here.
- Submission history - details of any pensions data submissions that have been successfully sent through PensionSync.
- Payment approval (for NEST clients only) - gives you the option to switch Automatic Payment Approval on or off if needed for each of your clients. Includes a Payment Approval history so you can see what amounts were approved and when.
- Note: If this is switched off, you will need to manually approve all payments for clients on the NEST website. Automatic Payment Approval includes 0 payments where no contributions have been submitted.
- Worker instructions - shows any opt outs (or other worker instructions) that have happened in the last 6 weeks. You can also export the notifications as a CSV file from here if needed.
To view even more details (like pension contribution rates, payment arrangements and so on), simply click the Scheme details tab. For the scheme’s activity history, hit the View activities tab.