QuickBooks HelpQuickBooksHelpIntuit

Process payments in the GoPayment app

by Intuit106 Updated 4 months ago

Learn how to accept payments on the go.

If you have QuickBooks Payments, customers can pay their invoices by credit card or ACH bank transfer.

When you're on the go, use the GoPayment app to take cash, check, and credit card payments wherever and whenever you need to. Think of it as a mobile point of sale app. You can use a Bluetooth card reader to swipe credit cards or EMV chipped cards. You can also accept Apple Pay, Google Pay, and Samsung Pay. And if you don't have a card reader, you can still manually enter transactions.

Take your business on the go with the new QuickBooks Card Reader so you never miss a sale. Its innovative design includes a LED display and contactless payments, which conveniently lets customers pay, tip, and check out without having to share your phone. Learn more

Always check the QuickBooks Payments website for the latest plans and processing fee rates. If you're a ProAdvisor, see how you can qualify for lower payment rates.

Step 1: Connect your QuickBooks Payments account to GoPayment

If you haven’t yet, sign up for QuickBooks Payments.

Or if you already have a QuickBooks Payments account, follow these steps to connect your existing account to QuickBooks Online.

Step 2: Process payments on the go

Follow the steps based on the type of sale and the GoPayment app you have.

If you don't have a card reader, check out order a card reader for QuickBooks GoPayment. Once your card reader arrives in the mail, here's how to set it up.

If your app has a green background, you have the green GoPayment app.

Green GoPayment App

You can take payments on the spot, create an invoice, apply a payment to an invoice, and add/manage customers. The green app links to and automatically synchronizes with a QuickBooks Online account.

Make a new sale

If you're taking payment on the spot, create a sales receipt.

  1. Open the GoPayment app.
  2. Tap the Plus (+) and select New sale.
  3. Enter the total sale amount. Or select Items to add individual products and services from your inventory.
  4. Select Review order.
  5. Select the Charge $ button.
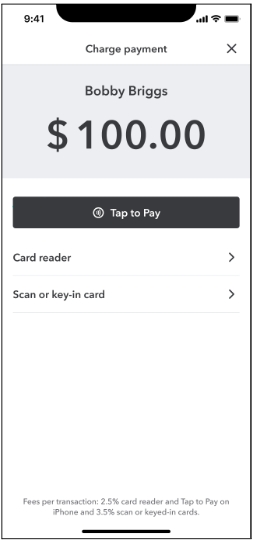
  6. Select a payment method.

If you select Card reader, follow the steps based on the card type:

  • Credit cards with EMV chips: Put the card in the slot with the chip facing downward. Then tap Charge.
  • Credit cards you swipe: Slide the card across the slot on the back of the reader. Then tap Charge.
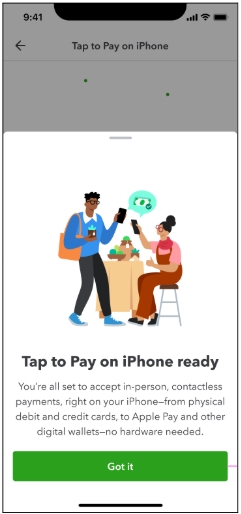
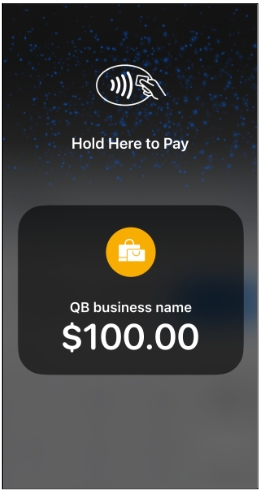
  • Apple Pay, Google Pay, and Samsung Pay: If you have the All-in-one Bluetooth Card Reader, you can process mobile payments. Ask customers to tap their device to the front of the reader. Then tap Charge.

If you don't have a card reader, select Key in card and enter the info manually. Then tap Charge.

When you're finished with the form, select Tender Done then select Send to email or text the receipt.

Take payment for an existing invoice

If you've already sent a customer an invoice in QuickBooks Online, they can pay for it online from the email you sent them. This is the easiest way to get paid.

You can also process payments for open invoices in person. The GoPayment app automatically syncs the payment with the invoice in QuickBooks Online.

  1. Open the GoPayment app.
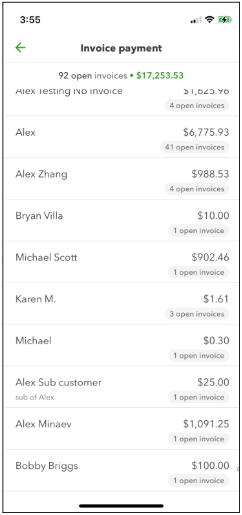
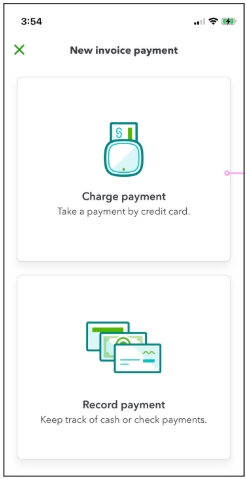
  2. Tap Plus (+) and select Invoice payment.
  3. Find the customer, or use the search field.
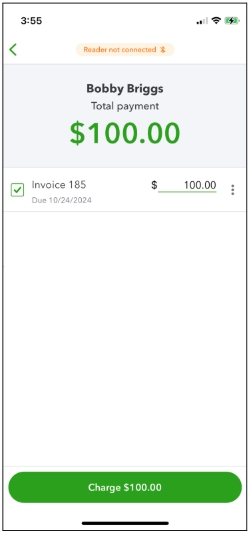
  4. Select the invoice the customer wants to pay.
  5. Tap Charge and select a payment method.

If you select Card reader, follow the steps based on the card type:

  • Credit cards with EMV chips: Put the card in the slot with the chip facing downward. Then tap Charge.
  • Credit cards you swipe: Slide the card across the slot on the back of the reader. Then tap Charge.
  • Apple Pay, Google Pay, and Samsung Pay: If you have the All-in-one Bluetooth Card Reader, you can process mobile payments. Ask customers to tap their device to the front of the reader. Then tap Charge.

If you don't have a card reader, select Key in card and enter the info manually. Then tap Charge.

Take payment in advance

You can accept a customer payment before you create an invoice with the GoPayment app. QuickBooks Online saves the payment as a credit.

  1. Open the GoPayment app.
  2. Select the Plus (+) and select Customer payment.
  3. Select the customer or select Plus (+) to add their info.
  4. Select Add charge amount and enter the amount.
  5. Select the Charge $ and select a payment method:

If you select Card reader, follow the steps based on the card type:

  • Credit cards with EMV chips: Put the card in the slot with the chip facing downward. The magnetic strip should face the customer. Then tap Charge.
  • Credit cards you swipe: Slide the card across the slot on the back of the reader. The magnetic strip should face the customer. Then tap Charge.
  • Apple Pay, Google Pay, and Samsung Pay: If you have the All-in-one Bluetooth Card Reader, you can process mobile payments. Ask customers to tap their device to the front of the reader. Then tap Charge.

If you don't have a card reader, select Key in card and enter the info manually. Then tap Charge.

  1. When you're finished with the form, select Tender Done.
  2. After the transaction finishes, select Send to email or text the receipt.

The next time you create an invoice for the customer, apply their credit to pay for the invoice.

If your app has a green background, you have the green GoPayment app.

Blue GoPayment app

You can take payments on the spot. You can link it to a stand-alone payments account or a QuickBooks Desktop account managed through the Merchant Service Center (MSC). The payments information doesn't automatically synchronize with any QuickBooks product.

Note: If you linked your QuickBooks Payments account with QuickBooks Online, this experience isn’t ideal. You can switch to the new experience within the GoPayment app once you sign in as the primary admin.

Here's how to take a customer payment in person:

  1. Open the GoPayment app.
  2. Select Amount and enter the total sale amount. Or select the Items tab to add products and services from your inventory.
  3. Select the Taxable option to charge sales tax.
  4. Select View details if you need to add a memo or discount.
  5. Select the Arrow icon > next to the amount to start the sale.
  6. Swipe the customer's credit card. Or select Other payment options, then select either Key in card, Cash, or Check.
    If you select Card reader, follow the steps based on the card type:
    • Credit cards with EMV chips: Put the card in the slot with the chip facing downward. The magnetic strip should face the customer. Then tap Charge.
    • Credit cards you swipe: Slide the card across the slot on the back of the reader. The magnetic strip should face the customer. Then tap Charge.
    • Apple Pay, Google Pay, and Samsung Pay: If you have the All-in-one Bluetooth Card Reader, you can process mobile payments. Ask customers to tap their device to the front of the reader. Then tap Charge.
    • If you don't have a card reader, select Key in card and enter the info manually. Then tap Charge.
  7. After the transaction finishes, select Send to email or text the receipt.

Step 3: Learn about deposit times for customer payments

After you process payments, QuickBooks deposits the money into your bank account. The time it takes for your money to arrive depends on the payment type and product you're using. Get more info about deposit times for QuickBooks Payments

Note: Your first payments can take a little longer to process as we set up your accounts. After that, payments will be processed quickly.

Disclaimer: QuickBooks Payments account subject to eligibility criteria, credit and application approval. Money movement services are provided by Intuit Payments Inc., licensed as a Money Transmitter by the New York State Department of Financial Services.

QuickBooks GoPaymentQuickBooks Online AdvancedQuickBooks Online App for iOSQuickBooks Online EssentialsQuickBooks Online PlusQuickBooks Online Simple StartQuickBooks Payments for DesktopQuickBooks Payments for Online

Sign in now for personalized help

See articles customized for your product and join our large community of QuickBooks users.

More like this