Use our free invoice generator to create a professional invoice online. Enter your business information, upload your logo, and choose custom details within our invoice template. Then, you’re ready to download and send.
We're here for you.
INVOICE GENERATOR
Our free online invoice generator makes business invoicing a breeze
Subtotal
$ 0
GST
$ 0
Shipping
$ 0
Total
$ 0
Invoice Settings
Currency*
You'll receive your invoice templates shortly.
Want more? Visit our tools and templates!
How to make an invoice using our free invoice generator
Learn how to create a custom professional invoice using our invoice generator with this easy-to-follow step-by-step guide. Discover the wide range of customisable settings available in the right-hand invoice settings panel.
Here is a step-by-step guide to how to create an invoice:
- Enter the information for your invoice including the invoice number, invoice date, and invoice due date. If needed, you can add more fields, and notes in this section.
- Add your business name (or your name if you are a freelancer), your email address, contact number, and address into the “Billed By” section.
- Fill out the “Billed To” section with the information of the business or client you are sending the invoice to.
- Add each product or service as a line item, along with a description, quantity, and rate. You can also directly write down the amount if you did not want to add quantity or rate and remove those two items from the invoice settings panel on the right.
- If you are invoicing for multiple goods or services, you can add a new invoice item below the one you created in step 4.
- If applicable, you can add the sales tax amount and shipping costs on the invoice settings panel. Alternatively, you can remove these items, so they don’t show on your invoice.
- Then, to write instructions, payment terms, or any other relevant information, click on the add notes button.
- Add your signature or create a space for your client to sign the invoice if relevant.
- Customise your invoice by adding your business logo, changing the theme’s colour and fonts, or you could even add a header and a couple of banners at the bottom to show your business’s most recent updates or promotions. Adding banners or a header is optional, but we wanted to make sure you have the option to create the best invoice online that suits your needs.
Finally, you can preview or directly download your PDF invoice ready for you to send to your client.
How to send this invoice
After creating your first invoice using our invoice generator, it's time to learn how to send it to your client.
The first step is to compose an email to your client and then attach the PDF version of the invoice. This approach enables your client to easily access and review the invoice by opening the invoice as an attachment.
For a more advanced solution, you can create invoices on QuickBooks Online. Adding invoices to QuickBooks allows you to track them by checking their status after they've been sent. If you send the invoice directly from QuickBooks, you can even add a pay now button making it easier for clients to pay you. With these simple steps, sending invoices has never been easier. Get a free trial to QuickBooks Online today.
For more information view our guide on how to create an invoice on QuickBooks Online.
What should be on an invoice
Header
A document's purpose should be clearly stated in its header. On the QuickBooks invoice generator, you can add the invoice number, date, and due date. Adding a header to these documents helps you and your clients differentiate them quickly, which can save time when reviewing records or preparing taxes.
Logo
Additionally, you can enhance the professional appearance of your invoices by adding your company logo in the designated "Add Business Logo" section. If you don't have a logo, leaving this section blank is acceptable if the rest of the invoice is properly formatted.
Business Name
We recommend including your business's name and contact details, such as an address, phone number, and email, when creating an invoice. This information can be added under the ‘Billed By’ section of the invoice generator.
Details of Client
Be sure to include the client's name and contact information, including their address, phone number, and email address. This can be added in the ‘Billed To’ section of the invoice generator.
Invoice Number
An invoice number is a distinct identifier assigned to each invoice. It aids in organising multiple invoices and can be formatted in many ways such as file numbers (000001), unique billing codes, or date-based purchase order numbers. If you wish to use your own custom format for your invoice number, you can update each invoice number yourself each time you use the invoice generator.
The full version of QuickBooks invoicing software can automatically manage your invoice number, the software will create a unique invoice number for each document.
Invoice Date
Including the invoice date on each invoice is important as it helps avoid confusion when a customer receives multiple invoices. This is particularly important as payment is generally expected within a specific number of days after receiving an invoice, and the date on the invoice indicates the due date for payment.
Description of Product or Services
In the product section, you should list each good or service provided to a client separately. Include the name of the good or service provided, the unit price and the quantity of the product.
Explore more templates with QuickBooks Invoice templates
If you’re looking for a downloadable blank invoice template, use our free invoice templates that you can download in Word, Excel, PDF, and other formats.
Tired of manually creating and sending each invoice?
Looking to up your invoice game? With QuickBooks online you can:
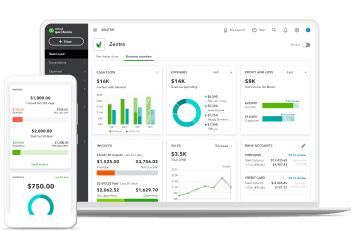
- Create and send customised, professional invoices from your phone or computer, which will help you save time and get paid faster, no matter where you are
- Set up automatic invoices to help you get paid on time
- Generate smart predictions that make it easy to know when your invoices will be paid, you can even automate gentle reminders for overdue invoices
Get Started with QuickBooks invoicing software to send better invoices and get paid twice as fast as paper invoicing.
Build the right plan for your business
Frequently Asked Questions

Get up and running with a free setup session
Our experts can help you:
- Connect your bank accounts and credit cards
- Create and send customised invoices
- Automate your expenses
- Learn super useful tips and tricks


