
Benefits include

Conveniently manage
all your customers

Quickly and easily
manage money-in transactions

Record payments
against customer invoices
Step-by-step guide
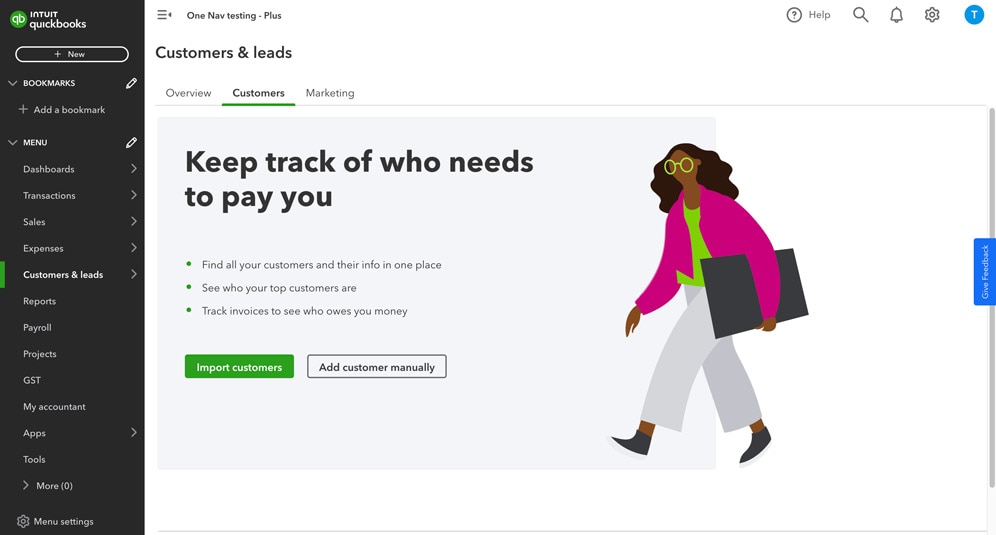
Adding a customer from the Customers & leads tab
Step 1
- From the left menu, select Customers & leads.
- Select the Customers tab.
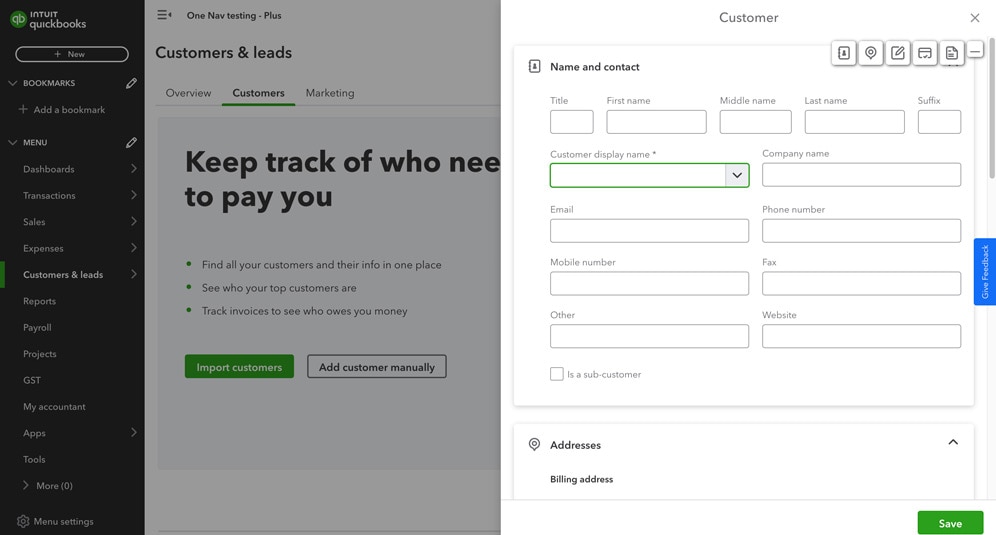
Step 2
- Select Add customer manually.
- Add a Display Name for your customer and email.
- Add as much additional information as you want to record for your customer, including telephone numbers, address, and payment information.
Step-by-step guide
Import customers from a CSV file
Step 1
- Go to Customers & leads, then select Customers.
Step 2
- Select Import Customers.
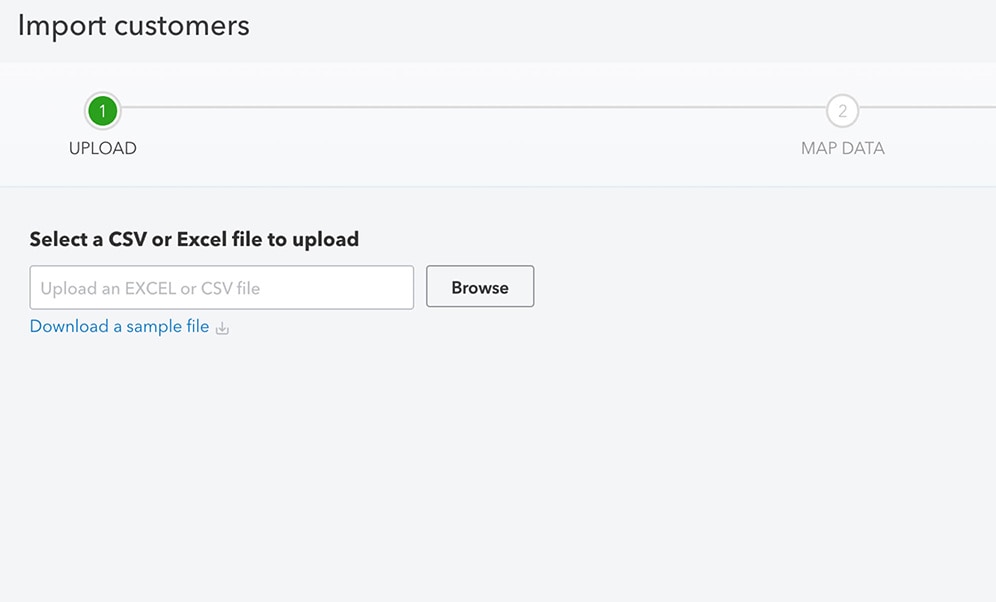
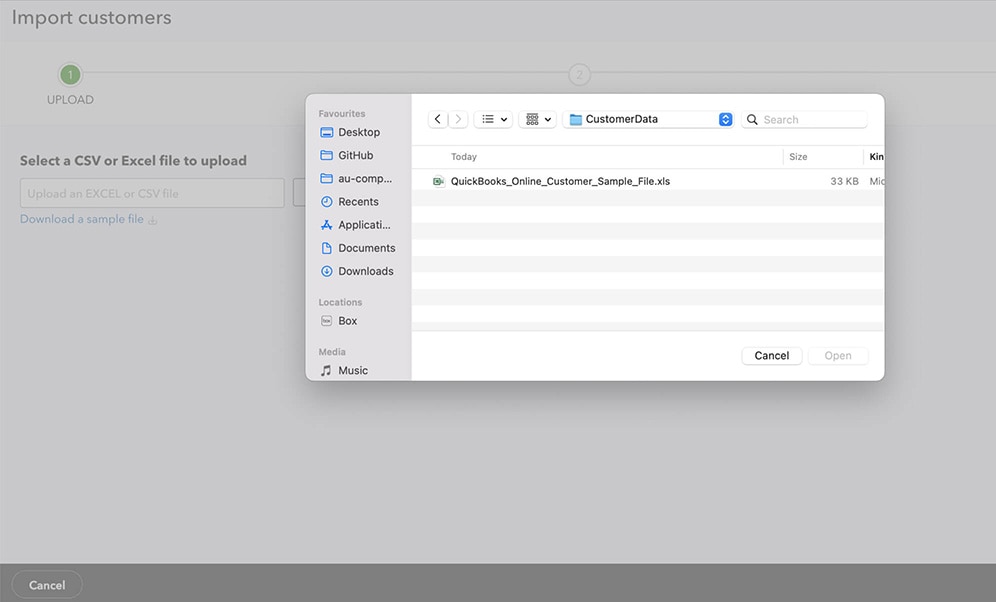
Step 3
- Click Browse, select your excel file and Open, then Next
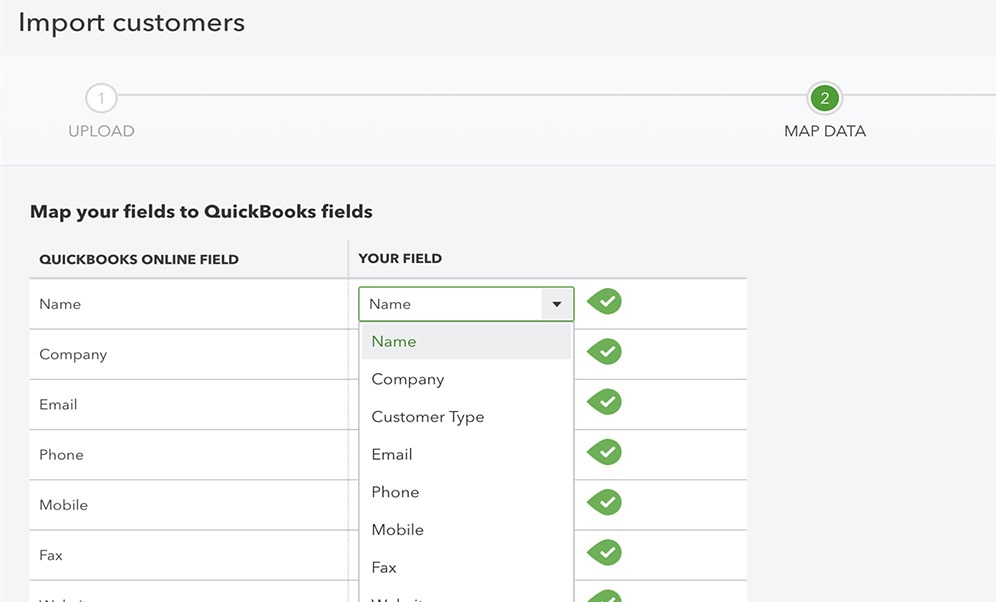
Step 4
- For each of the QuickBooks Online (QBO) fields on the screen, choose one of your excel columns. This action tells QuickBooks which columns in your excel spreadsheet get pulled into which QuickBooks field. Click Next when you have completely mapped your fields to QuickBooks.
- Learn more about how to name your columns and what information will be imported here.
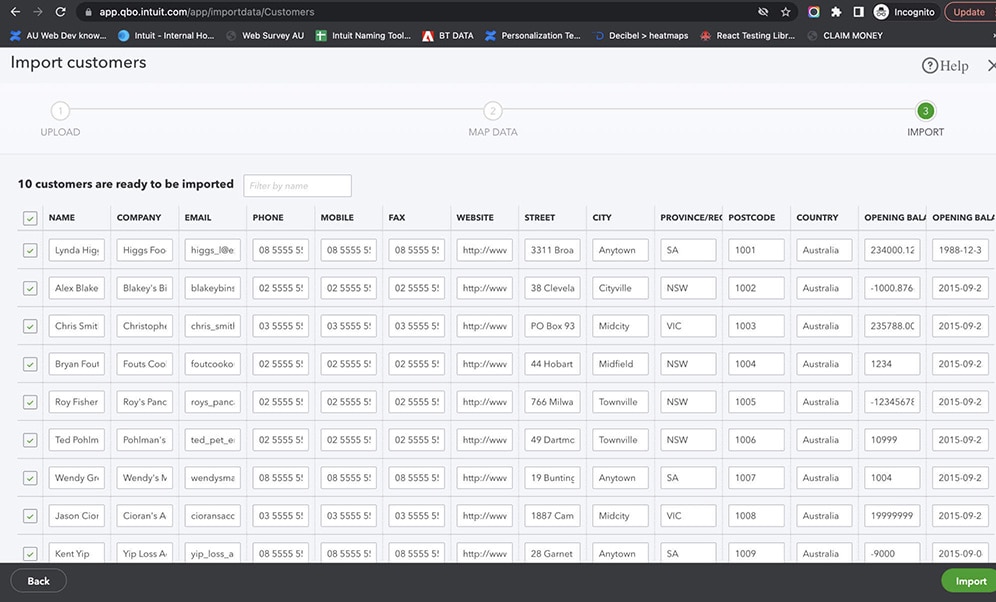
Step 5
- The next page shows your data and where it's going into QuickBooks. Make sure you check the box on the left for all the items you want to import.
- When you're ready, click on Import.


Need more help?


Intuit helps put more money in consumers’ and small businesses’ pockets, saving them time by eliminating work, and ensuring they have confidence in every financial decision they make.
Award Winning Accounting Software
