Benefits include

Give your company
a more professional feel
Make your brand stand out
on your invoices, estimates and sales receipts

Customise your logo
colour scheme, font, headers/footers and custom fields
Step-by-step guide
Step 1
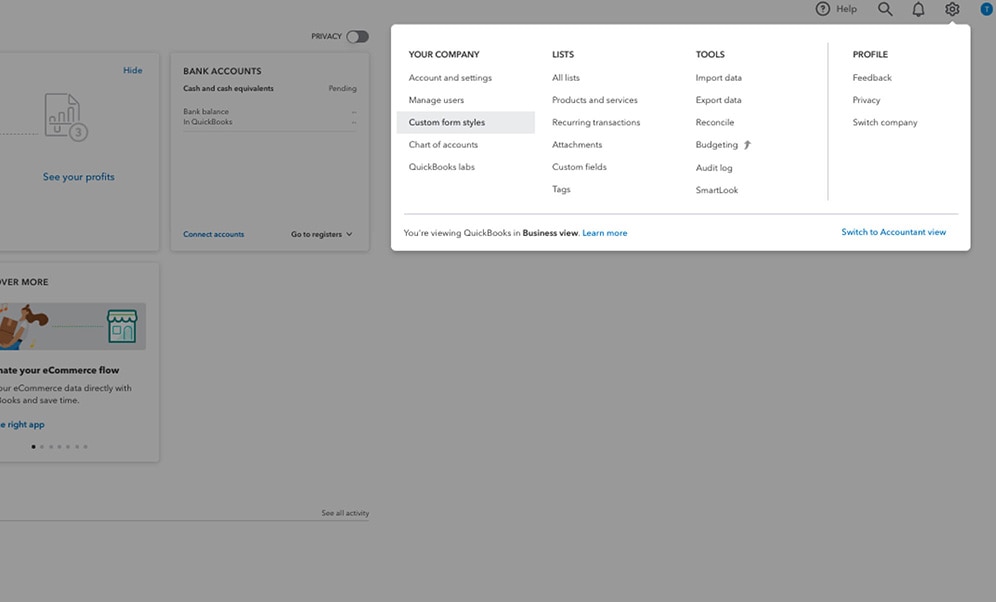
- Select the Gear icon on the Toolbar, then Custom Form Styles under Your Company.
Step 2
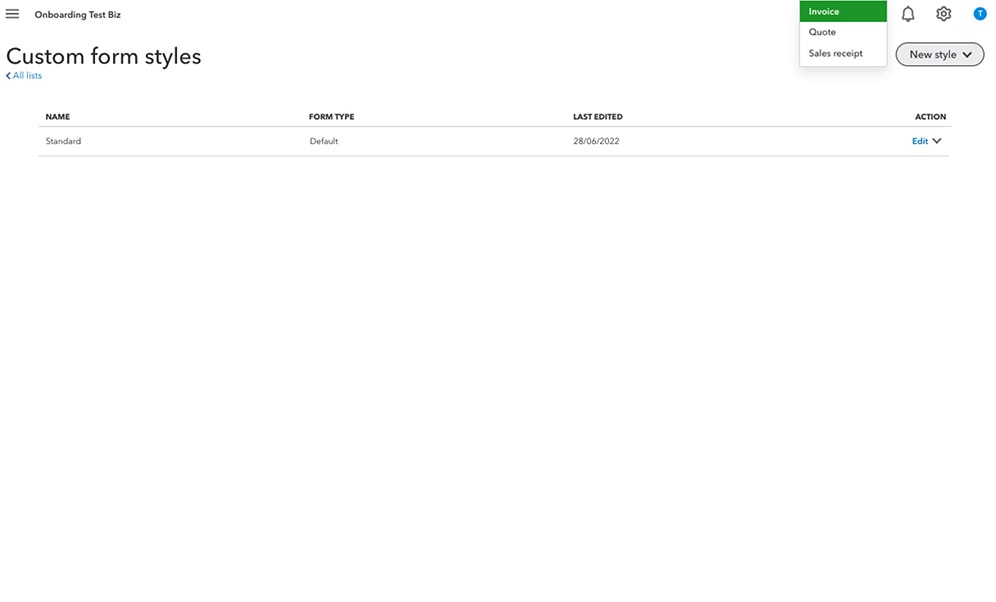
- From the new style drop-down menu, select the type of transaction you'd like to customise (Invoice, Estimate, or Sales receipt).
- You can also edit the default form which will apply the changes to all basic sales forms.
Step 3
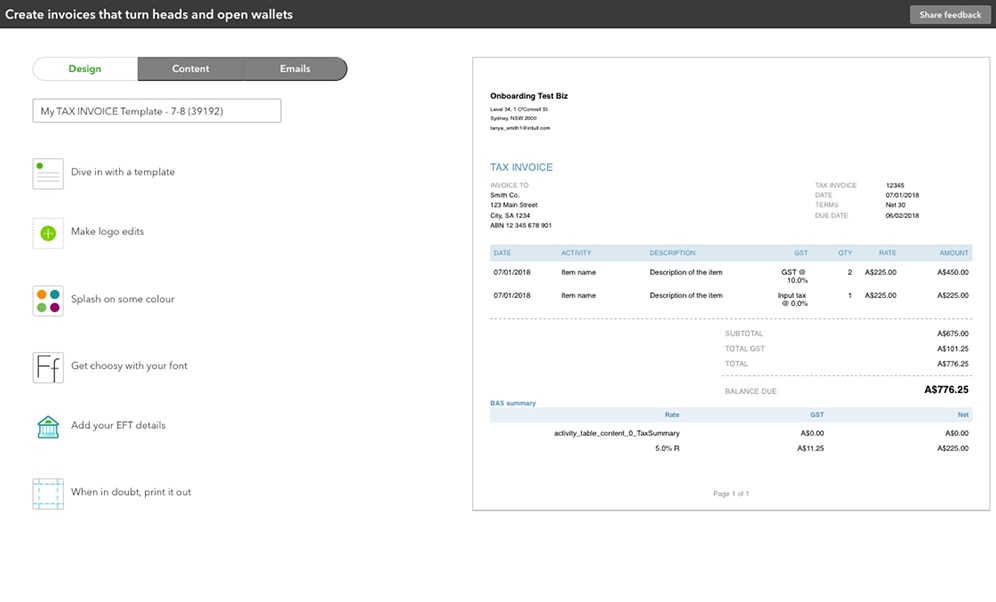
- You will see a template pop up for the chosen type of transaction
- The customisation page is broken into three sections: design, content and emails:
- Design - this is where you can edit/add your logo, add some colour and choose your font.
- Content - here you can edit your information, add website/address, and change labels and their widths.
- Emails - choose whether to show full or partial details and create your message for your customer.
- You can jump into this builder and click on the things you wish to change.
Step 4
- Once you've finished customising, select Preview PDF to check if you are happy with the final version, then select done.
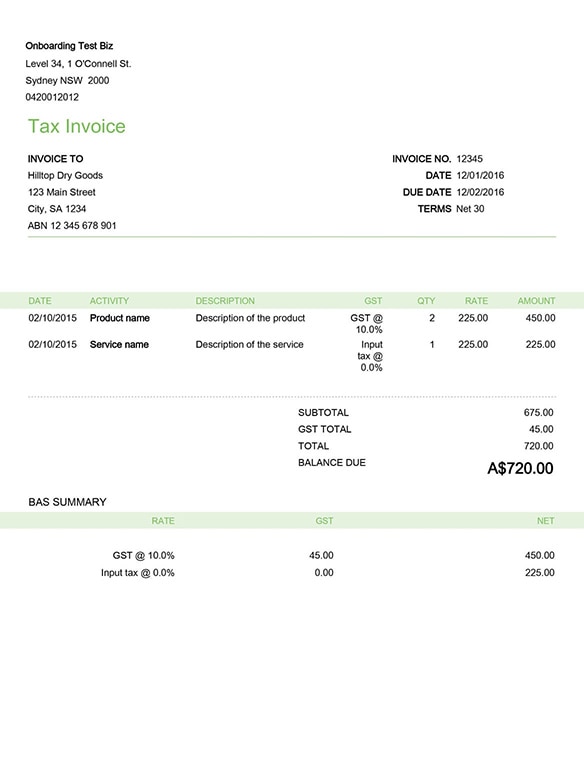
Step 5
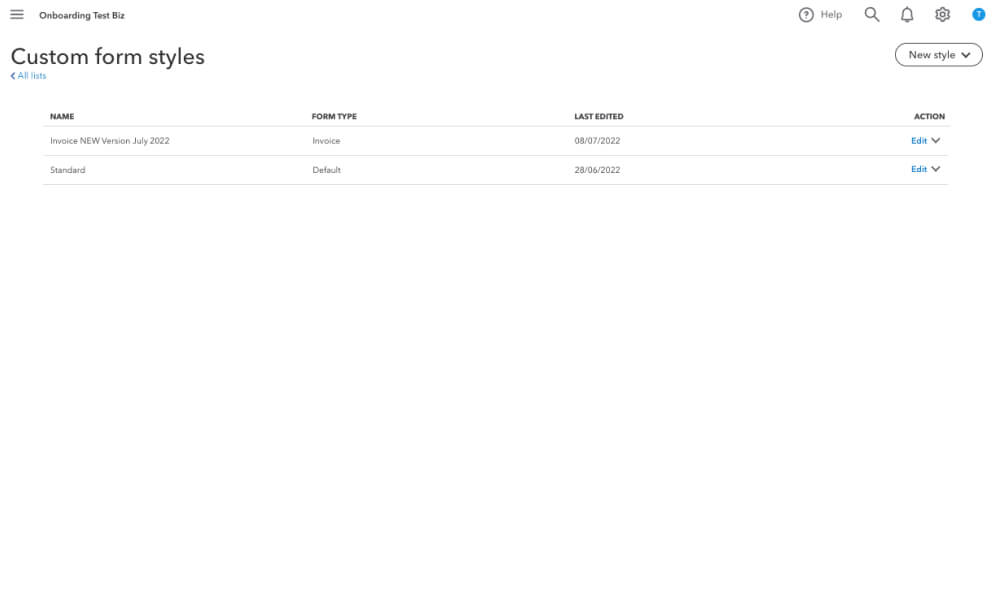
- The new customised form will now be listed on the Custom Form Styles page.
