to help with your company’s operations and bookkeeping
Benefits include
Adding users
Customising each role
and providing individual permissions for specific tasks
Managing users and permissions
easily at the click of a button
Step-by-step guide
Step 1
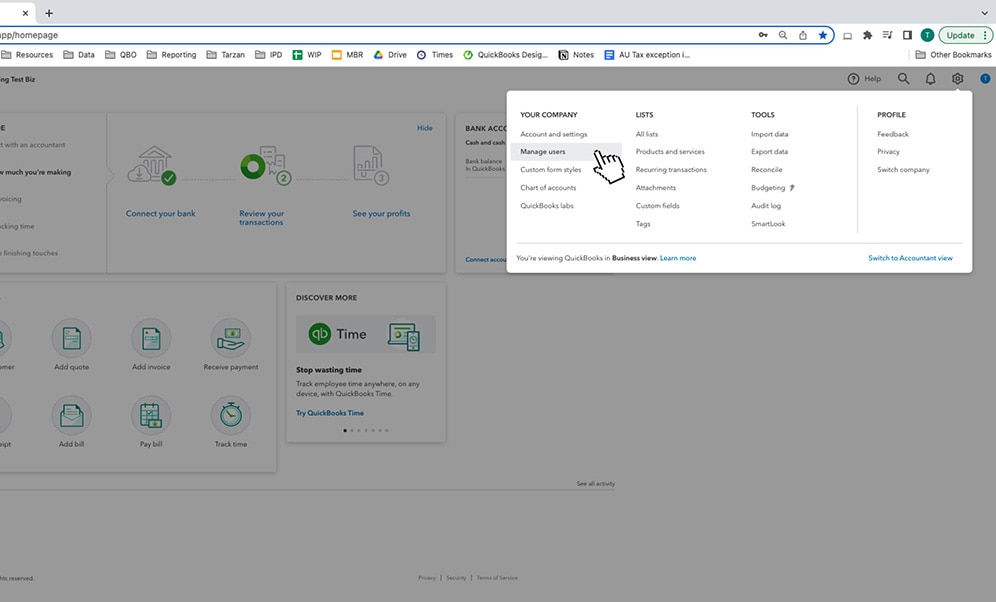
- Select Settings ⚙, then Manage users. If you can’t select this, you don’t have permission to manage other users. Contact an admin user for help.
- Select Add user.
Step 2
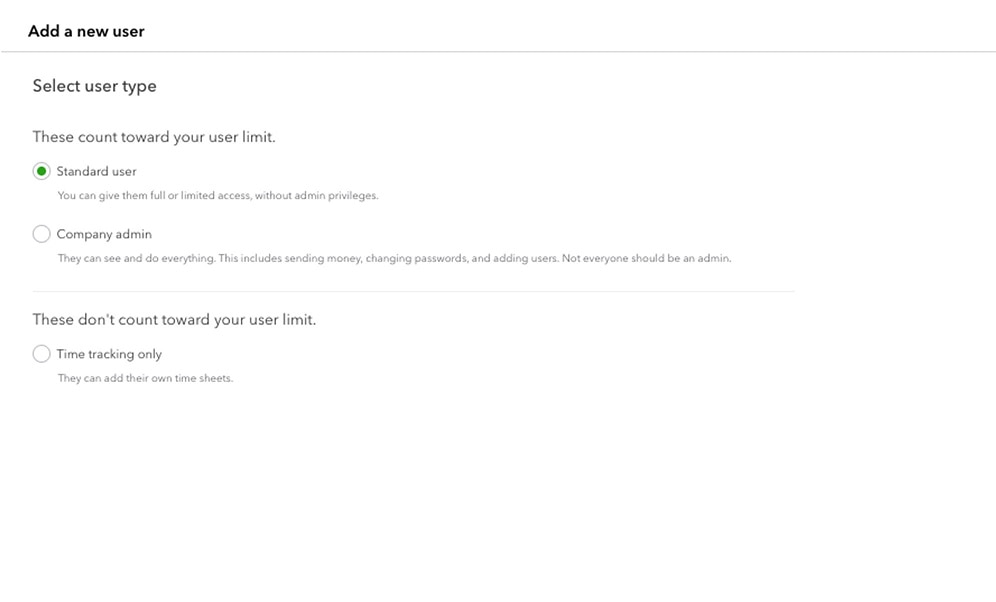
- Select the user type you want to create and click Next.
- More options will appear on the screen depending on the user type you select.
Step 3
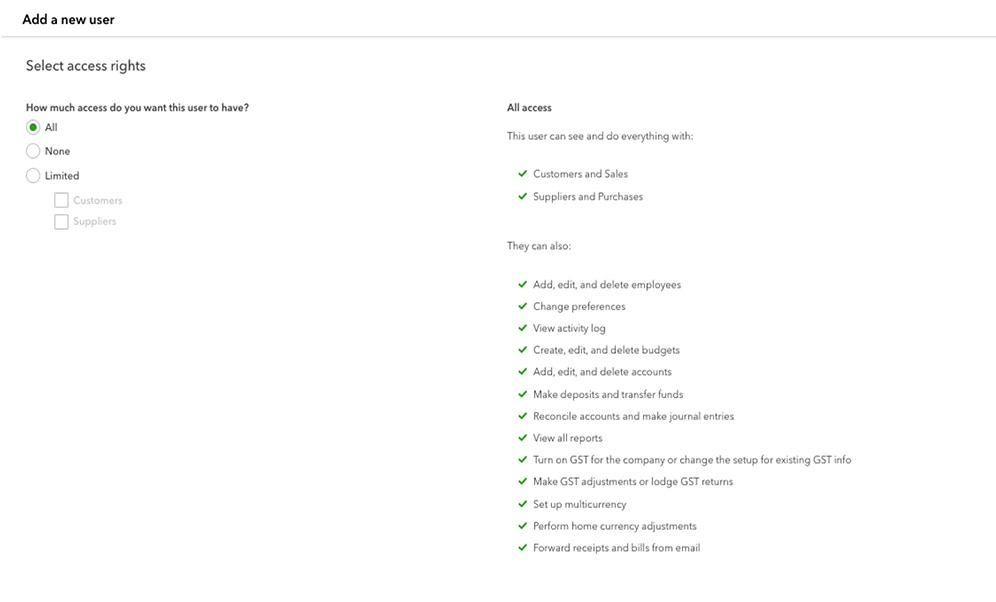
- If you select a Standard user you will then choose access rights.
- You can select access to all, none, or limited.
- Depending on what you choose, you will see the access rights update on the right hand side of the screen.
Step 4
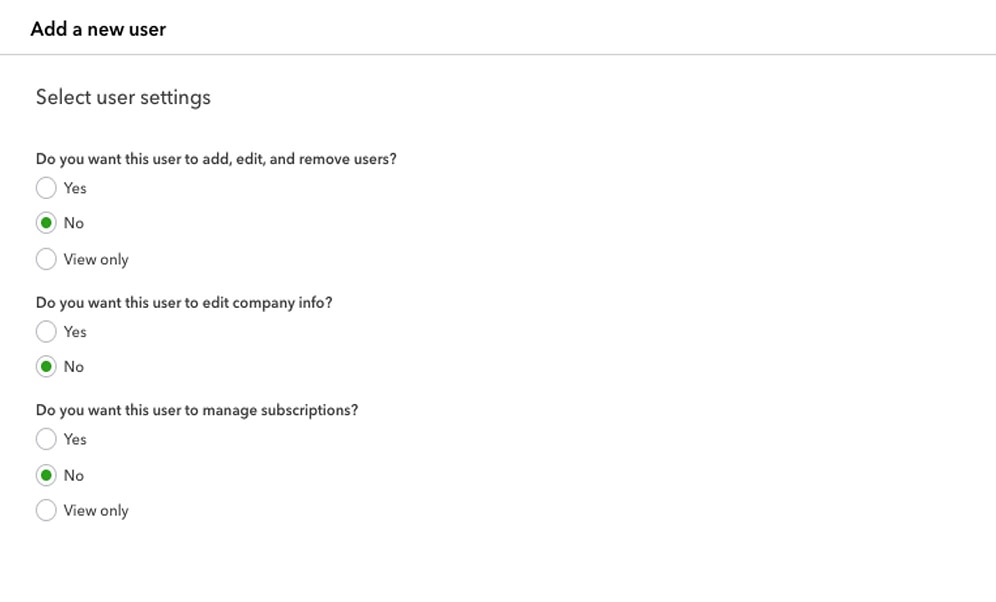
- If you selected access rights to all or limited, your next step will involve selecting User settings.
- This includes enabling this user to add or edit users, edit company info and manage the QuickBooks Online subscription.
- One you’ve chosen, click Next.
Step 5
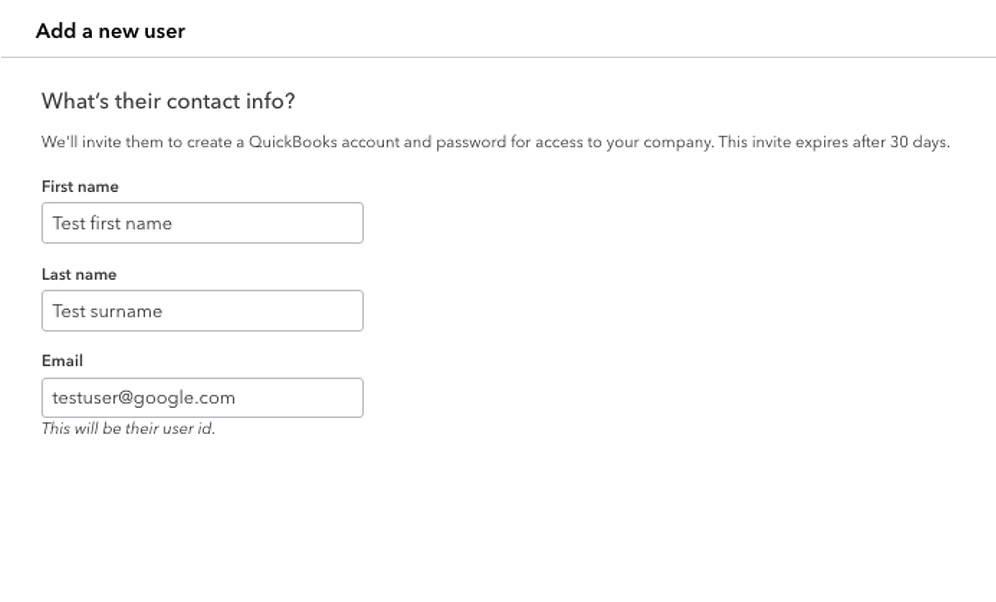
- Add in the new user's name and email address.
- This will send an email to the new user. All they need to do is open the email and click the Let’s go! button. The final step is for them to sign in.
