QuickBooks Payroll Resource Hub
Learn how to get the most out of QuickBooks Payroll. These resources will provide you with all you need to know from signing up to payroll to setting up and completing your first pay run.

Self service for employees
An employee self-service solution allows employees to access their payroll information anywhere at any time, all they need is a stable internet connection. Employees can access their roster, check their hours worked, look at their payslips, claim expenses, and request leave. With self-service payroll systems, employees can take control of their own payroll information, making the process faster, more accurate, and more convenient. This article will provide you with the steps to set up your employees up on self service.
What activities can an employee complete using a self-service payroll?
- Access and print payslips
- Check their holiday and annual accrual
- Check sick days accrual
- Request annual and personal leave
- Check information around superannuation payments
- Arrange shift swaps
- Access their roster
- Get updates and notifications from the employer
Step 1.
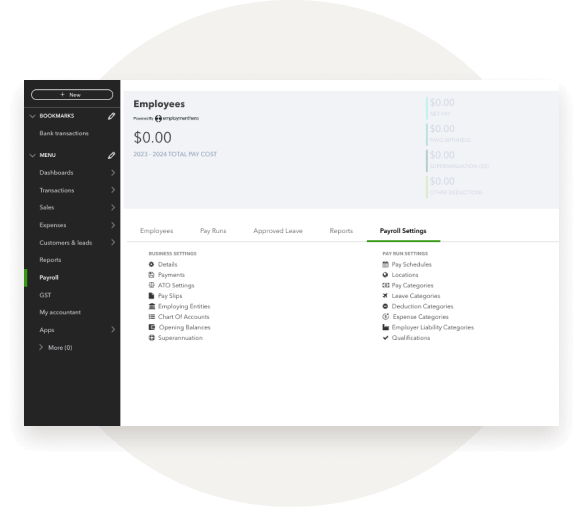
Select the Payroll tab from the left hand navigation bar and select Payroll Settings.

Step 2.
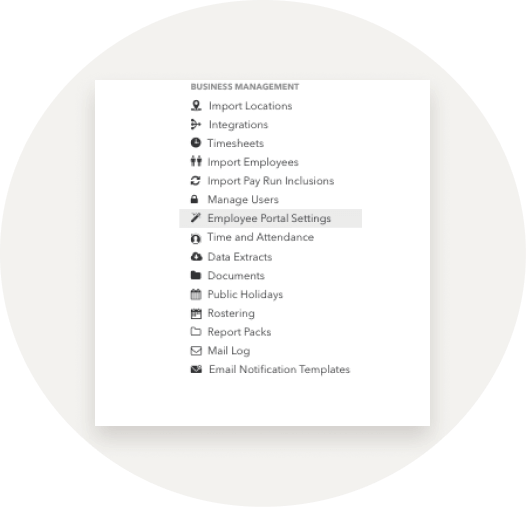
Select Employee Portal Settings.

Step 3.
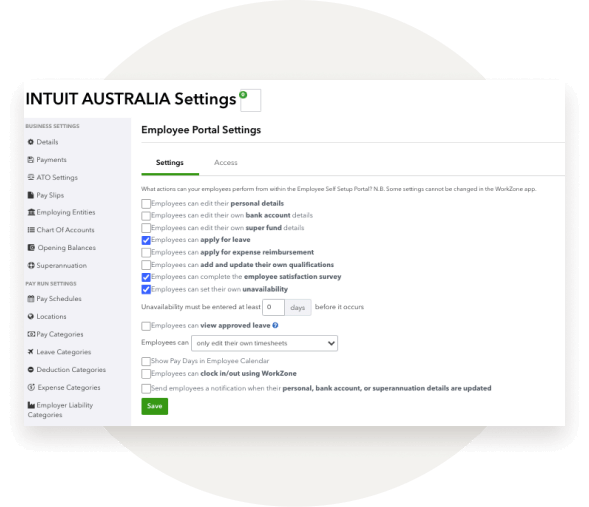
Choose which permissions can be provided to your employee in each checkbox. Once you’ve saved your settings you can now provide employees access to the Employee Portal.

Step 4.
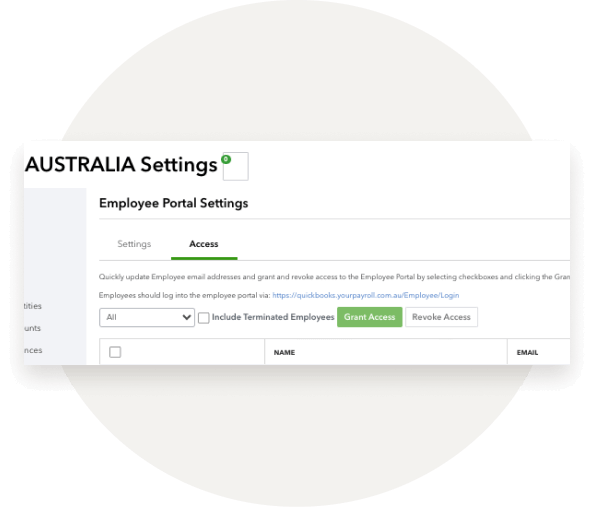
Select the access tab, next to settings. By default, a list of all your active employees will be displayed. Using the tick boxes next to the employee’s name, you can individually grant the employee access to the employee portal. To bulk grant access, click on the checkbox to the left of Name at the top of the table.

Step 5.
Select Grant Access. You can also revoke access, either individually or in bulk, from this screen by ticking the employee/s name and then selecting Revoke Access.
Have some topic suggestions to include in the hub? Leave your feedback here.


