Step 1
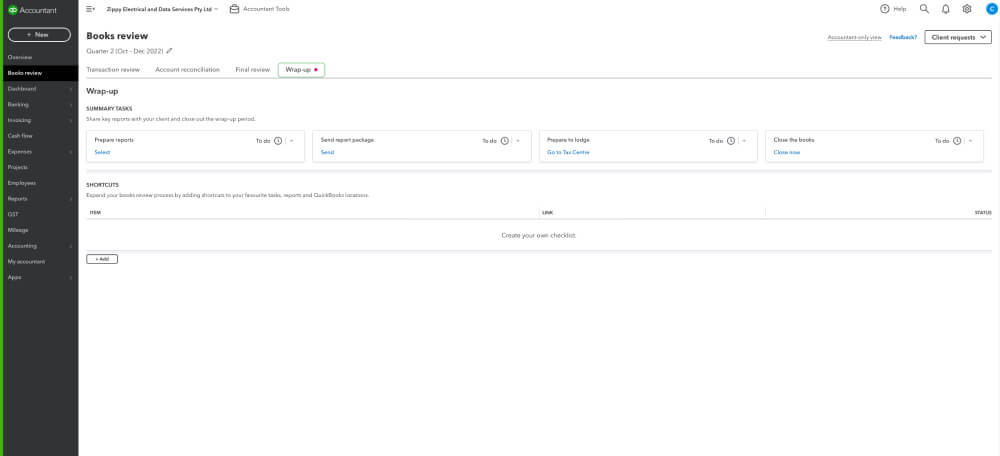
- Open a client's QuickBooks Online subscription.
- Select Books Review from the navigation menu or select Accountant Tools and then Books Review.
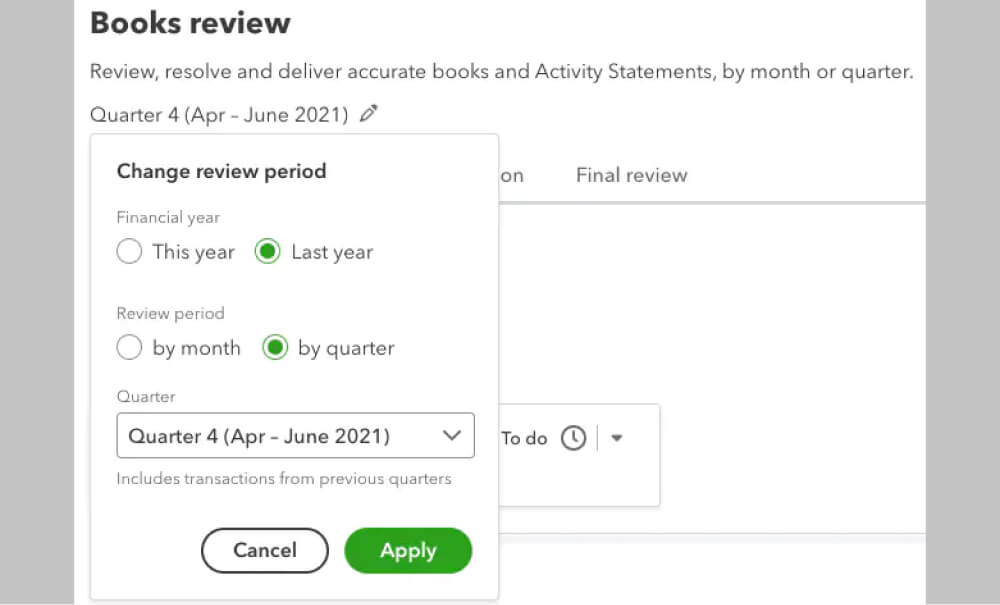
- Select Edit next to the date to choose the review period you’re after. You can choose by month or by quarter.
Step 2: Review Transactions
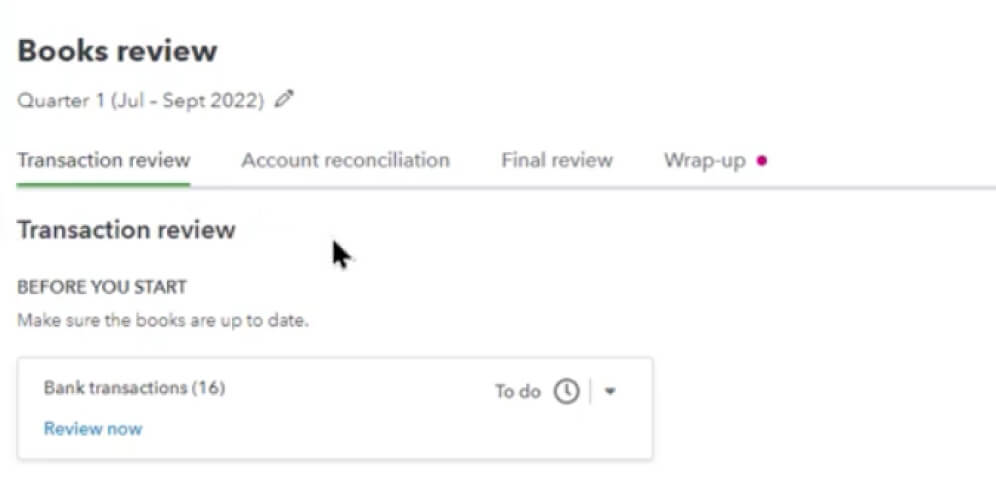
- The Transaction review tab shows transactions with missing or incorrect information. QuickBooks flags uncategorised transactions, transactions without payees, and unapplied payments.
- If data is missing, you'll see a blank line in the column. Select a transaction to open it and make corrections.
Step 3: Client Requests
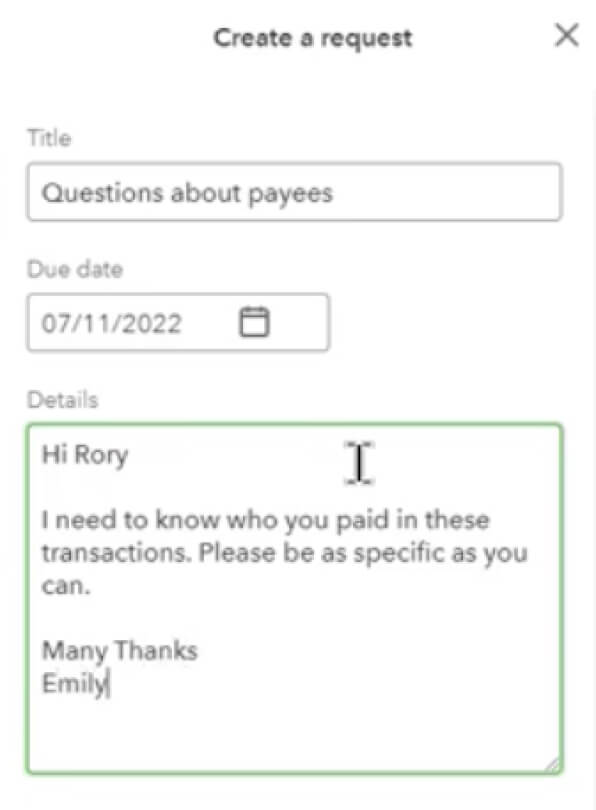
- A unique feature in Books Review is that you can ask clients directly for missing information. Select one or more transactions. In the Actions pop-up, select Ask client.
- The Create a request form automatically fills out a name and description along with the request for missing details. You can edit these fields, such as the due date when you’d like a client response, or add related documents.
- Your client will receive an email asking them to log into the My Accountant function in QuickBooks to respond to your queries.
Step 4: View the status of every job
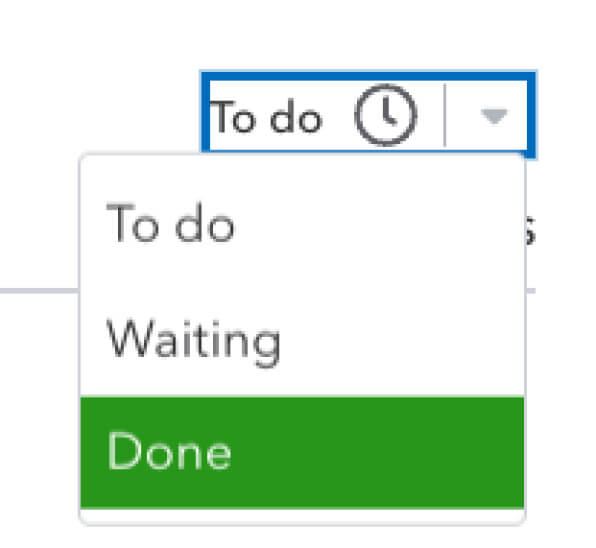
- Update the status of every job - when you click on the timer icon you can easily change the status to Done.
Step 5: Account Reconciliation
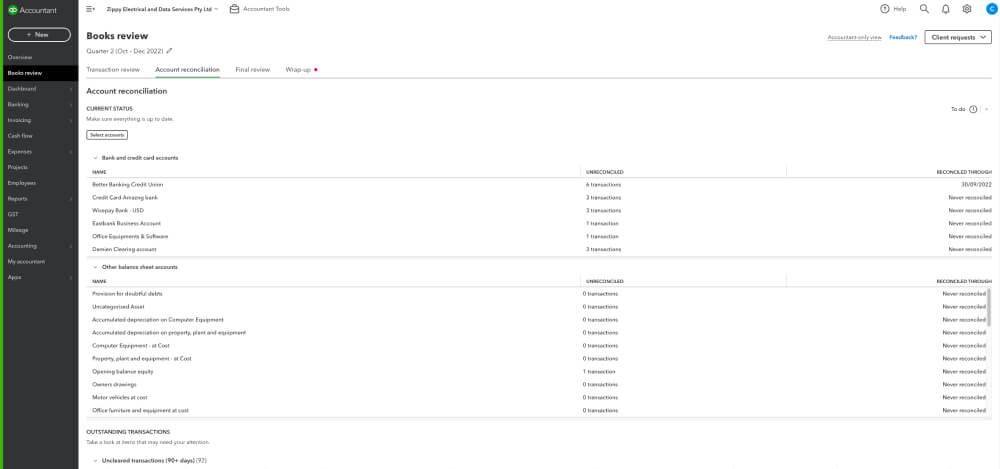
- The Account reconciliation tab lists accounts you need to reconcile.
- Select an account to start reconciling it.
- Outstanding transactions appear in the Unreconciled column.
Step 6: Final Review
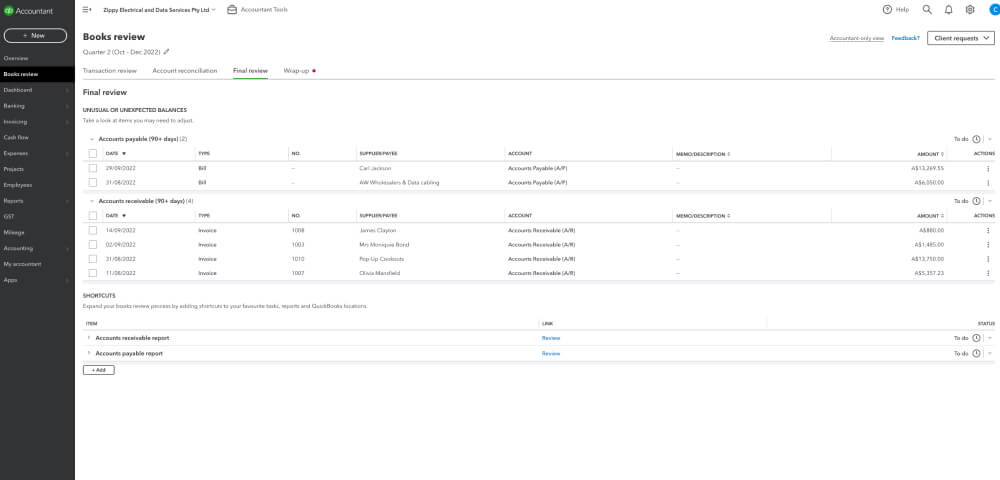
- The Final review tab lists key financial reports to help you check account balance issues.
- Select Review to open a report.
- QuickBooks automatically filters reports for the month you select.
Step 7: Wrap up your clients' book review
- Prepare and send a report package to your client and close their books.
- Proceed to the GST Centre by selecting GST from the navigation menu for one final review prior to lodging your BAS.
