Create custom payroll reports
QuickBooks Payroll
You can now create custom payroll reports for your business and save them alongside other existing reports for future use.
You can now create custom payroll reports for your business and save them alongside other existing reports for future use.
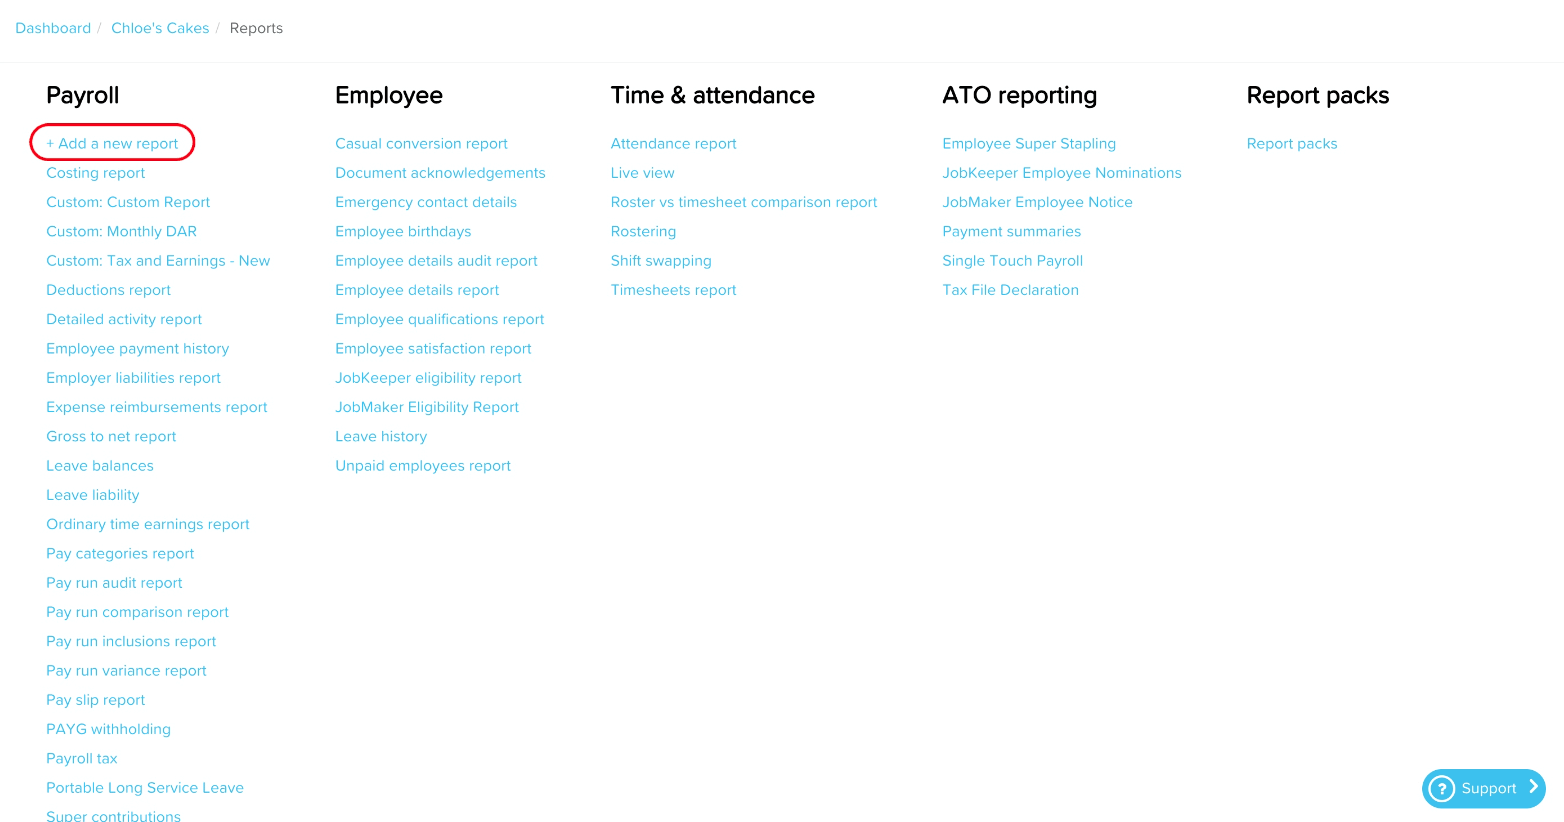
You can use the pre-existing report templates or you can build your own report using a range of display column options. You can easily organise your data by dragging and dropping the columns into the preferred order. Once your report is created, it can be added to any report packs you have created.
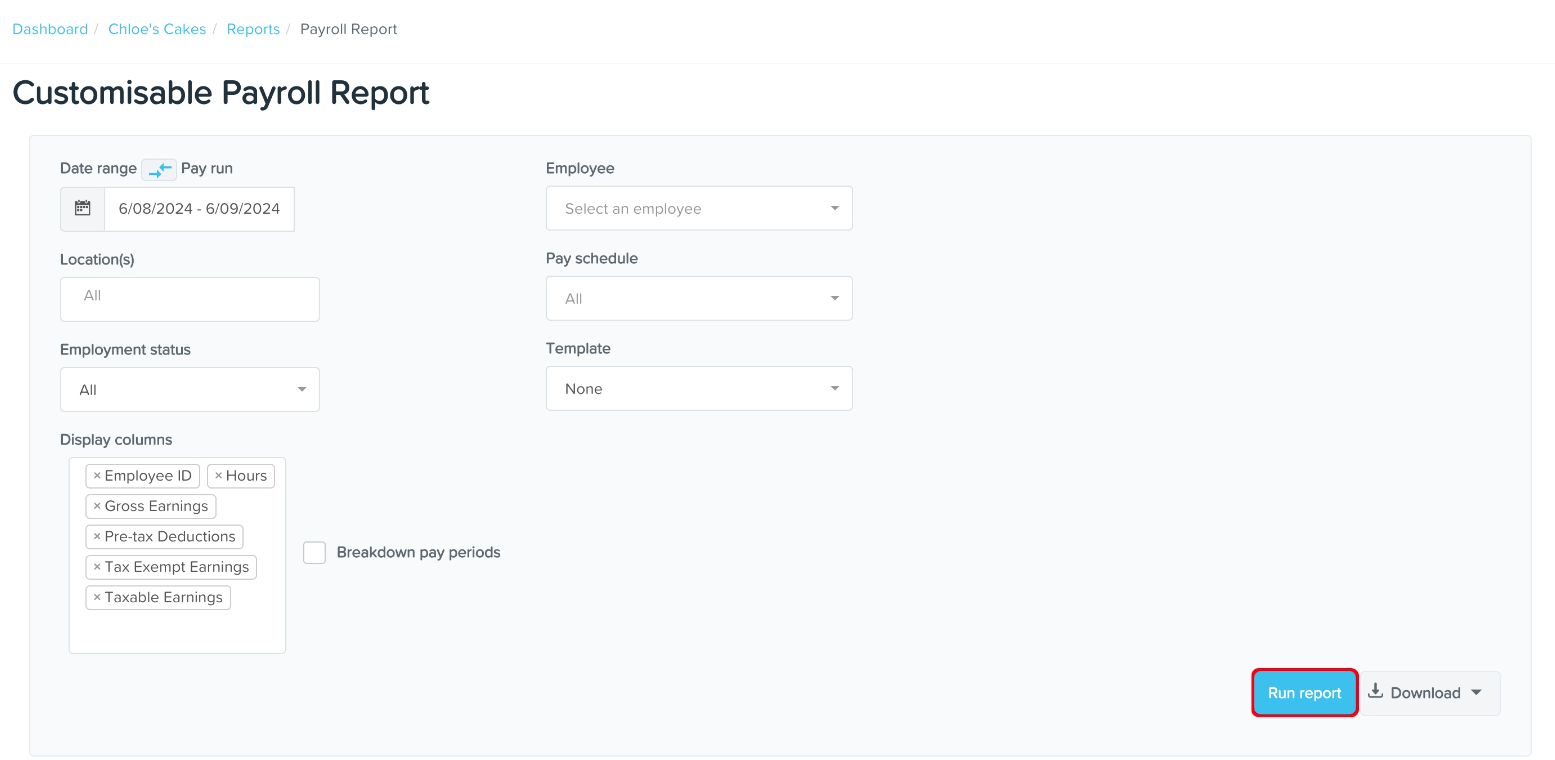
Like to get started? Check out the step by step instructions on how to create and download a custom report here.
QuickBooks Online Advanced now offers increased control over what your team members can access. The latest improvements deliver additional permissions to control what roles can view, create, edit or delete.
In the example below, you can determine if a role can view, create and/or edit customer information.
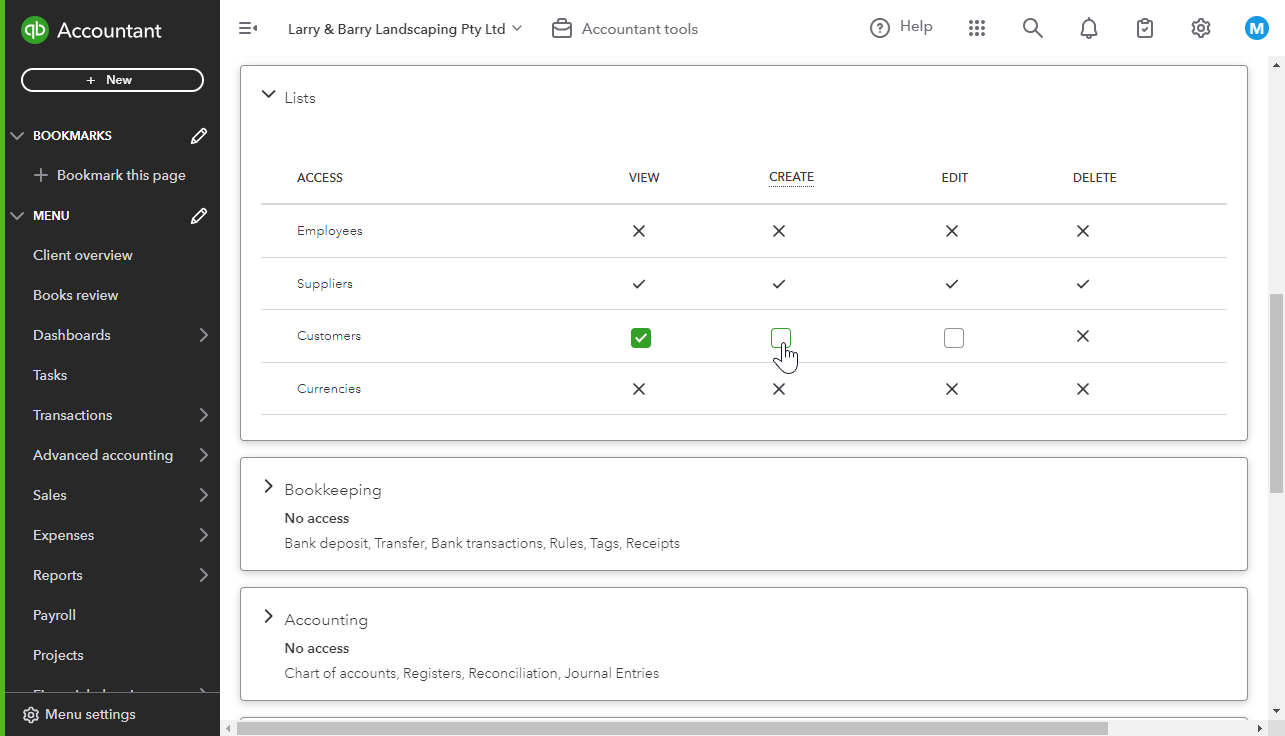
This enhanced functionality makes it easier to create custom roles where you want to provide limited access to key areas in QuickBooks where full access isn’t suitable.
These extra permissions have been applied to banking, chart of accounts, registers, reconciliation, customers and suppliers.
Learn more about how to add and manage custom roles in QuickBooks Online Advanced.
Let’s save you a click! Using Spreadsheet Sync, you can now set your Excel spreadsheets to auto refresh (or not) so you’re always working with the latest data.
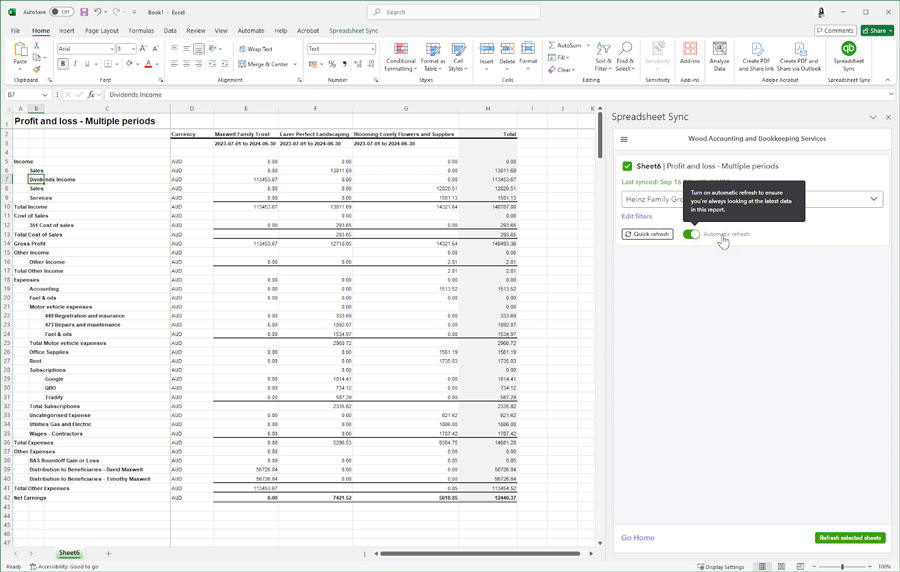
To use this new feature, once you have created a report, simply slide the Automatic refresh toggle to on and every time you access your spreadsheet, Spreadsheet Sync will automatically collect the latest data for you.
Head here to learn more about getting started with Spreadsheet Sync.
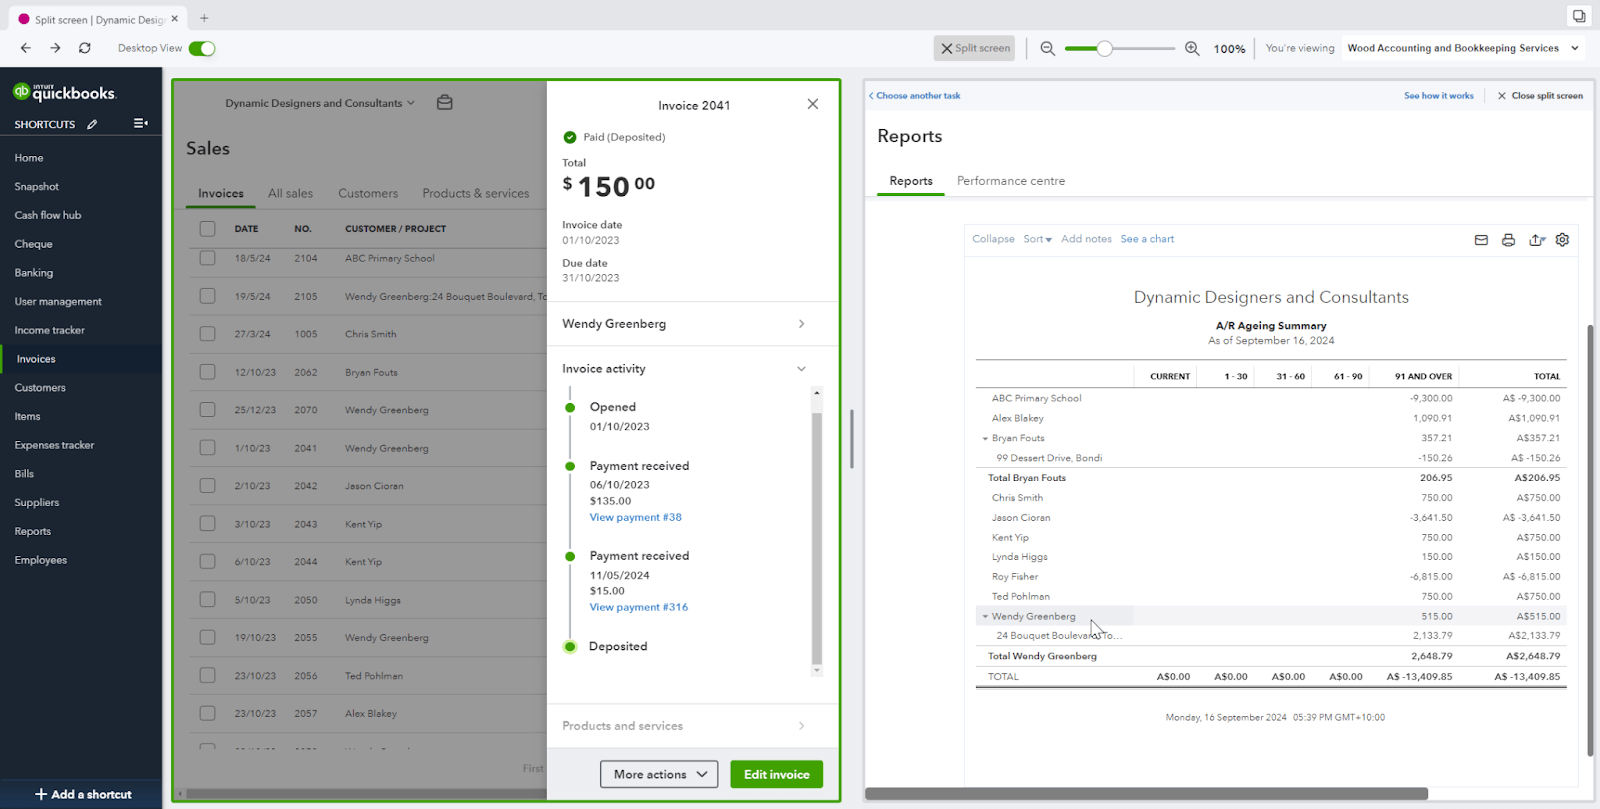
Provided with QuickBooks Online Advanced, the desktop app has been enhanced to display two areas of the product at once. This is great for cross referencing values or simply doing two things at once using a single screen.
To ‘split the screen’, launch the desktop app then toggle Desktop view at the top of the screen. Next, click on the Split screen button on the top toolbar and select the area of the product you would like to access.
In the example below, we have opened the invoice area on the left and the reporting area on the right.
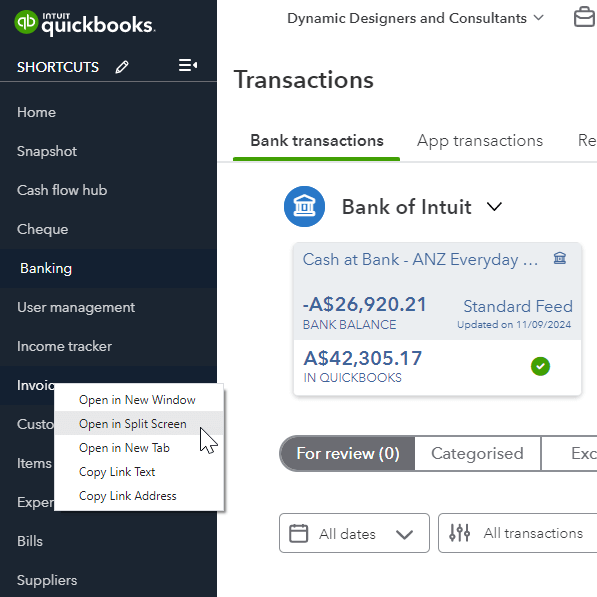
Alternatively, you can open split screen mode by right clicking on the required menu item on the left navigation bar and selecting Open in Split Screen.
Like to learn more? Here’s a video about how to use Split Screen using the desktop app.

TAKE A NO-COMMITMENT TEST DRIVE
Our customers save an average of 9 hours per week with QuickBooks invoicing*
By entering your email, you are agree to our Terms and acknowledge our Privacy Statement.