This feature allows you to customise play slips generated for your employees.
The settings for payslips can be accessed via:
>Payroll Settings
>Business Settings
>Pay Slips

This feature allows you to customise play slips generated for your employees.
The settings for payslips can be accessed via:
>Payroll Settings
>Business Settings
>Pay Slips
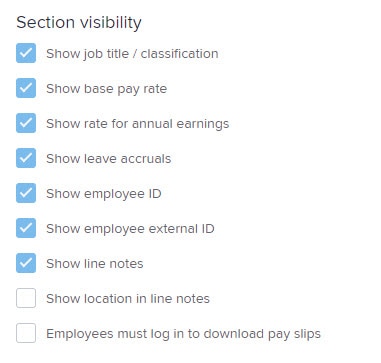
Update Section Visibility
Choose what information is displayed on employee payslips such as leave accruals and super contributions.

Update the employee email notifying your staff that their payslip is available:
From email address: this allows you to specify the ‘from address’ that the payslip email notifications are sent from. This is handy when employees want to reply to their payslip with questions or queries regarding their pay.

Custom message: This message will appear in the payslip notification emails (not the payslips themselves). If you would like to create a custom payslip notification, click the ‘edit’ option as shown below. This is an example of the default text we provide:

The text area is fully editable and you can delete any or all of the default text in order to create your own custom message. Note there must be some text entered. The system will not allow you to save the page if no text exists. The functionality also allows you to use the rich text editor for effects such as bold, italic, to add links, etc:

Where you see {{ }} in the template, this means that a “placeholder” has been selected and will populate the email with the relevant detail, depending on the placeholder name within. Within the text editor, it will look like this:

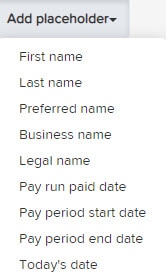
To use the ‘placeholder’ feature you can click on the ‘Add placeholder‘ option and you will see a drop-down menu with all the available choices. These have been listed in order of when they will likely be used in the template:

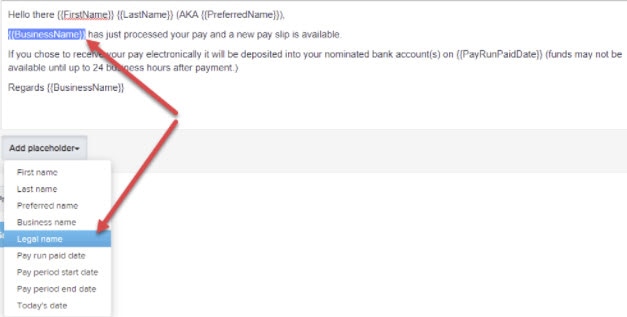
If you would like to replace some text with a placeholder or change the placeholder that is currently set, you will need to highlight the area that you wish to replace (if you are replacing an existing placeholder you need to include the {{ }} brackets when you highlight the text).
Once the text is highlighted, click on ‘Add placeholder’ and select the relevant option. For example, if you want to change the business name to show the legal name instead, you would highlight {{BusinessName}} within the text, and then select ‘legal name’ from the placeholder options. Once you do that, {{LegalName}} will replace the text:

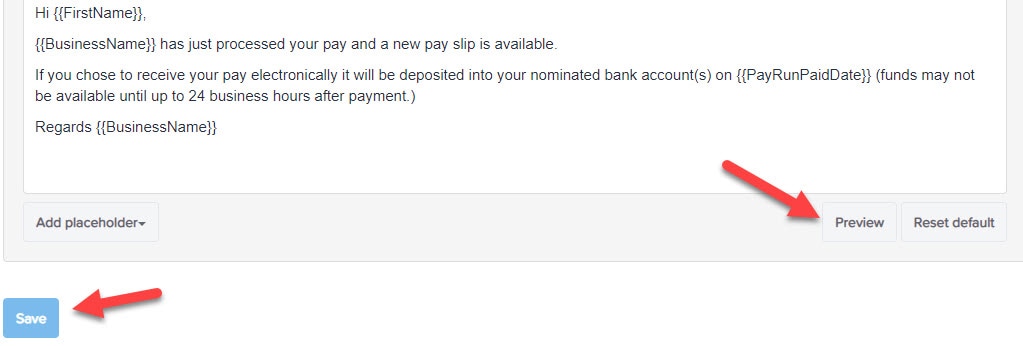
Once the required changes have been made you can see a preview of what the email will look like by clicking on the ‘preview’ option. Note this does not save the template. You will need to click on the ‘save’ option if you wish to save the changes:

If you would like to reset the template back to the original (i.e. no custom message) you can use the ‘reset default’ option. N.B. this will delete any custom text you had added. This includes any existing messages that have carried over to the new template.

TAKE A NO-COMMITMENT TEST DRIVE
Our customers save an average of 9 hours per week with QuickBooks invoicing*
By entering your email, you are agree to our Terms and acknowledge our Privacy Statement.