QuickBooks Blog
70% off
for 3 months
Buy now
FINAL DAYS!
70% off
for 3 months
Buy now
Get your
business
organised
Buy now
70% off
for 3 months
Buy now
SALE Save 70% for 3 months Buy now
Get your
business
organised
Buy now
DON'T MISS OUT
Buy now and get 70% off for 3 months Claim offer
DON'T MISS OUT
Claim offer
SALE
Buy now and
save 50% off today
See plans + pricing
50 %off for 3 months
50 %off for 12 months
  • Invoices
  • Expenses
  • Reports
Image Alt Text
Invoicing

Get Paid On Time: The Complete Guide to Invoices

For freelancers and self-employed people, invoicing is an essential part of your work. Without invoicing, you won’t get paid and won’t be able to continue working for yourself. The first step in getting paid is having the right invoicing techniques. Here’s everything you need to know about creating and sending the perfect invoice.

Lesson 1: Use the Right Invoicing Format

There is a basic format that you should stick to. Typically, it begins with a professional header that contains your contact information. Underneath and on the opposite side of your contact information, you want to include your client’s contact information in a similar format:

Example: Craig’s Design and Landscaping Services

Street number, Street Name

Anytown, State, Area Code

example@example.com

You’ll also need to include each detail of your invoice on a separate line:

  • Invoice number
  • Date prepared
  • Payment due date
  • Preferred payment option

Invoice Number: How you choose to number your invoices is up to you. For example, you could write the invoice number as “Invoice: 00001.” However, many freelancers prefer to organize their invoices by the name of the client. For example, if you have a client named Tony’s Landscaping, the invoice number could be “TL 00001.” No matter how you decide to number your invoices, always use a sequential order, as this makes them easier to track and manage.

Date Prepared: This is simply the day the project was completed and/or the invoice was sent out.

Payment Due Date: The majority of invoicing systems use either a 30-day, 45-day or 60-day time frame. If you have a service agreement with your client already in place, then you would simply include that date. If you want to get paid on the 15th of every month, then that would be the due date of the invoice. However, if you expect to be paid immediately, then you want it to state “Due upon receipt.”

Preferred Payment Option: Beneath the due date, you should indicate what method your client should use to submit payment. Do you want to be paid by check, credit card or an online payment gateway like PayPal? Be sure to include the all of the details your client needs in order to pay you.

The body of your invoice includes an itemized breakdown of services. This should contain:

  • Services: A detailed description of the work you performed.
  • Date: This is the date the service was performed or when a product was purchased.
  • Quantity: This is either how many hours you worked or how many items you sold.
  • Rate: The price you charge for your goods or services.
  • Hours: This applies if you’re working hourly.
  • Subtotal: The total amount you are charging for goods or services.

You also need to calculate the total, subtotal plus sales tax, delivery fees and any other additional fees. The total should be in bold so it clearly stands out.

Finally, underneath the total, you will need to detail any additional terms and conditions. This could include your return policy, how many days the client has to pay before incurring a late fee, any discounts for early payment, etc.

Having all of this information can prevent delays in payment since the client knows exactly who sent the invoice, how to pay that invoice, and is aware of exactly what they are being billed for.

Lesson 2: Offer Flexible Payment Options

There was a time when waiting to get paid for goods and services was a lengthy a process. You would have to create and mail an invoice to a client, wait for that client to send out a check, and then wait several days for the check to clear.

Today, thanks to technology, you can send out an invoice and get paid in a matter of minutes.

By offering your client multiple payment options—such as an electronic check, credit card or a third party like PayPal—you’re improving your chances of getting paid on time because you don’t have to wait for snail mail. More importantly, you’re making it easier for a client to pay because you accept a payment option they already feel comfortable using.

Being flexible also means adhering to your client’s billing schedule. If your client only accepts invoices on the 1st, 15th or 30th of the month, then you know those are the days that you need to send out an invoice.

Lesson 3: Use Invoicing Software

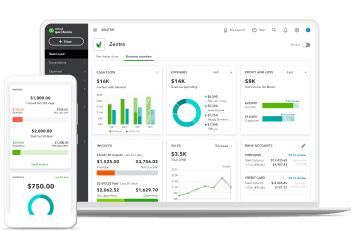
Financial software like QuickBooks offers invoicing tools for small businesses to allow you to create and send out invoices in just a couple of minutes, at your desk or on mobile. You can store client information for future invoices or even set up recurring billing, which saves you time when creating invoices. It can keep track of the hours you spent on a project or collaborated with team members. QuickBooks is feature packed Small Business Accounting Software with a fantastic App and even lets you scan your receipts with your smartphone directly into your account.

Try it on us Free for 30 days and Save 50% when you buy now.

Lesson 4: Invoice Frequently

Don’t feel embarrassed or think you’re being an annoyance. You need to invoice frequently and be persistent.

You may want to invoice all your clients on a weekly basis. This prevents you from forgetting to send an invoice. But more importantly, it cuts the time down between sending out an invoice and getting paid.

Grow Your Business with QuickBooks

Lesson 5: Send Out Reminders

Just because a client hasn’t paid you within a couple of days doesn’t mean they’re trying to skip out on the bill. It may have actually slipped their mind or gotten misplaced. If the deadline is approaching, there’s nothing wrong with sending a client a personalized email, text or quick phone call reminding them their invoice is due. If you’re having problems getting paid, learn more about how to manage late invoice payments.

Lesson 6: Recurring Billing

If you’ve secured a long-term client, then you should set up recurring invoices each month, instead of creating and sending an invoice and then waiting for the payment. When recurring billing is set up, your client’s credit card is automatically charged each month.

Lesson 7: Get Paid in Advance

There are some circumstances that allow you to get paid in advance, especially for service providers. This is a retainer or deposit, such as 50% upfront and 50% after completing the project. This is common practice in many industries, so if a client has an issue with you requesting a deposit, it may be a red flag indicating they could give you a problem when the final bill is sent.

Lesson 8: Add Late Fees and Discounts

At the bottom of your invoice, you should clearly describe the late fees. For example, you could include the phrase, “Accounts not paid within 15 days of the date of the invoice are subject to a 2% monthly finance charge.” If a client still hasn’t paid the invoice, you should still follow up with the client as a courtesy.

If they still refuse to pay, you should have a plan in place. This could be writing them a letter that they’ll be taken to small claims court or warning them that the bill will be placed in collections.

Additionally, you could include a discount for your clients if they pay the bill ahead of time. For example, you could deduct 2% of the amount owed if paid with 10 days.

It’s good practise to add this to your Invoice Terms, so it’s clear what to expect if any problems arise.

Lesson 9: Be Polite

We’ve done some research and found that adding the phrase “Please pay your invoice within” or “Thank you for your business” to your invoice can actually increase the chance that your invoices are paid on time by more than 5%.

If you have a good rapport with a long-term client, you can go beyond that and send them a birthday greeting or even a corporate gift as a way to show that you genuinely appreciate the client. Having a strong relationship with a client is an effective way to make sure that your invoice is a priority for them.

Lesson 10: Cut Out the Middleman

If you’re dealing with a larger enterprise, your contact may not actually be the one handling the billing. This can delay payment because the contact has to send the invoice to the billing department. If you can send the invoice directly to the individual in charge of payments, then you’re speeding up the payment process.

Lesson 11: Deliver On Time

If you’re supposed to have a task completed by a deadline, and you’ve passed that date, then why would the client be willing to pay you on time? Deliver the work that you promised on time to prove that you’re reliable. If you do your end of the bargain, a client should have no problem paying you in a timely manner.

Lesson 12: Reputation

This applies to both you and your client. If you take on a new client, do some investigating to see if they have a reputation for paying for goods or services rendered—the Better Business Bureau is a good place to start. If you see any warning signs, it’s probably not worth the chance to conduct business with them.

As for you, as mentioned above, if you have a reputation for completing great work on an appropriate timeline, then you should be able to secure top-notch clients.

Final Lesson: Get Everything in Writing

Always have a contract with your clients. Besides the typical non-disclosure agreement and whatever clause both parties have agreed upon, a contract will establish payment terms. This includes when an invoice is sent out, when an invoice is expected to be paid, how an invoice will be paid, and what happens when a bill is not paid. Not only does this assist you with getting paid on time, it can also come in handy if the matter has to be settled in court.

Why not try Quickbooks for Free for 30 days to save time on business admin Make your first invoice in minutes and then customise with your own company logo, font style and colour.

Getting paid on time doesn’t have to be a hassle. Choose your clients carefully, set expectations and use these techniques to keep your cash flow rolling.


Related Articles