DON'T MISS OUT
Save 90% off for 6 months
Hurry, ends 31 July
Buy now
DON'T MISS OUT
Buy now
JULY SALE
Save 90% off for 6 months
Hurry, ends 31 July
Buy now
JULY SALE
Buy now
OFFER ENDS 31 JULY
$1/MONTH FOR 12 MONTHS* per Plus file, when purchased in bundles of 10
OFFER ENDS 31 JULY
$1/MONTH FOR 12 MONTHS*
Secure offer
$1/MONTH FOR 12 MONTHS*
Per Plus file, when purchased in bundles of 10
Secure offer
$1/MONTH FOR 12 MONTHS* per Plus file, when purchased in bundles of 10
$1/MONTH FOR 12 MONTHS*
Per Plus file, when purchased in bundles of 10
$1/month
for 12 months
When purchased in bundles of 10
50 %off for 3 months
50 %off for 12 months
  • Invoices
  • Expenses
  • Reports
Tablet and mobile phone with QuickBooks software on screen.
Invoicing

How to make an invoice and what to include

There are many different ways that a small business owner can create an invoice—and that’s precisely the challenge. As the creators of the world’s most popular accounting software, QuickBooks has conducted extensive research into what makes an invoice most effective. 

In this article we’ll cover:

The components of an invoice

When creating invoices for a small business or for yourself as an independent contractor, you should include the following invoice components:

1. Header

The word INVOICE should be in large letters centered across the top of the document. This practice will help you signal to your busy customers that they need to make a payment and will help them save time filtering through many documents on a daily basis. Invoice headers will also save your business time when reviewing records ahead of tax season.

Include your company logo in the header to create a more professional invoice. Using your business colours, logo and design create a more personalized invoice that matches your branding.

2. Business name and details

Add your business’s legal name and contact information including your business address, phone number and email address. Providing your business contact details will make it easier for your customers to send you a check and reach out if there are any issues with the invoice or payment. 

3. Client’s name and details

Clearly state your client’s name and contact details including their address, phone number and email address. This information will help your customers understand that the document was, in fact, intended for them.

Tip: Remind your clients to provided updated contact details to ensure they receive your invoice to the correct email address.

4. Date

It’s important to include the date the invoice was issued to avoid confusion when customers receive multiple invoices, particularly if you are issuing multiple progress invoices for one project.

Payment is usually due a specified number of days after receiving an invoice. Including a date helps clients understand when payment is due.

Tip: To avoid disputed invoices, you can also include dates(s) of the work completed or when products were ordered or delivered. Discuss this preference with your client and/or business to make the invoice processing easier for both of you.

5. Invoice number

An invoice number acts as a unique identified for each invoice and helps with keeping invoices organized. Invoice numbers allow you to quickly look up specific invoices to keep track of invoice payments and due dates.

Below are some common invoice number formats you can adopt:

  • INV00001
  • Unique billing codes 
  • Date-based purchase order numbers

No matter which format you use, be sure that the invoice number goes up incrementally each time it is sent.

6. Itemized list of goods or services

Itemized details are especially important for both yours and your customers’ accounting documentation. Depending on the type of work that is being billed, include separate line items for each good or service you are providing.

Itemised lists for goods or products should include:

  • Name of the goods
  • Stock keeping unit or ID
  • Description (including colour, size or any other unique details)
  • Quantity 
  • Cost /price per-unit
  • Any tax, shipping and handling or extra fees

Tip: Use a SKU generator to automatically create an SKU for your products.

Itemised lists for services rendered such as the completion of a design or writing project should include:

  • Name of the project
  • Description of the type of work (i.e. graphic design, writing)
  • Hourly rate (including the number of hours worked) or flat rate
  • If payment is per piece, each piece should be listed separately
  • Any tax, or extra fees such as travel fees


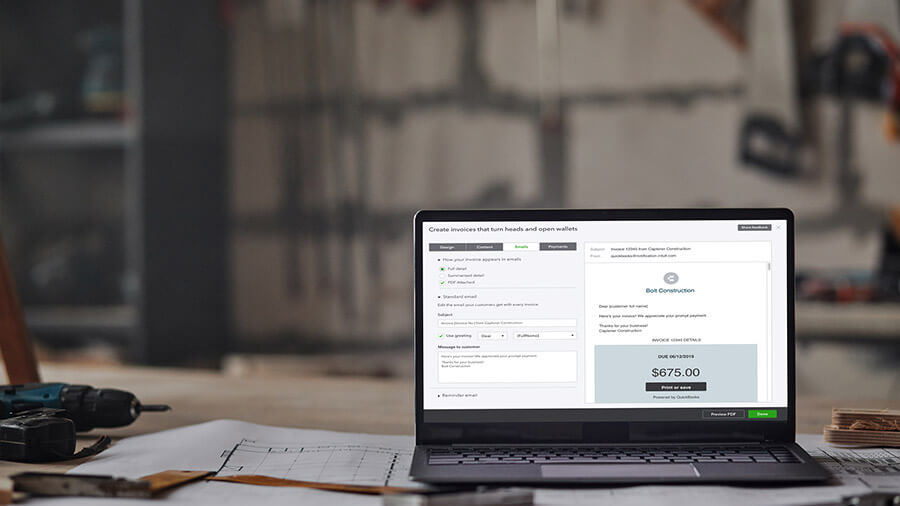
7. Invoice total or balance due

Underneath the listing of products or services being billed, there should be an invoice total that is clearly marked to avoid any undue confusion. This will specify the exact amount your client needs to pay. 

8. Terms and conditions

You’ll want to be sure to note the payment terms. Whether the payer or the payee, it’s important that everyone has an expectation of when the payment is to be made. Standard invoice payment terms may vary by industry, company policies or previous dealings with your customer. 

Choose invoicing terms that maximize your cash position and likelihood of getting paid. You may choose to collect 50% upfront or require immediate payment upon completion. Then, you can decide how long your customer needs to settle an invoice. 

Most invoices have a 30-day payment term (net 30 days or “N/30″), meaning they must be paid within 30 days of receipt to avoid any late fees or penalties. It’s important to clearly state the consequences of not following the payment terms such as late fees or additional charges for overdue invoices or late payments

You can learn more in our guide to choosing invoice payment terms.

9. Payment options and instructions

Include payment options and instructions and note your preferred payment method so your customers know how to pay. Below are some invoice payment methods you can offer your clients:

  • Cheque
  • Cash
  • Bank transfer
  • Credit card
  • PayPal

Make sure to include your account number, bank name and any relevant details your clients need to know in order to make payment.

With QuickBooks you can create invoices on the go, when and where you need them

How to create personalized invoices and why they matter

Don’t think of an invoice as an afterthought — something that comes only after a project ends. Think of invoices as important communication tools that reinforce your brand and your professionalism. Create personalized invoices with these easy to follow steps tips:

  • Reinforce your branding: Incorporate your business colours, fonts and logos to create a positive brand reflection using good invoice design. If you’ve branded yourself, you’re more likely to be at top of mind next time your clients need to assign a task to someone who fits your expertise.
  • Itemise goods and services: Clearly show your clients what they got for their money. It can provide a sense of good value.
  • Add personal messages: Use the comments section to add a personal message. The comments section of an invoice is an ideal place to address the client by name.
  • Add a thank you note: Thank the client for their work by mentioning a key milestone worth celebrating. Mention your most significant takeaway from the project or why you enjoyed working on it.
  • Offer a Call-to-Action: If you’d genuinely enjoy working on similar projects for the client in the future, say so and ask for the business. Make sure they have contact details available at hand.z
  • Include a helpful link: If working on the project relates to a blog post you have written or read include it. This shows you have a pulse on the industry and that your skills are applicable.
  • Send a referral: Finding quality freelancers can be challenging for your clients. If you are among a client’s trusted writers and you know a graphic designer who would be a good fit for them, put them in contact. The freelancer will appreciate the work, your client will be thrilled, and the good rapport could result in more work for you. It’s a win-win-win.

By personalizing your invoices, your business demonstrates a commitment to quality work and recognising and building a valuable business relationship. 

How to make an invoice

There are multiple options available to make an invoice. While you can make an invoice Microsoft Word or Excel manually, it is very time consuming. Thanks to invoicing software, you can create invoices using automated templates. Using tools like an invoice template, business owners can quickly input information to keep invoices simple. Here are three easy ways to create an invoice:

  1. Invoice Generator: Use QuickBooks free invoice generator to create and export invoices. Simply input all the required invoice details and download your invoice for free.
  2. Invoice Templaes: Download a free invoice template from QuickBooks to use in Microsoft Word, Excel or PDF. Customise the reusable template with your company colours, populate the invoice components, save it as a PDF and send it to your client.
  3. QuickBooks Invoicing Software: Use QuickBooks to automatically generate invoices and accept payments. Watch our video to see how easy it is to create and send invoices with QuickBooks.
Discover QuickBooks Free Invoicing Tools

Manual invoicing vs invoicing software

If you’re just getting started as an entrepreneur, you may be wondering whether to create invoices manually or to use automated invoicing software right away. Let’s explore the pros and cons of manual vs automated invoicing.

Creating invoices manually has its benefits: you can fully customize your templates, aesthetics, and process.

But if you do create your invoices from scratch using spreadsheet or word processing software, you may encounter administrative errors. Also, if you’re creating invoices manually, you’ll run into challenges tracking them and getting paid.

That’s why it’s important to start using invoicing software or an accounting software with integrated invoicing from the beginning. While it may make sense to build your own invoices for one, two, or even five customers, imagine how your efforts will scale across multiple customers.

Eventually, the process of creating invoices may become unsustainable. You’ll run into a situation where you’ll need to hire someone to manage this process. Or, you can pay a monthly fee to use software, at a tiny fraction of the cost of bringing on an employee.

quote image
91% of customers save time by invoicing customers via QuickBooks.*

Save time and automate your invoicing with QuickBooks

Our customers save 9 hours per week on invoicing.*

Scale your invoicing with QuickBooks

If you’re ready to upgrade your invoicing system with even more personalization to boost your brand and improve your client relationships, QuickBooks Online Invoicing Software allows you to experiment with your design and messaging to find your ideal invoice format and send customised invoices to customers. 

Explore the features of QuickBooks invoicing and download our free mobile accounting app to send online invoices from your fingertips, anytime, anywhere. QuikckBooks makes it easy to get started with a free 30-day trial on us.

FAQs


Related Articles