QuickBooks Blog
Need help choosing a plan?
Created with Sketch. 1800 917 771 Schedule a call
Need help?
We're here for you.
Schedule call
Created with Sketch.
product update

Connecting to a bank account

QuickBooks Online has a range of features that streamline your accounting and bookkeeping processes. Connecting your bank account to your QuickBooks Online account is a useful function that allows you to track purchases, withdrawals, funds transfers and deposits accurately and efficiently. You have the option to connect cheque and savings accounts, as well as credit card accounts – as long as they are accessible through your bank’s online banking.

Our step-by-step overview will help you set up this function in no time.

Connect Your Bank AccountsΒ to QuickBooks Online:

  1. ChooseΒ TransactionsΒ >Β BankingΒ from the left-hand-side navigation bar
  2. ClickΒ Add AccountΒ in the top right-hand corner


2015-09-14_12-15-02

3. Enter the name of your financial institution

4. Click the magnifying glass toΒ Find

5. Alternatively, if your bank is listed, click on the institution’s name. If your bank requires extra information, enter this in the appropriate fields and clickΒ Log In. This could occur if you use a bank token


2015-09-14_11-59-21

6. Enter your online banking credentials that you have set up with your bank. These details will be the same as your normal bank login. For example, for Westpac Bank customers, enter yourΒ Customer ID

7. Enter yourΒ PasswordΒ and clickΒ Log In


2015-09-14_11-59-37

It may take a few minutes to process, so do not hit the back button. Once complete, it will take you to yourΒ Add an accountΒ window.

Choose the bank account you want to connect. You do not have to choose all – just the accounts you wish to add to your QuickBooks Online account.

8. You can choose the date range you would like to bring into the file up to 90 days. Click on the days required. You can chooseΒ 0, 7, 30 or a maximum of 90 days

9. TickΒ theΒ AccountΒ you would like to connect to your QuickBooks Online file. Please note the left-hand-side accounts are the bank accounts held with your banking institution

10. ClickΒ on theΒ drop-down menuΒ to choose the bank account you have set up in QuickBooks Online Chart of Accounts. Make sure this is set up prior to this stage. ClickΒ ConnectΒ at the bottom right-hand side.Β The connection will take a few minutes after this initial setup. QuickBooks Online works magically behind the scenes and connects the bank account chosen from your financial institution to your bank account in QuickBooks Online

2015-09-14_12-19-08

11. When it is finished connecting, clickΒ β€œI’m done. Let’s go!” at the bottom right-hand corner


2015-09-14_12-26-08

12. After your download finishes, go back intoΒ TransactionsΒ >BankingΒ from the left-hand-side navigation bar (image 1). ClickΒ theΒ New TransactionsΒ tab to see the downloads

Handy Hints and Troubleshooting

IfΒ your bank doesn’t appear as an option to select:

WhenΒ you enter your bank name and clickΒ Find, youΒ may getΒ the messageΒ Sorry! We can’t find your bank

  1. ClickΒ Request to add my bank
  2. EnterΒ the bank’s website URL, the bank name and your email into the fields provided
  3. ClickΒ Submit


2015-09-14_12-56-17

Note: We can’t tellΒ you if or when a bank may be added to our list because this isΒ a decision between Intuit andΒ the financial institution.Β You will beΒ contacted if the bank decides to become part of our supported financial institutions.

Common Errors When Connecting an Account

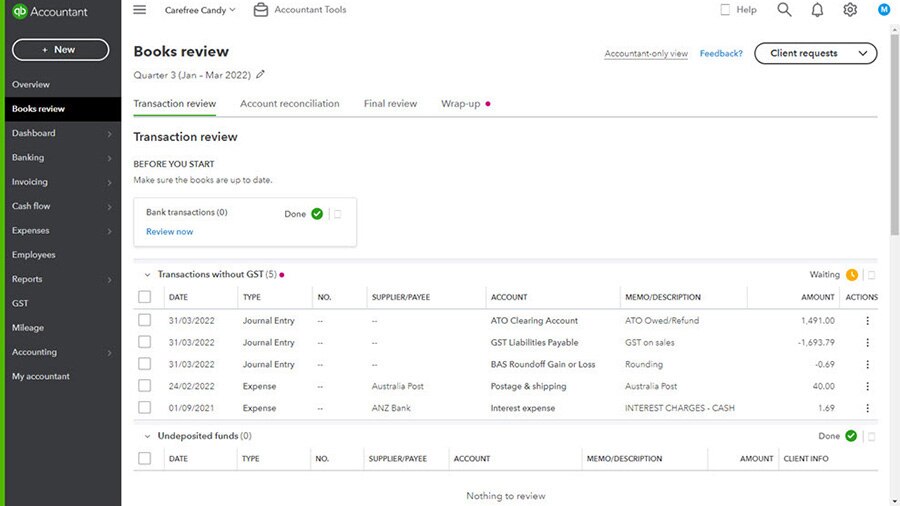
If you are trying to connect your bank or credit card account in QuickBooks Online Banking and receive the error 103 or 107, it is possible that you have selected the wrong financial institution from the list when multiple results are displayed.Β Try connecting again using the steps below:

  1. Go toΒ TransactionsΒ >Β Banking
  2. ClickΒ Add account
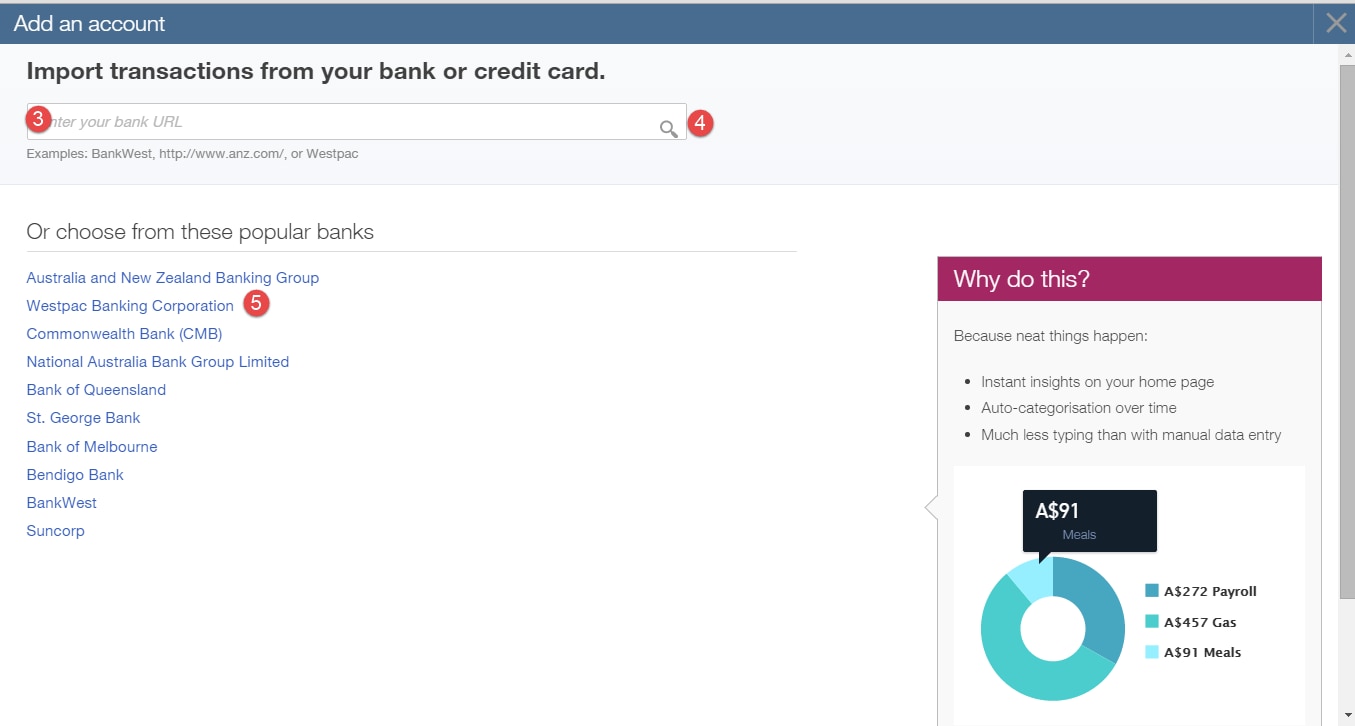
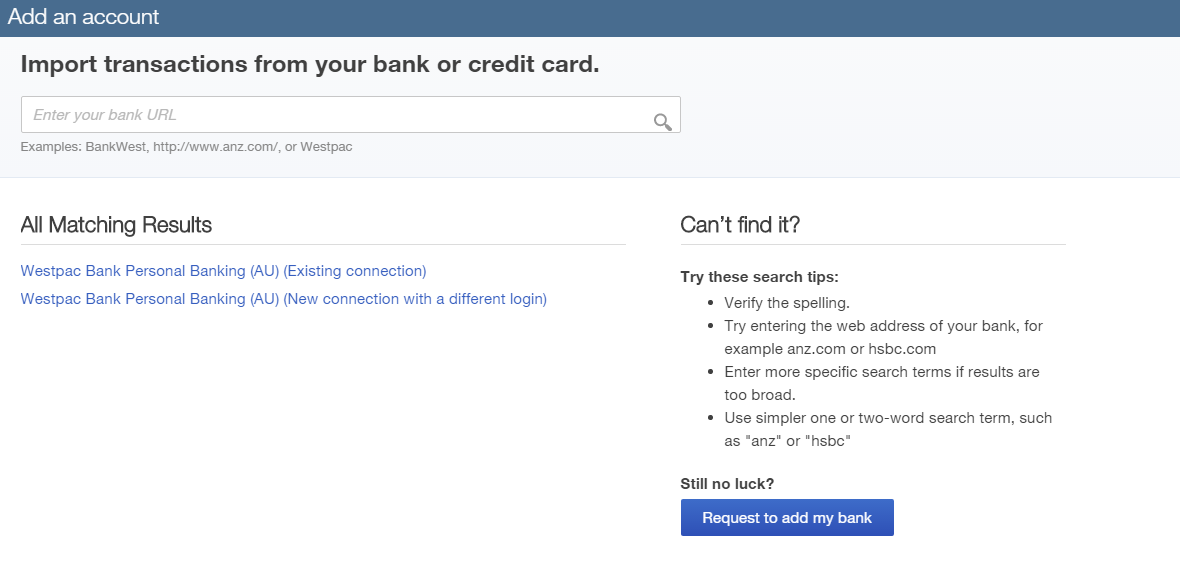
  3. In the search field, enter the full name of the bank you are trying to connect to or enter the bank’s URL. For example: http://www.westpac.com.au
  4. If multiple results are displayed, click on the bank name in the list
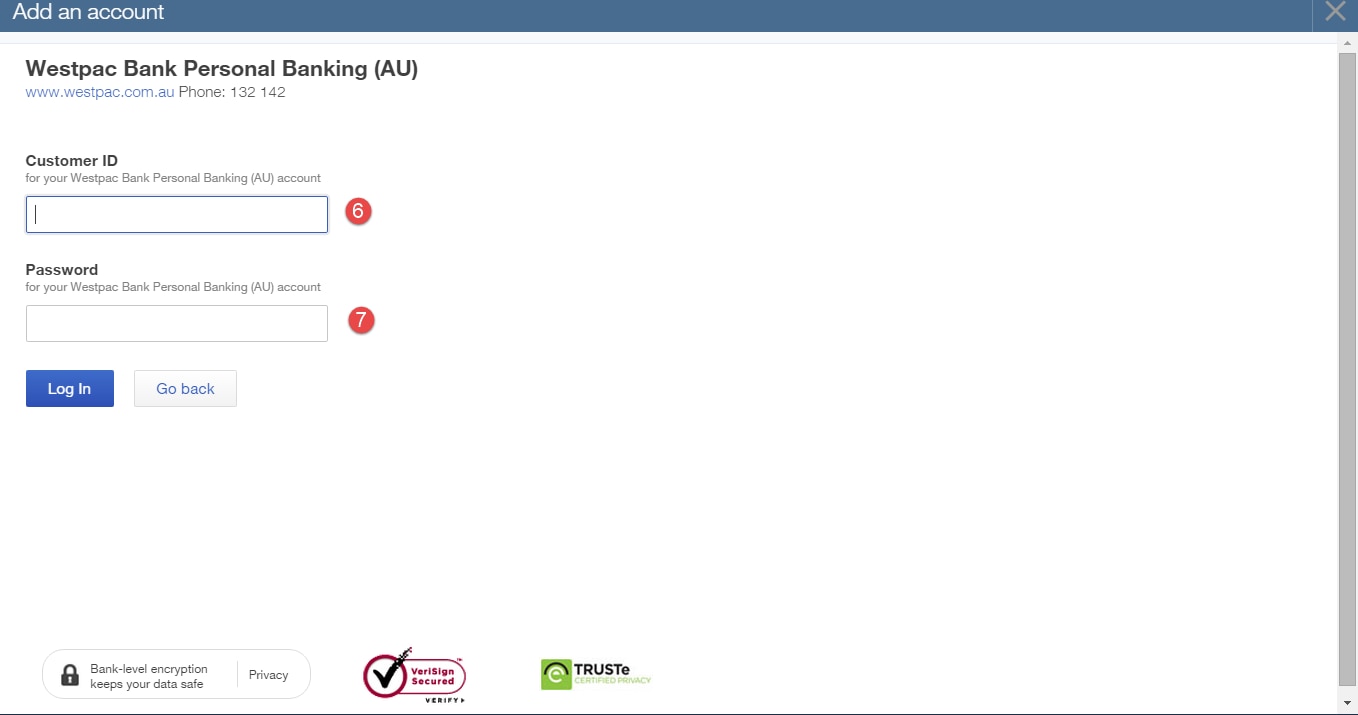
  5. On the next screen, verify that the URL for the bank that is displayed under the name is the correct URL that you use when signing into your online banking account. If not, clickΒ Go backΒ and select the next name in the list. Repeat this process until you find the correct URL listed under the bank name
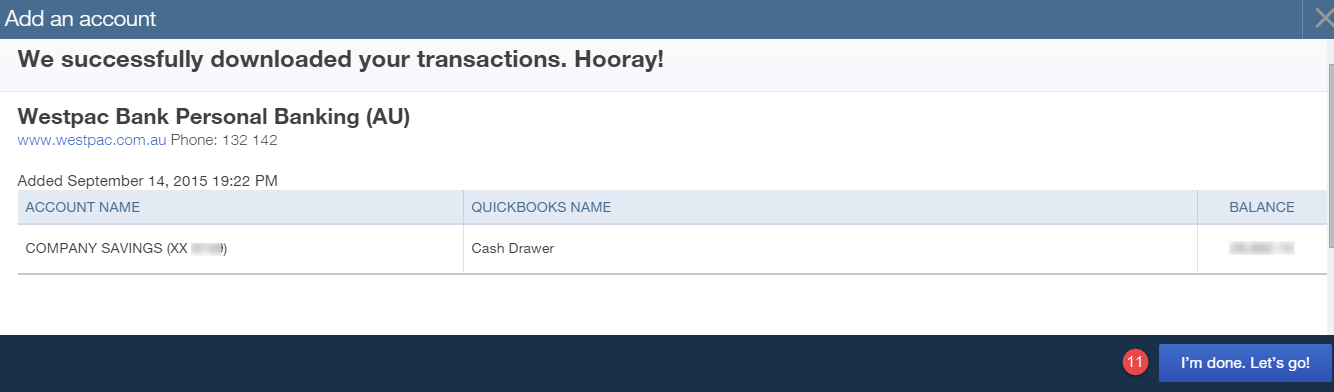
  6. Enter your user ID and password
  7. ClickΒ Log In

ChangingΒ the QuickBooks OnlineΒ Account or Switching theΒ Bank Connection

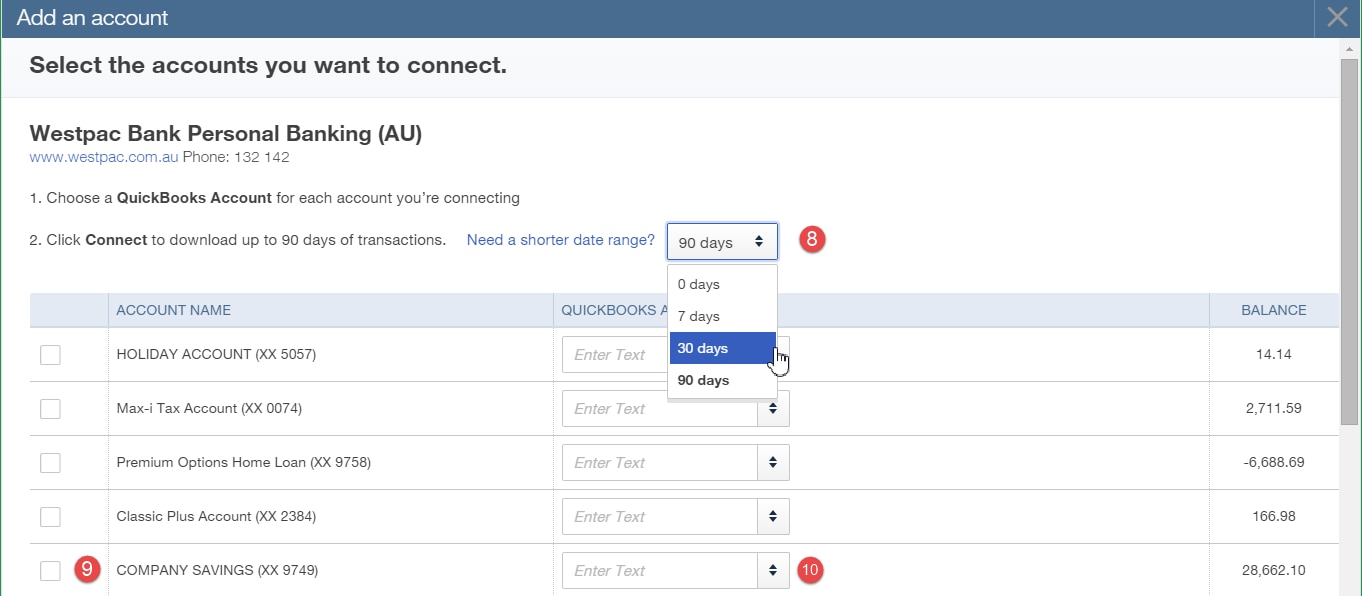
If you’ve connected the wrong account to online banking, you can change the QuickBooks Online details. Please note that disconnecting the account won’t automatically remove theΒ previously accepted transactionsΒ from the register, and when you reconnect to the correct accountΒ onlyΒ the last 90 daysΒ of data will download.

IfΒ you have transactions downloaded into the wrong account fromΒ earlier than the 90 days, we suggest you edit them and switch them to the correct bank or credit card account (register) beforeΒ performingΒ a β€œmass-undo”.

To switch to the correct account of the transaction:

  1. ChooseΒ TransactionsΒ >Β Chart of Accounts
  2. ClickΒ Account HistoryΒ in the row of the account with the unwanted transactions
  3. Click to highlight the unwanted transaction and then clickΒ Edit
  4. Change the bank account in the bank field to the correct QuickBooks Online Account
  5. ClickΒ Save
  6. Repeat this procedure for each transaction

If you have acceptedΒ transactionsΒ to the wrong register and the transactions areΒ within 90 days, you canΒ undo them:

  1. ChooseΒ TransactionsΒ >Β Banking
  2. Select the account you wish to undo and clickΒ In QuickBooksΒ (middle tab)
  3. Click the check box at the top left above the transactions to mark all transactions
  4. Under batch actions, selectΒ Undo selected

The Undo tool won’t un-add or un-match any transactions that have been edited or the opening balance equity transaction on the register. To remove these transactions:

  1. ChooseΒ Transactions > Chart of Account
  2. In the row of the account with the unwanted transactions, clickΒ Account History
  3. Click to highlight theΒ unwanted transactionΒ and then clickΒ Delete
  4. ClickΒ YesΒ to confirm
  5. You’ll need to repeat this procedure for each transaction. There’s no mass undo option when deleting from the register
  6. Disconnect the account
  7. Reconnect to the correct QuickBooks Online account
  8. From theΒ Chart of Accounts, select the bank account required to be disconnect from the drop-down menu. ClickΒ EditΒ and uncheck the boxΒ Disconnect this account on Save.Β This will disconnect all connections to the bank


2015-09-14_13-05-58

Once your bank accounts have been added, you can then process transactions directly into your file, saving you time and keeping your account up to date with the correct details.


Related Articles

Looking for something else?

Get QuickBooks

Smart features made for your business. We've got you covered.

Help Me Choose

Use our product selector to find the best accounting plan for you.

QuickBooks Support

Get help with QuickBooks. Find articles, video tutorials, and more.

A computer screen showing a picture of a computer.

TAKE A NO-COMMITMENT TEST DRIVE

Your free 30-day trial awaits

Our customers save an average of 9 hours per week with QuickBooks invoicing*

No credit card needed

Cancel anytime

Unlimited support

By entering your email, you are agree to our Terms and acknowledge our Privacy Statement.