QuickBooks Online has an added feature called Rules (or Bank Rules). It saves you time by setting up automatic categorisation of regular recurring transactions even if they are slightly different each month. It also allows you to customise many variables of the bank feed data to highly automate the bank transactions you accept into QuickBooks Online.

How to set up bank rules in QuickBooks Online
How to set up bank rules

In QuickBooks Online go to: Left hand side navigation bar > Transactions > Banking > top right click on down arrow on File upload > Manage Rules
Click > New Rule

This is the Rules Page…
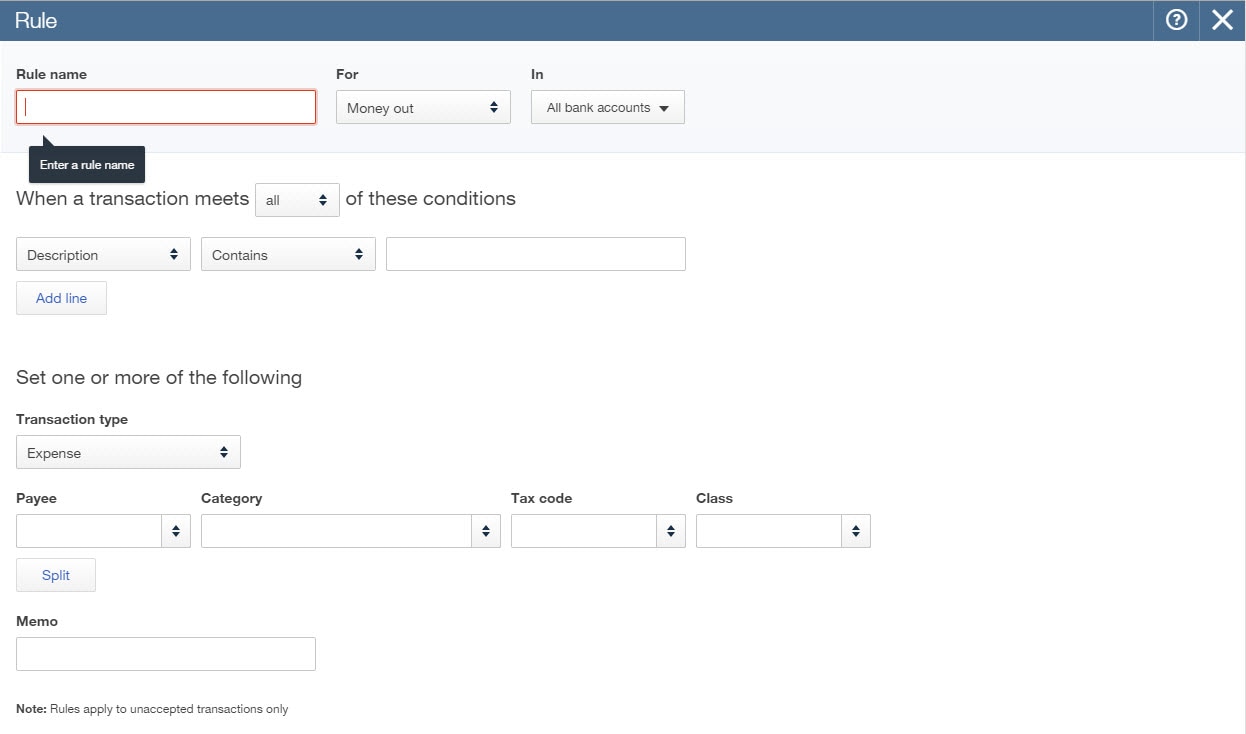
You will find the following fields:
Rule Name: This is the name that will show up when a transaction is automatically filled out for you based on the rule. It’s good to be descriptive with the rule name so that you know exactly what rule was applied. Something easy for you to remember.
For: You can choose from Money Out (expenses) or Money In (income).
In: This is where you choose the bank or credit card account to apply the rule to. Alternatively, you can have the rule apply to any bank account, or all bank accounts.
When a transaction meets – “all” or “any” of these conditions:
Conditions: When you choose a condition, ALL or ANY conditions must be met.
Description: This is the description associated with the transaction. You can choose from:
- Contains – Is Exactly – Doesn’t Contain
Bank Text: In my experience using the bank feed text works best. Simply cut and paste the bank text from the bank feeds area and use “Contains” as the condition for the transaction that the Rule is being set up
- Contains – Doesn’t Contain
Amount: This is the dollar amount of the transaction you can choose from:
- Equals – Is greater than – Is less than – Doesn’t equal
Add Line: You have the option of fine tuning this Rule and adding a Line if you so wish. Set one or more of the following…
Set one or more of the following:
Transaction Type:
If you choose Money out you can choose from: Expense – Cheque – Transfer
If you choose Money in you can choose from: Deposit / Credit card credit – Transfer
Payee: This is the Customer or Supplier (again depending on money in or out).
Category: This is the account you’ll apply the transaction to expense or income
Tax Code: Which GST code is applicable to this transaction each time?
Class: This is the Class tracking category if applicable.
Location: This is the Location tracking category if applicable.
Memo: You can use this as a detailed memo of the transaction.
Split: Something that you won’t see right away is the option to add multiple line items by amount or percentage. This is useful if you need to allocate certain transactions across tracking departments or several accounts (i.e. Telephone expense over various tracking departments or splitting phone and internet use to different accounts). If you click on the Split Button you’ll see the option to split the transaction based on allocating percentages to various categories or fixed amounts you can edit this selection at the down arrow box at Percentage.
A simple example of applying a rule would be bank fees:
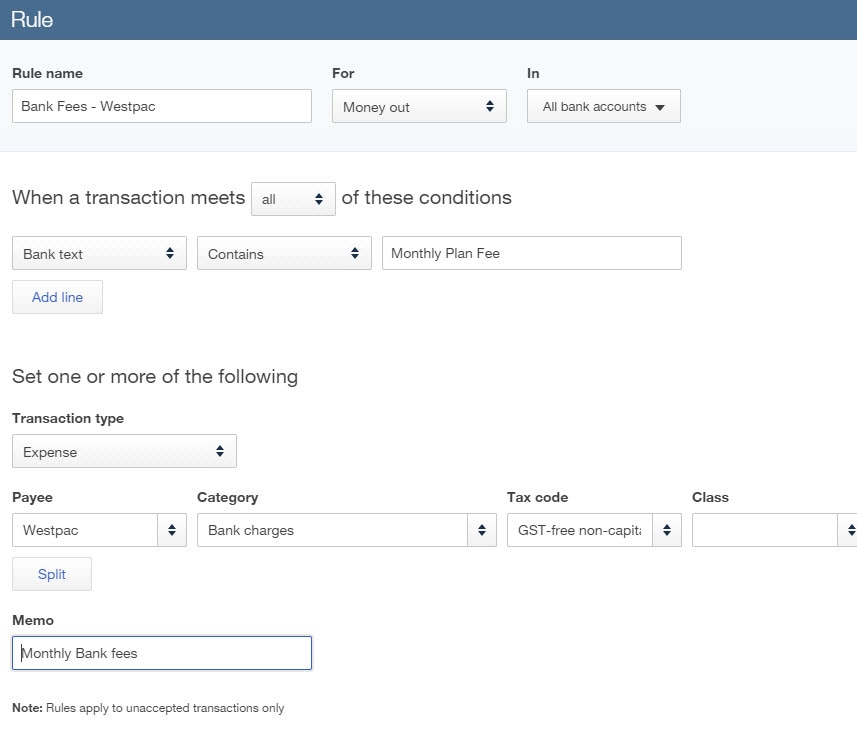
Or something a little more difficult: paying back a Bank Loan of Principal and Interest. Interest is variable each month, principal remains the same $515.00, payments have never been over $600.00.
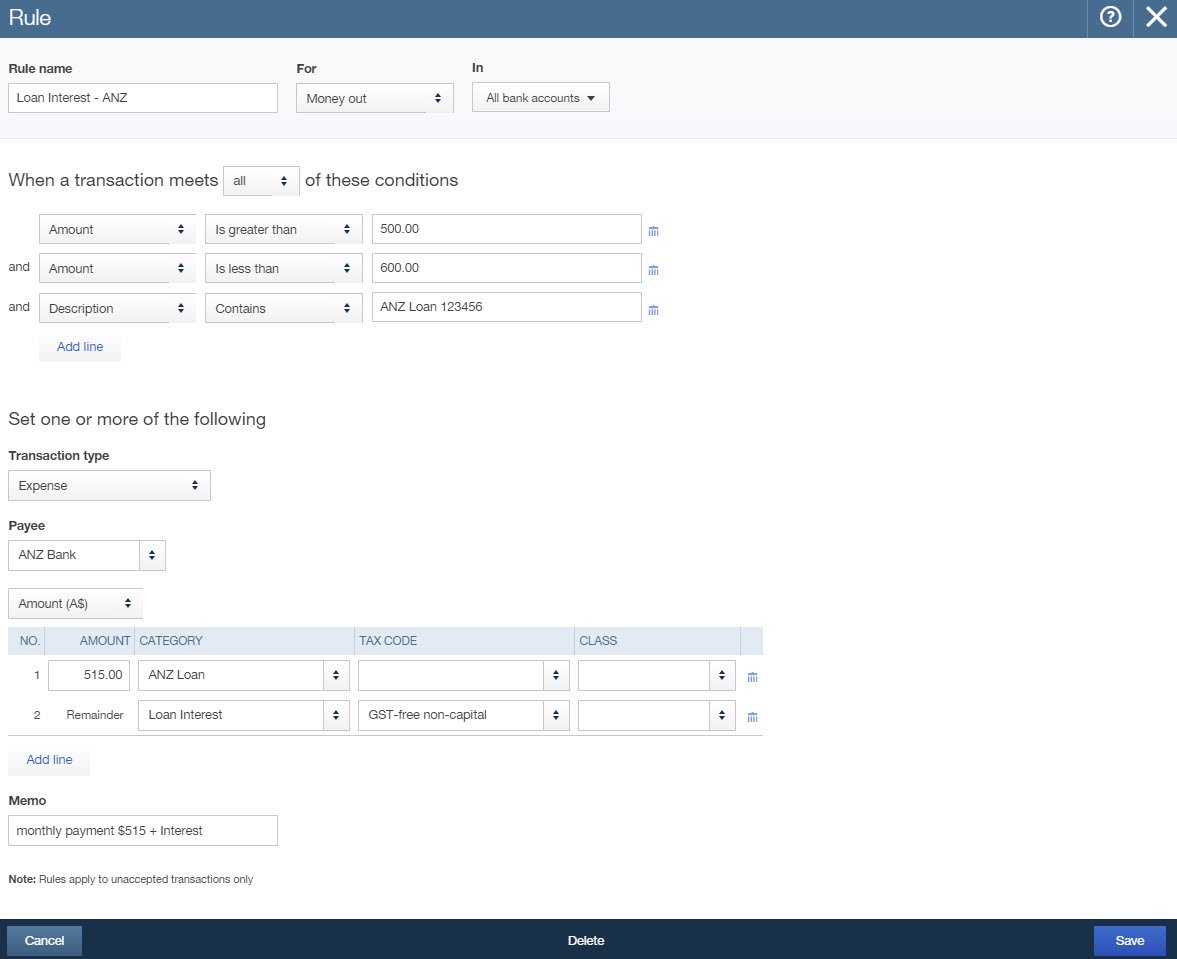
As you can see bank rules can take your bank feed allocations to another automation level entirely. Happy bank rule creating!
Related Articles
Looking for something else?

TAKE A NO-COMMITMENT TEST DRIVE
Your free 30-day trial awaits
Our customers save an average of 9 hours per week with QuickBooks invoicing*
By entering your email, you are agree to our Terms and acknowledge our Privacy Statement.
