Don't miss out! Small business, big savings 🤑 Save 50% for 12 months* Claim now
Need help choosing a plan?
Created with Sketch. 1800 917 771 Schedule a call
Need help?
We're here for you.
Schedule call
Created with Sketch.
Image Alt Text
Running a business

Connect your eCommerce and your accounting with QuickBooks Connector

The day-to-day tasks of an eCommerce business owner are immense. If you’re running an online store, you’re often busy all day with orders, updating product information, checking inventory, responding to customer enquiries and dealing with suppliers… The last thing you want to worry about is the accounting of your books, tracking GST, managing stock and staying compliant. 

One of the best ways to save time (whilst keeping your books in top shape) is to connect your accounting software with your eCommerce platform(s). 

For those of you using QuickBooks Online, the free QuickBooks Connector app helps you do just that – enabling you to sync data between your books and platforms such as Shopify, Amazon and eBay, eliminating the need for manual data entry and keeping your figures up to date.
What is QuickBooks Connector?

QuickBooks Connector

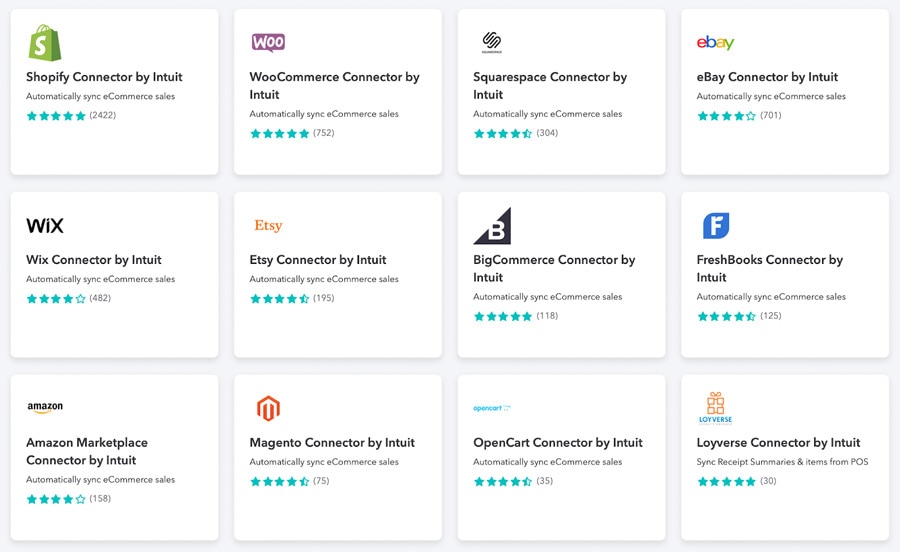
QuickBooks Connector was developed by OneSaas, a company that was founded in Sydney, Australia, before joining the Intuit family in 2021. OneSaas’s integrations have long been some of the most popular apps in the QuickBooks app store. They still are but now they are free and all fit under the QuickBooks Connector naming-umbrella. For example, if you download Shopify Connector by Intuit, you get access to all 14 integrations, including Squarespace, WooCommerce, Wix, Etsy, Magento and many more.

Another thing that’s stayed the same is their legendary support – the OneSaas/QuickBooks Connector support team are available 24 hours a day from Monday to Friday (excluding public holidays) and are always happy to help you get your connection set up right. You can connect with them here, chat with them through the app, or send them an email directly at support@onesaas.com

Optimising your eCommerce accounting

As an advisor I help business owners take control and streamline their back-end processes and I can tell you QuickBooks Connector is a life saver. 

Here are 6 reasons why I love QuickBooks Connector:

  1. Gives you visibility of all your sales channels in QuickBooks, with daily totals sync and a breakdown of your fees and deductions
  2. Saves you a lot of time by not having to manually bring your transactions into QuickBooks, such as daily sales receipts or invoices
  3. Highly customisable, allowing you to tailor what data it syncs
  4. Makes staying on top of your GST a breeze, which helps with cash flow planning
  5. Identifies which products and sales channels are most profitable, through reports in QuickBooks
  6. The support team is amazing and loves nothing more than to “get your syncs just the way you want them”!

When you run your own business, you need all the help you can get. With that said, here’s how to prepare for, connect and configure QuickBooks Connector. 

Before you get started

My example below shows how to connect Shopify with QuickBooks Online. The process is similar for the other eCommerce platforms too, but you may want to refer to the support guides for extra help. Here are a few things to consider before you connect:

  1. You’ll want to have your QuickBooks and Shopify/eCommerce accounts set up correctly and working, including the right tax codes and banks connected.
  2. In this example, I first added two accounts to my QuickBooks chart of accounts (learn how to add a new account to your COA or learn why clearing accounts are important)
  3. “Shopify Clearing Account” (Cash & cash equivalent) - This makes managing your transactions easier. You can reconcile this account like a regular bank account.
  4. “COS - Shopify Fees” (Cost of Sales) - This simplifies the tracking of your Shopify fees.
  5. Inventory
  6. Inventory management is only available in QuickBooks Online Plus. For those with Simple Start or Essentials, you may want to create items as non-inventoried items.
  7. QuickBooks’ Inventory functionality is great for lower volume requirements. If you sell hundreds of orders a week, manage a large inventory or are manufacturing or assembling products, consider an inventory app and/or only sync payouts with QuickBooks.
  8. Learn more about QuickBooks Connector and stock control.

Step 1: Connect QuickBooks with your eCommerce platform

The first thing to do is attach QuickBooks Connector, this creates the bridge for your data between QuickBooks and your eCommerce platform.

Connect QuickBooks with your eCommerce platform

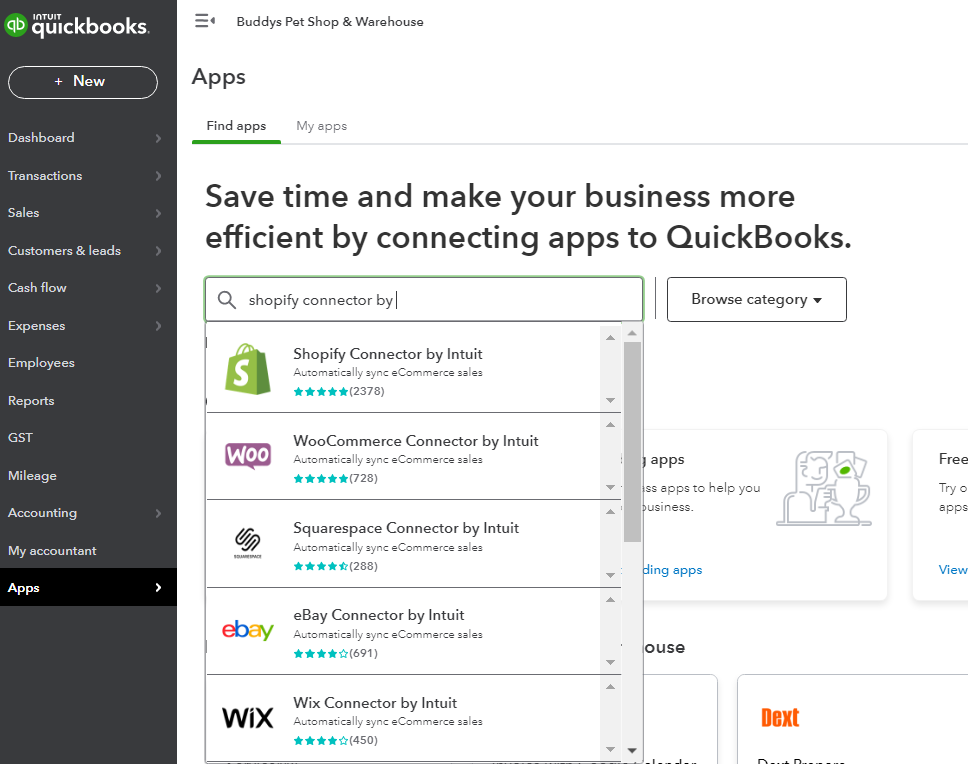
Sign in to QuickBooks Online and head to the Apps section on the left menu bar. Type the name of the eCommerce platform you’re after and add “connector by Intuit”, select it and click Get app now. It will take you to the connections screen, where you will want to click on Connect to Shopify (in this example). 

Connect QuickBooks with your eCommerce platform

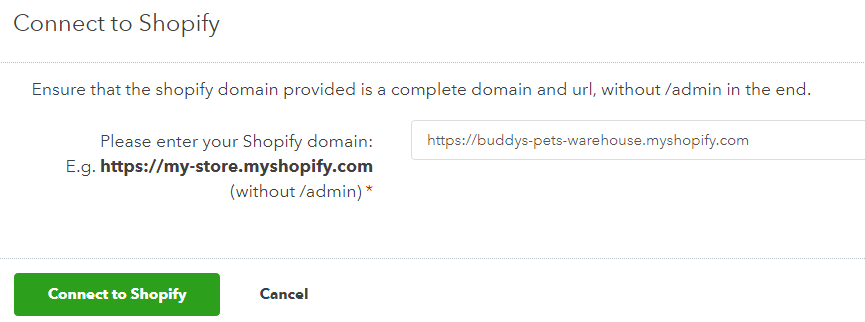
Enter your Shopify domain name URL and click Connect to Shopify once again.

Connect QuickBooks with your eCommerce platform

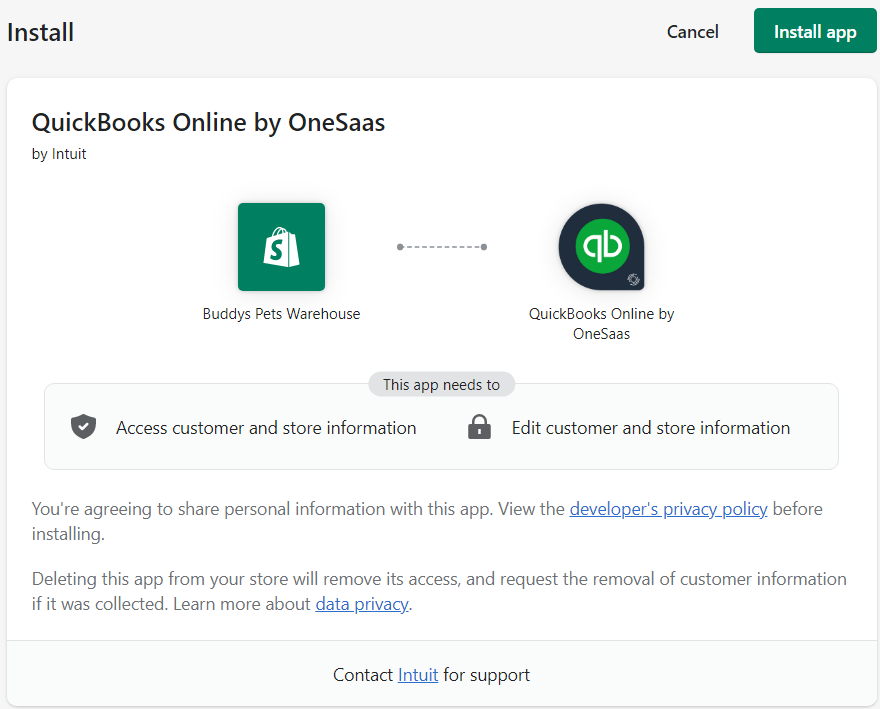
Click on the Install app button.

Congratulations! Your connection is established.


Step 2: Configure your connection

Now for the fun part! Depending on how comfortable you are with accounting terms, this may be a bit tricky, so take your time.

Go back to your QuickBooks account, head to Apps, then My Apps and Launch Shopify. Here you will see the configuration options where you map data from Shopify to QuickBooks.

Please note: 

  • There are a number of synchronisation options, read them carefully as what's right for someone else's business might be wrong for yours. If in doubt, reach out to that friendly QuickBooks Connector support team and they will get you set up to your specific requirements.
  • If you are a high volume business, consider against syncing every sales receipt with QuickBooks as this will likely be overkill. Syncing Payouts only may be a better option.

To show the configuration process and the flow of data, I’ve created two videos where I solve for the needs of a fictional business named Buddy’s Pet Shop.

Example

Buddy’s Pet Shop & Warehouse is an online store that sells through Shopify. We’re using QuickBooks Connector to sync sales data from Shopify to QuickBooks Online. Buddy’s has 3 sales for the day that we have chosen to sync to QuickBooks as Sales Receipts. The total is $213.95. Instead of using a bank account for the Sales Receipts, we set up a new account in our QuickBooks Online chart of accounts called “Shopify Clearing Account”, and use it like a bank account. We will receive a total of $213.95 from our payment gateway for that day – the expense for the payment will go to “COS - Shopify Fees”, which is another account we have set up, and is called a Cost of Sales account. 

Once you’ve finished your configuration, click the “Turn Integration On” button and let those sales come through to QuickBooks!

Step 3: Streamlining your accounting process in QuickBooks

Now that we’ve connected and decided which data will come across to QuickBooks Online, we need to look at the accounting process that will affect your figures. 

The sync will bring your transactions from Shopify, to your Sales in QuickBooks. I generally map these to a Shopify Clearing account. You will also find the fees as an expense that comes across to an account called “COS - Shopify Fees” The figures should match the payout figure from Shopify for that day/period.

Example

The sync pulls Buddy’s Sales receipts from Shopify across to Sales in QuickBooks. The transactions will be mapped to the “Shopify Clearing Account” account, you will find the fees as an expense in the account called “COS - Shopify Fees”. These amounts should match those in your Shopify daily Financial summary report.

When the payout amount arrives in your bank transactions area, we transfer it across to the “Shopify Clearing Account”, which reconciles the banking and sales for that day. 

TIP: set a Bank Rule for the transfer to save time.


In the Shopify Finances report summary, you will find your total Gross Sales, Discounts, returns, gift vouchers, GST, and fees. I recommend reviewing this report when you are reconciling your clearing account (as shown in the video). 

This allows you to ensure that all transactions have been received in your bank. I suggest you do this on a weekly basis. It's a great way to keep your books up to date and ensure accuracy. It will also highlight any discrepancies that may not be correct in your online shop.

If you have other online sales channels, consider repeating this process with them for a full view of your business.

It’s worth repeating, If at any point in this guide you run into issues, remember, QuickBooks Connector support is only an email or live chat away. For additional help, see the comprehensive setup guides and support documentation on the QuickBooks Connector support page

Get insights about your business with QuickBooks

And there you have it! Your eCommerce data is synced and organised in QuickBooks, saving you hours in weekly admin and giving you time back to spend on growing your business. Your GST is being captured for BAS calculations, and importantly your accounting end of quarter and end of year financials are accurate, helping you stay compliant with the ATO. 

With accurate figures for your sales, you can even unearth insights that you may not have seen before. Running reports in QuickBooks such as Sales by Product/Service Detail will give you an understanding of which products are most popular and profitable. This allows you to determine where your main sources of income are coming from, which may justify further investment, as well as those which are less beneficial for your business.

Learn more about QuickBooks Online or QuickBooks Connector.


Related Articles

Looking for something else?

Get QuickBooks

Smart features made for your business. We've got you covered.

Help Me Choose

Use our product selector to find the best accounting software for you.

QuickBooks Support

Get help with QuickBooks. Find articles, video tutorials, and more.

Stay up-to-date with the latest small business insights and trends!


Sign up for our quarterly newsletter and receive educational and interesting content straight to your inbox.

Want more? Visit our tools and templates!

By signing up you are agreeing to our terms and privacy policy.

A happy small business owner signing up for the QuickBooks newsletter on laptop