SALE Buy now and save 50% off today See plans & pricing
QuickBooks Blog
Need help choosing a plan?
Created with Sketch. 1800 917 771 Schedule a call
Need help?
We're here for you.
Schedule call
Created with Sketch.
Product Release
product update

April 2024 Product Update

Enhanced Budgeting Experience


Budgets provide businesses with a map to forecast results and measure performance. The intent of a budget is to provide visibility - and often peace of mind - into the financial stability of the business. To help our customers establish a solid budget, we have updated the budgeting function in QuickBooks Online Plus and Advanced.


Accessed via Budgets in the left hand navigation in QuickBooks Online Plus or via Financial Planning in the left hand navigation in QuickBooks Online Advanced, outlined below are the new features you have access to. 


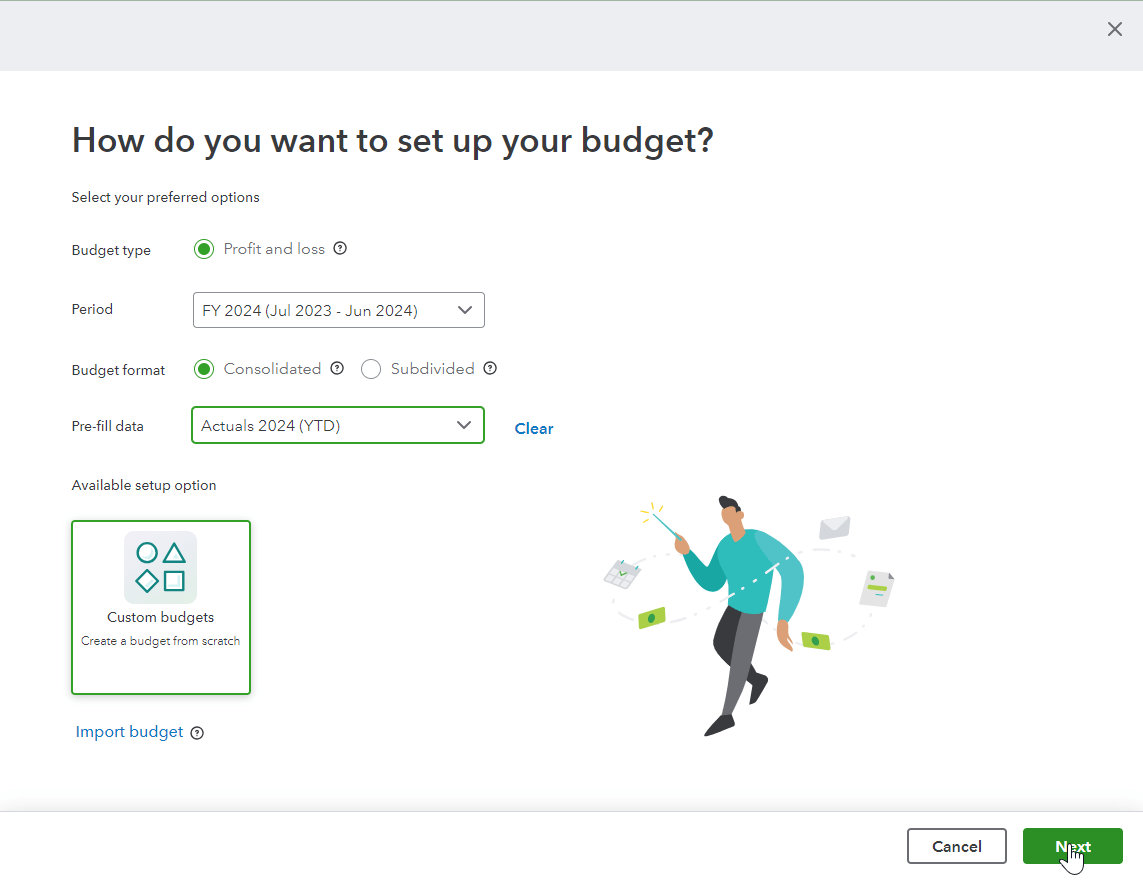
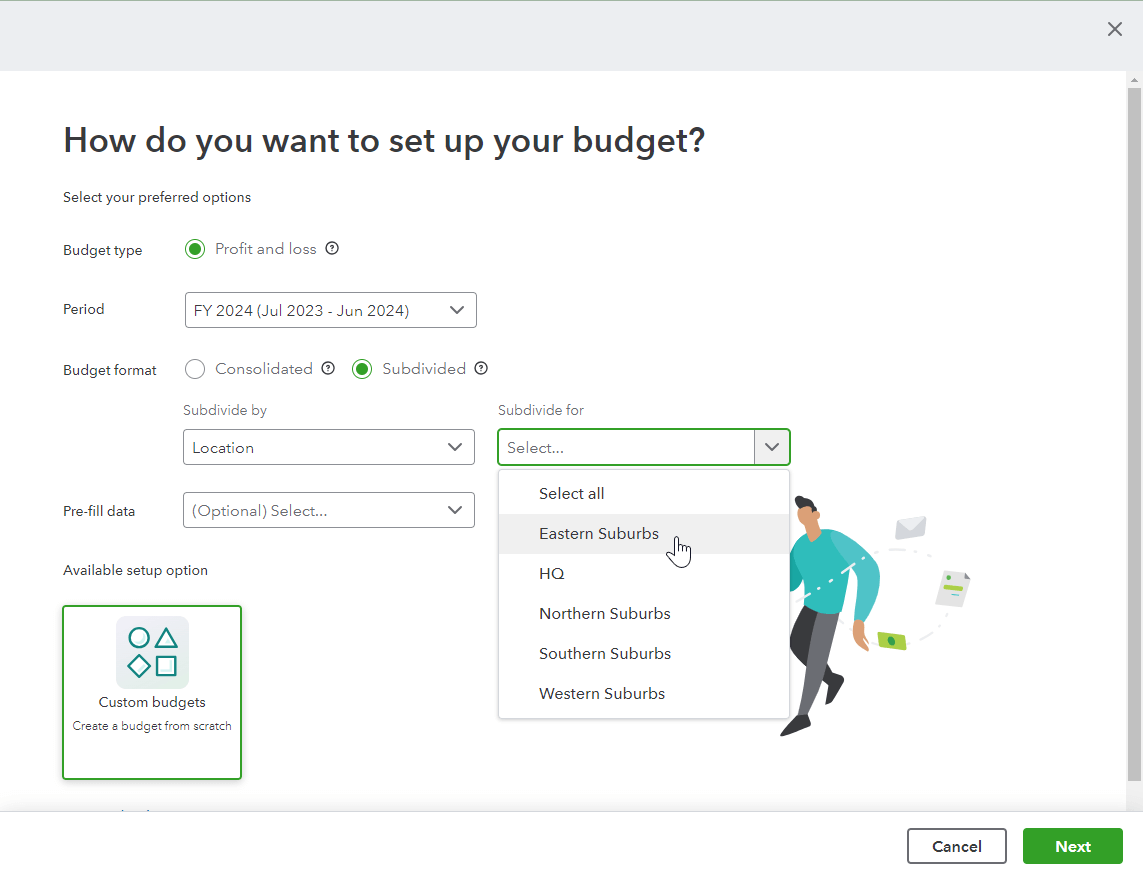
The budget wizard

When you create a budget, you will be provided guidance on the set up process. During this step, you’ll get to outline the criteria you want included in your budget such as which financial year it relates to, whether the budget is consolidated or subdivided by location, class or customer, what reference data you would like included in the budget or whether you want to create a customised budget from scratch. 

Image Alt Text

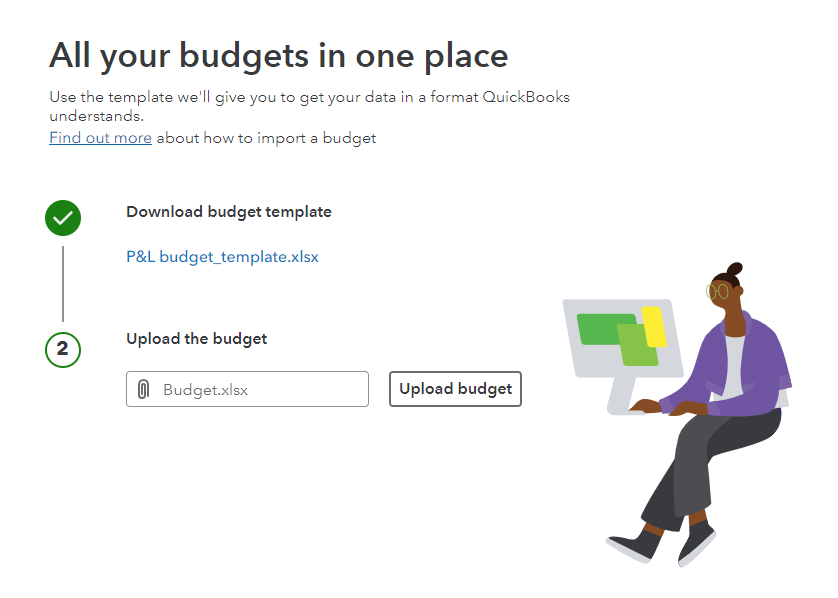
Alternatively, you can always create a customised budget from scratch by importing it from Excel using the template provided.

A black and white image of a computer keyboard.

Consolidate vs Subdivided budgets

You can now select whether you would like to create a consolidated budget or whether you would like to subdivide it using the locations, classes or customers set up for your business. 


Using the sub-divided format enables you to drill into the detail and have budget visibility across the locations, classes or customers in your business. You can learn more about using locations and classes here

A black and white image of a computer screen.

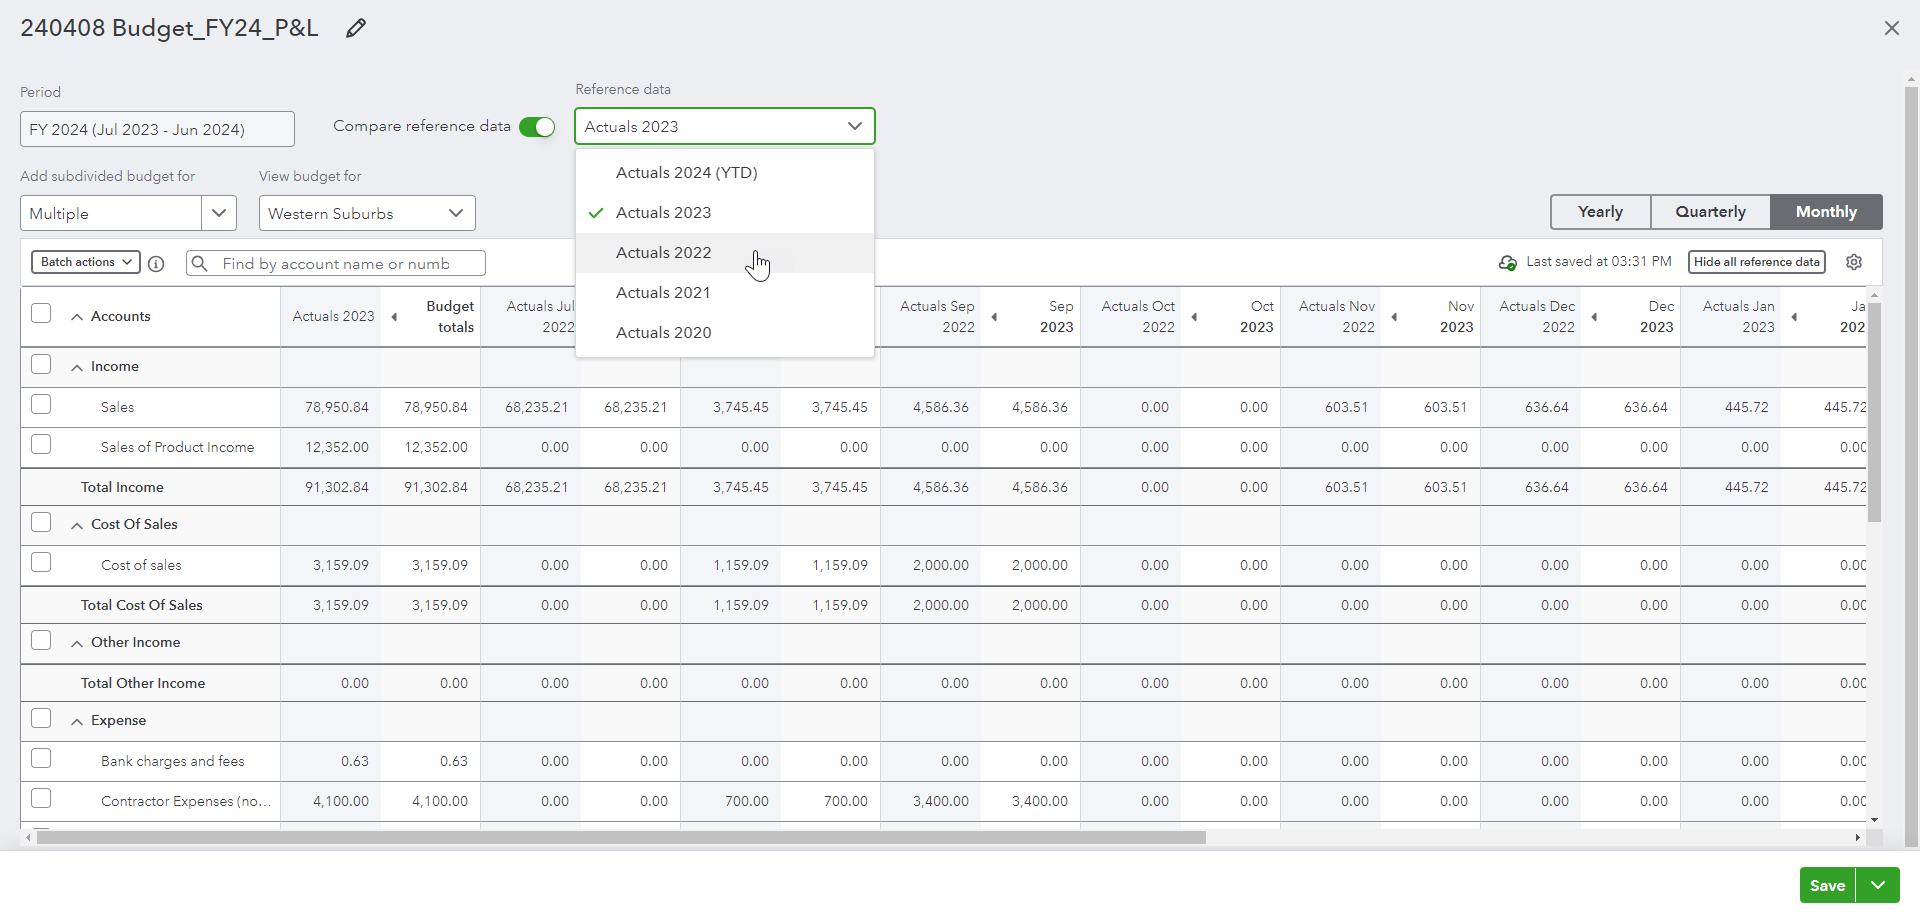
Easily compare your actual data 


When creating your budget or simply to review as a comparison, you can select which data you would like to use. You can select to compare your budget values to the current year or prior year data at any time.

Image Alt Text

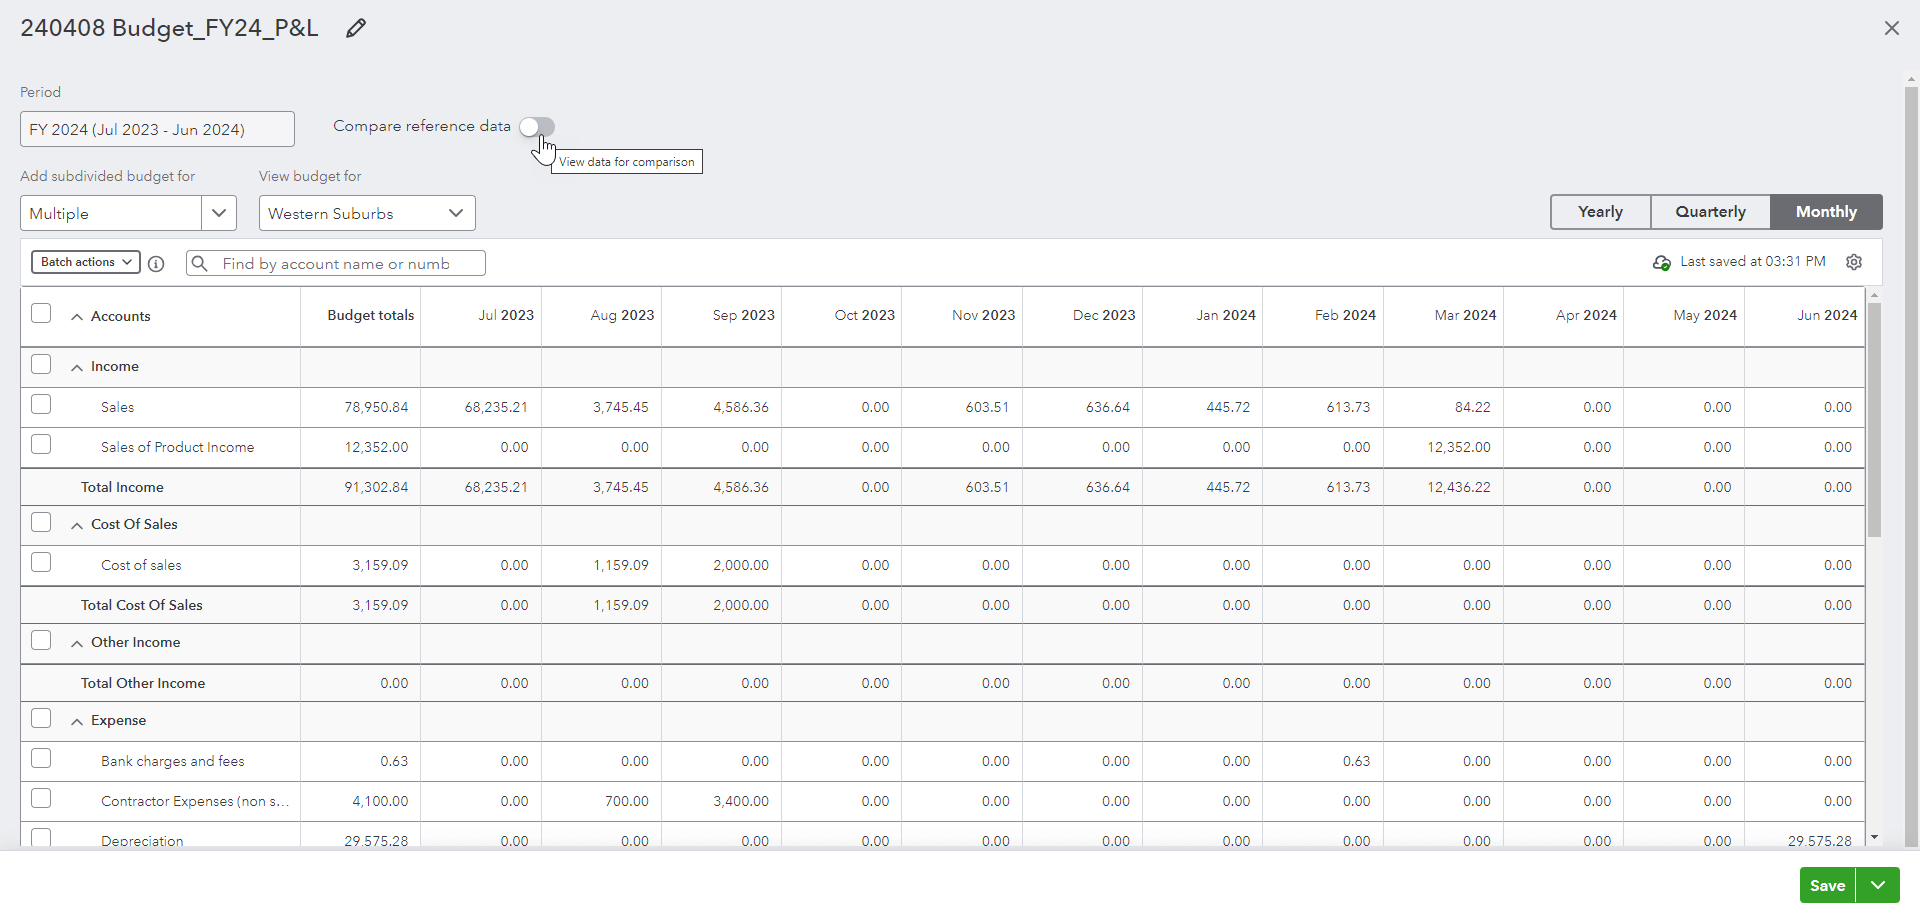
To compare or not to compare


For additional flexibility, you can elect to turn on or off displaying your actual data with your budget data.

Image Alt Text

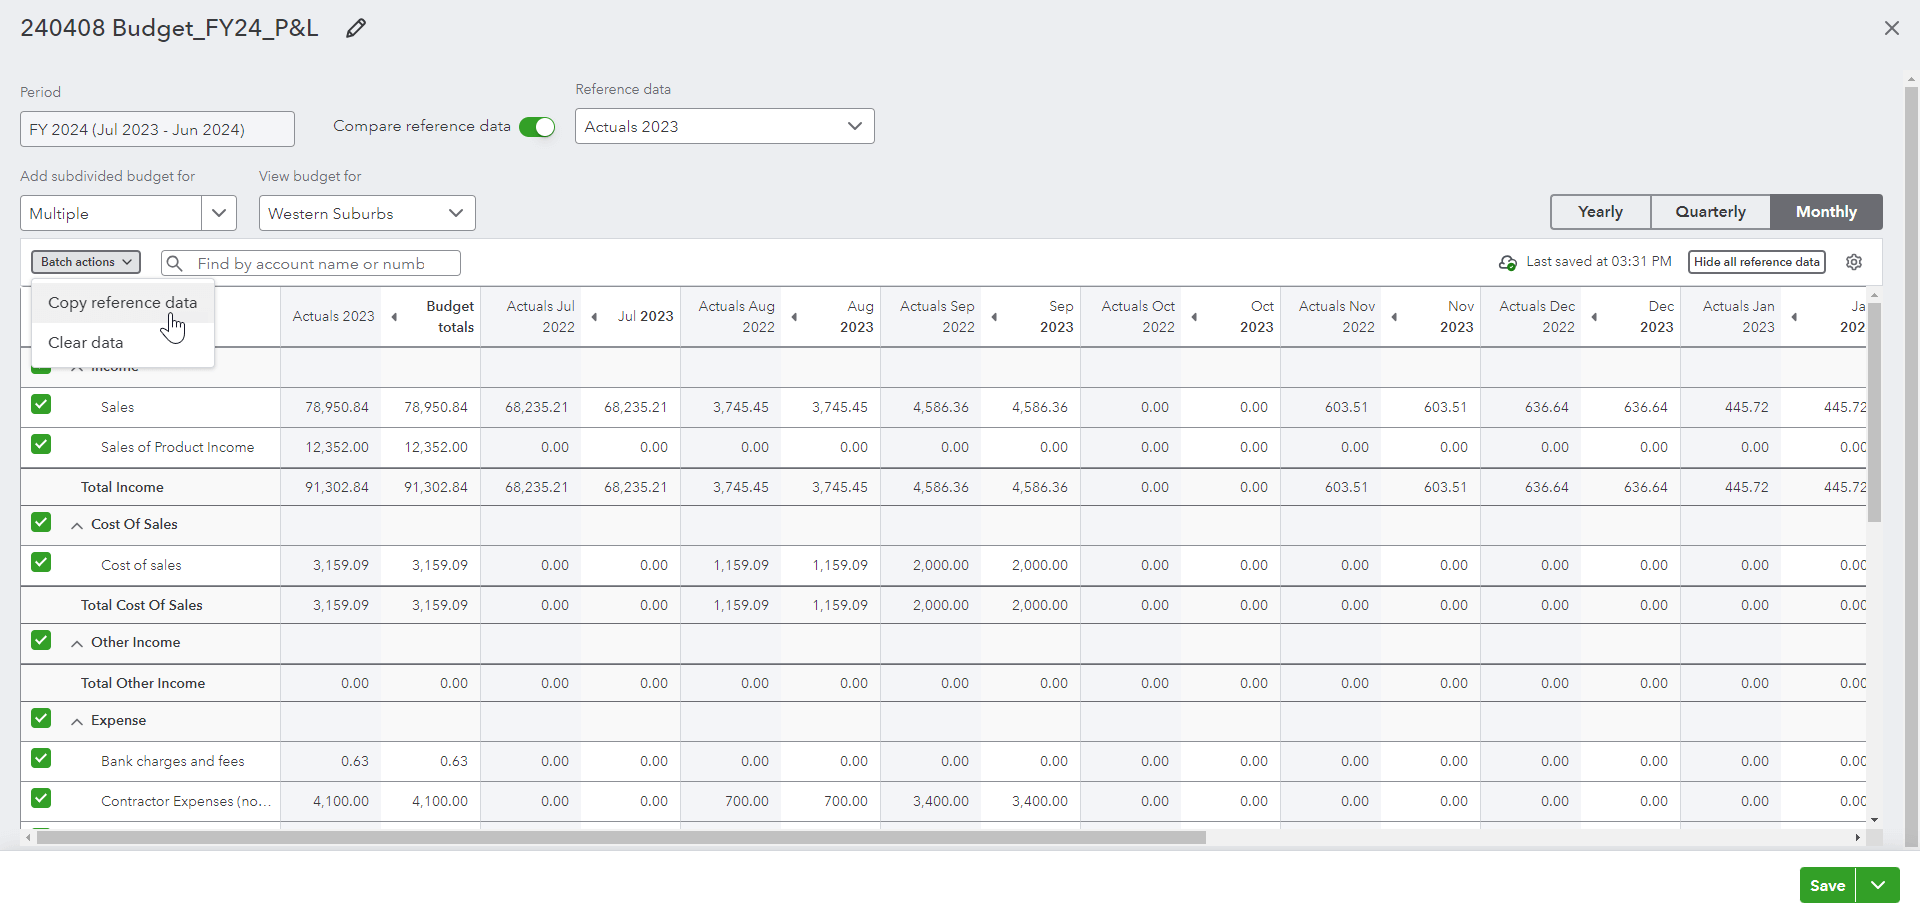
Batch options

Where required, you can select multiple accounts to either clear the data or to copy reference data.

A black and white image of a cell phone.

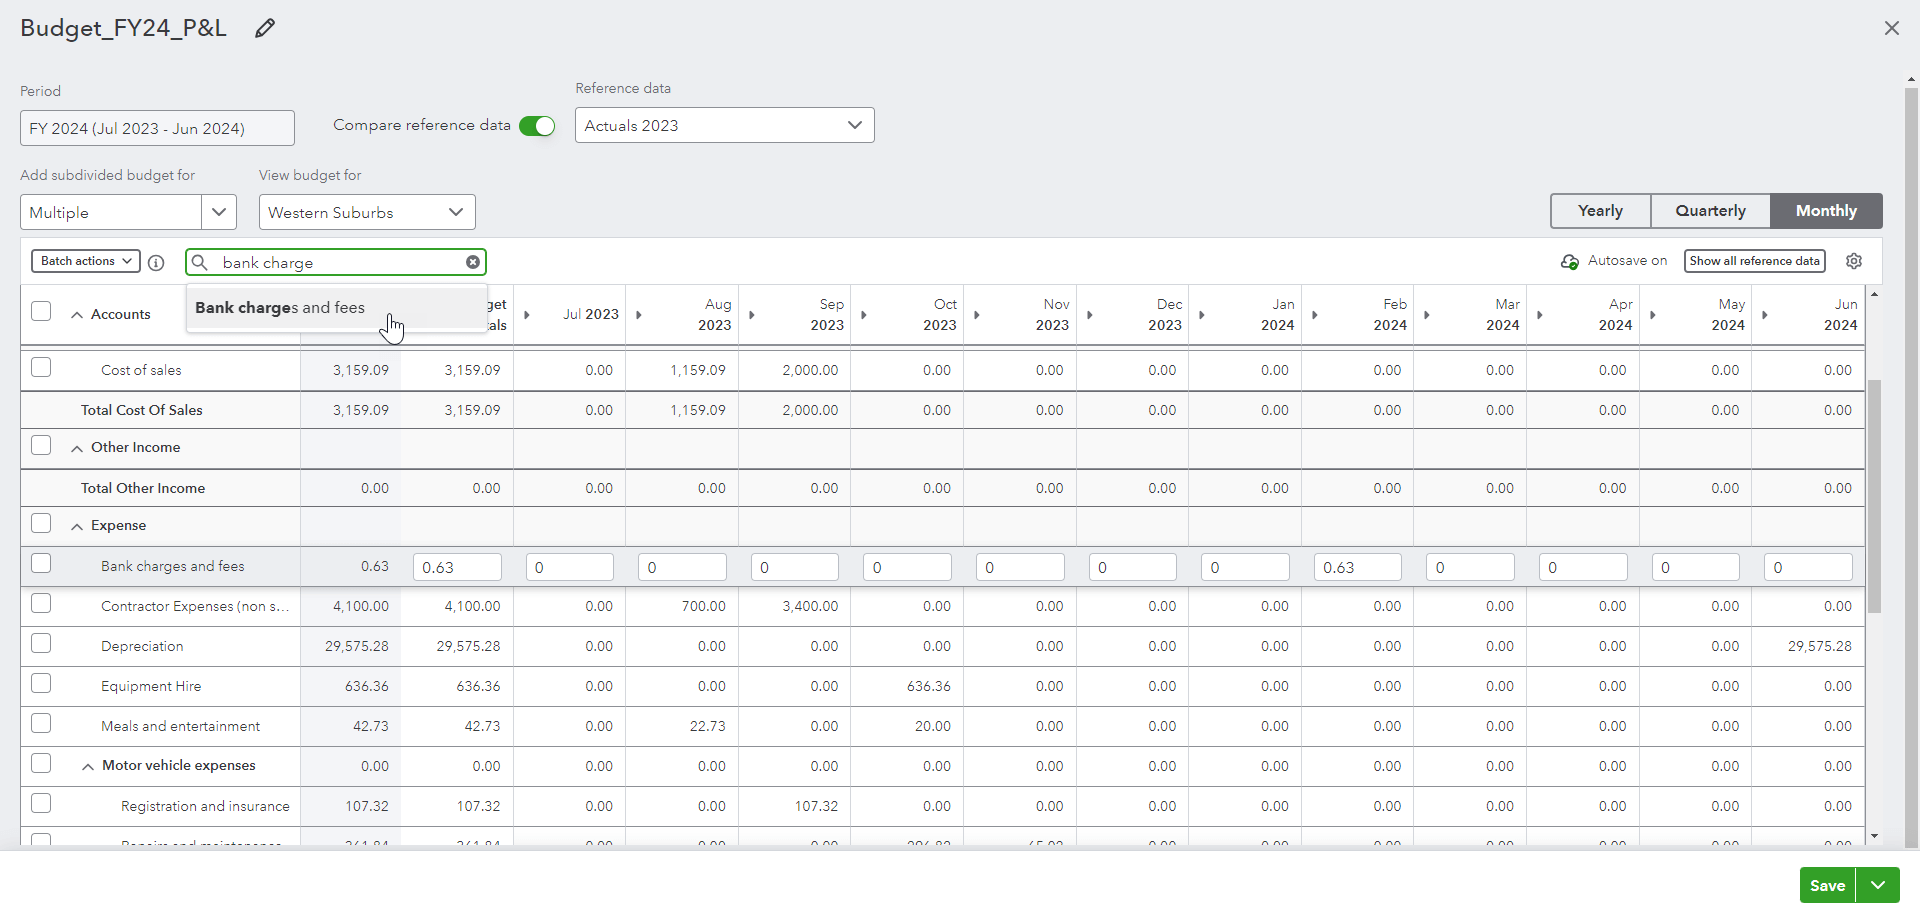
Search functionality

To help you navigate around larger budgets, you can use the search functionality to find a particular chart of account code or account name.

Image Alt Text

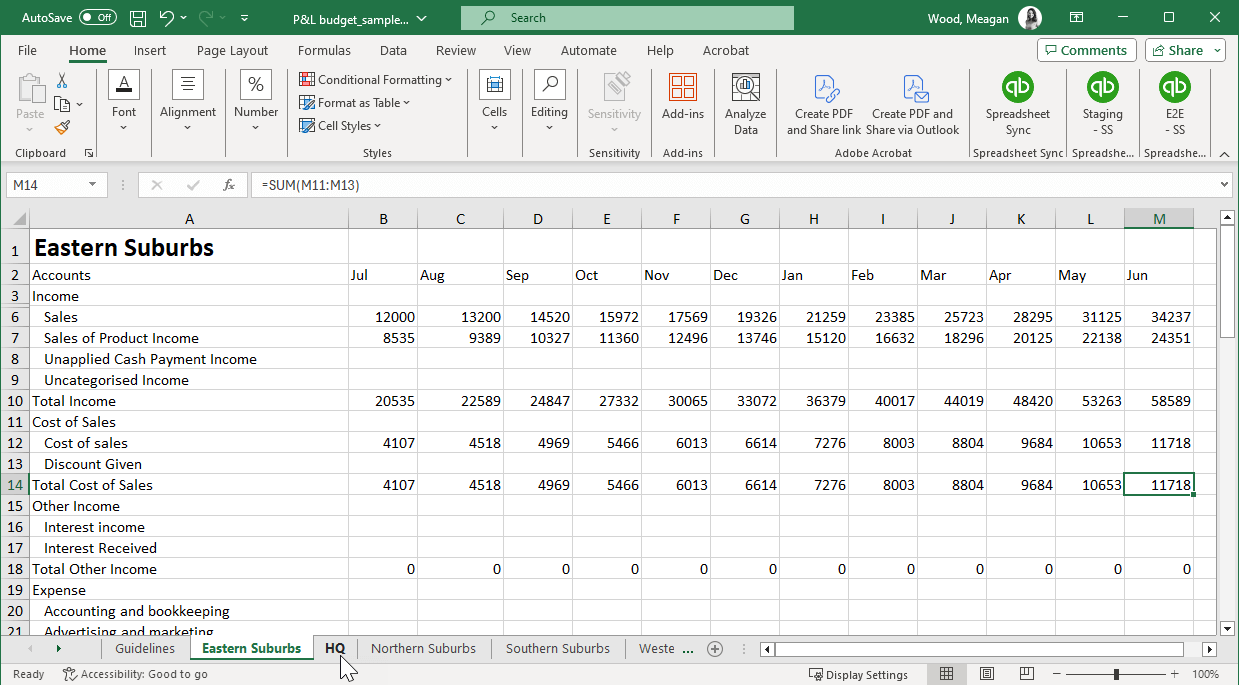
Additional Budget Import Option

Historically you were able to import a consolidated budget. Today, you have an additional option to import your budget subdivided by Location, Class or Customer.

A computer keyboard and mouse on a table.

Using the provided template, any locations, classes or customers are automatically added to the import template for you to import. You can learn more about importing budgets here.

Updated Roles and Permissions

Based on recent research, we’re making changes to our standard user roles in QuickBooks Online Essentials, Plus and Advanced to make managing user access even easier. 


The changes will commence rolling out from mid May. Importantly, these changes will not impact the roles currently available in QuickBooks Online Accountant.


What’s changing?

We’ll be introducing a new role, updating three existing roles and removing two roles. You can learn more about these changes below.


New Bookkeeper role

Due to popular demand, we’re adding a Bookkeeper role to support those businesses who have an in-house bookkeeper. 


Updated roles

We’re also updating three existing roles:


  • The ‘Standard limited customers only’ role will be renamed to ‘Accounts Receivable Manager’ and updated to provide additional access to record bank deposits to help complete the accounts receivable process.
  • The ‘Standard limited suppliers only’ role will be renamed to ‘Accounts Payable Manager’ and users assigned this role can now be designated as the approver for bills when setting up workflows in QuickBooks Online Advanced.
  • The ‘Standard all access without payroll’ role will be renamed to ‘In-house accountant’ and users assigned this role can now be designated as the approver for bills when setting up workflows in QuickBooks Online Advanced.


Removed roles

The ‘Standard no access’ role and the ‘Standard limited customer and supplier’ role will be discontinued however if your clients currently have users assigned to these roles, they will continue to operate as they do today. 


If you’d like to learn more about managing how to manage access or how to add users in QuickBooks Online, you can learn more in this article or by watching this video

Payroll super payment improvements


Integrate Super Payments with a Pay Run


Functionality has been added to the pay schedule settings, including the option to automatically create a super payment when finalising the pay run. Payrun and super payments modules are now connected, ensuring that superannuation contributions from each payrun are batched together.


This feature introduces a seamless integration between pay runs and superannuation payments and reduces the steps required for users to improve their superannuation compliance obligations.


This feature is only available to full admin users.


The new functionality saves full admin users time by being able to create a super payment when they are finalising a pay run rather than having to do this as a completely separate process in the reporting section and simplifies superannuation compliance as the pay run and super payments module are now connected.


Pay Schedule Settings

As part of the pay run finalisation process, users can now select to create a super payment immediately, or manually at a later date. Find out how below:


1. Navigate to Pay Schedules

2. Edit existing Pay Schedule

3. Click here under the pay run finalisation settings

4. From here you can select to create super payment immediately, or manually at a later data

5. To save your changes, select Next and Complete


Please note:

For users with Beam integration enabled, super payments created from the pay run will automatically be created as a Beam super payment by default.


For users who do not have Beam integration enabled, super payments created from the pay run will automatically be created as a manual super payment by default.


Icon Status Guide

You can check the status of your super payment on the pay runs page by hovering over the super icon, located next to the date paid column.


Grey: when the icon is grey, the super payment hasn’t been submitted (Beam super payments) or marked as paid (Manual super payments).


Yellow: when the icon is yellow, the super payment has been submitted, this icon will only appear for users with Beam integration enabled.


Green: when the icon is green, the super payment has been received (Beam super payments) or marked as paid (Manual super payments).

Red: when the icon is red, the super payment has failed, or there may be an error or return to your super payment, this icon will only appear for users with Beam integration enabled.


Related Articles

Looking for something else?

Get QuickBooks

Smart features made for your business. We've got you covered.

Help Me Choose

Use our product selector to find the best accounting plan for you.

QuickBooks Support

Get help with QuickBooks. Find articles, video tutorials, and more.

A computer screen showing a picture of a computer.

TAKE A NO-COMMITMENT TEST DRIVE

Your free 30-day trial awaits

Our customers save an average of 9 hours per week with QuickBooks invoicing*

No credit card needed

Cancel anytime

Unlimited support

By entering your email, you are agree to our Terms and acknowledge our Privacy Statement.