Connect your account to QuickBooks
By connecting your bank accounts to QuickBooks Online, you can easily track the profitability of your business. Follow this step-by-step guide to connect your accounts with a few simple clicks.
We'll run you through what connection is best for you based on your bank:

Benefits include

Fast, easy, secure setup process

No more manual data entry
as transactions are automatically downloaded into QuickBooks and reconciled

Getting a full picture
of your past, present and future scheduled transactions and cash flow
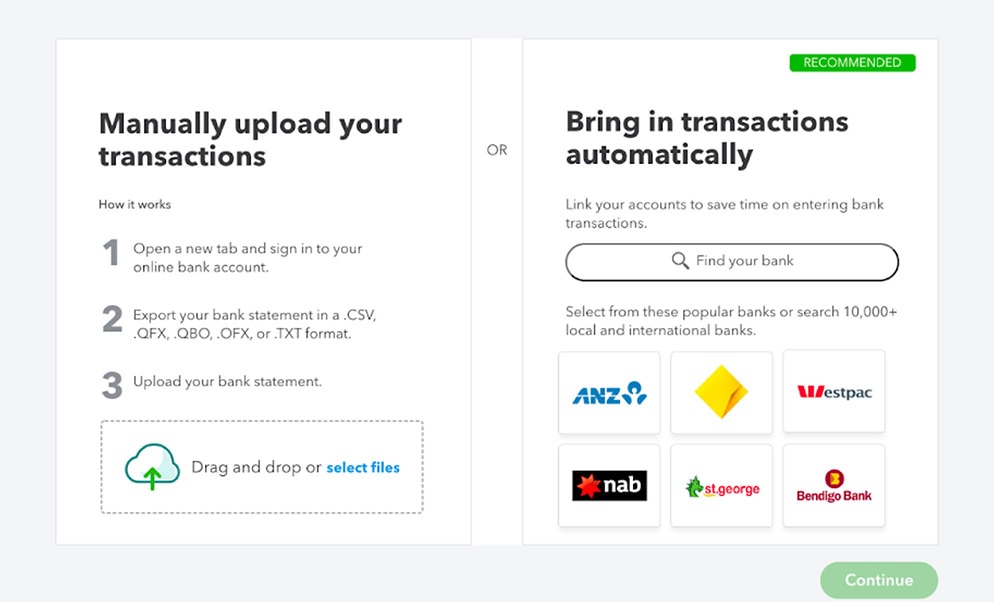
Choose your bank account below
To get instructions specific to your bank account select your bank and account type below.
For the most accurate information on connecting your account, make sure to filter to your
account details!
Step 1
Step 2
Step-by-step guide
Standard Feeds CAF
Standard Feeds CAF
Step 1
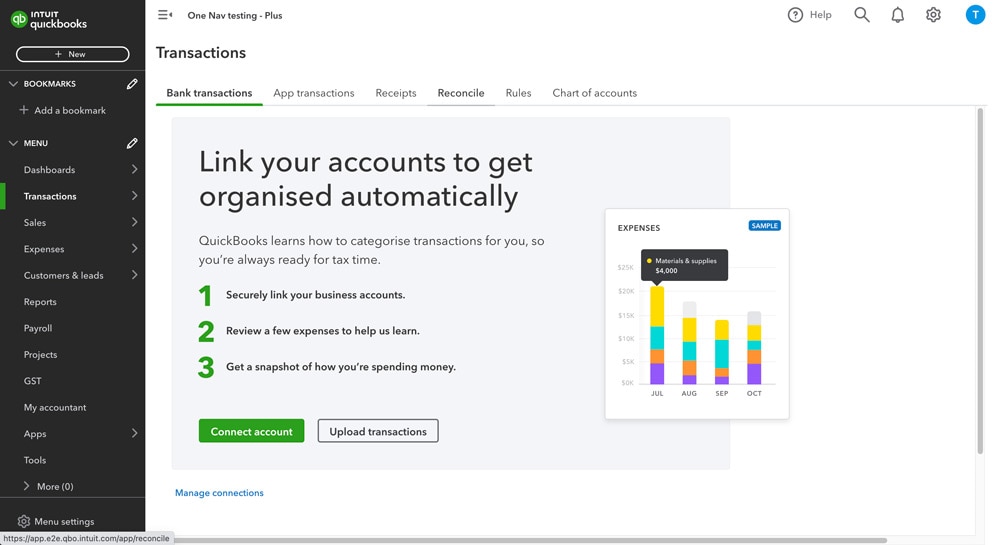
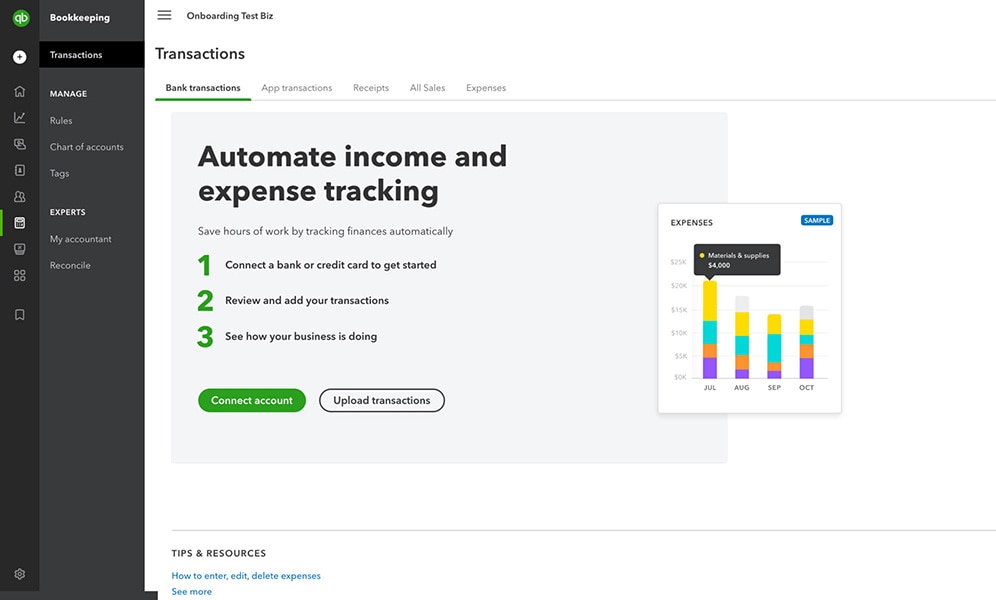
- Select Transactions from the left menu.
- Go to Bank transactions (Take me there).

Step 2
- Select the green Connect account button.
Step 3
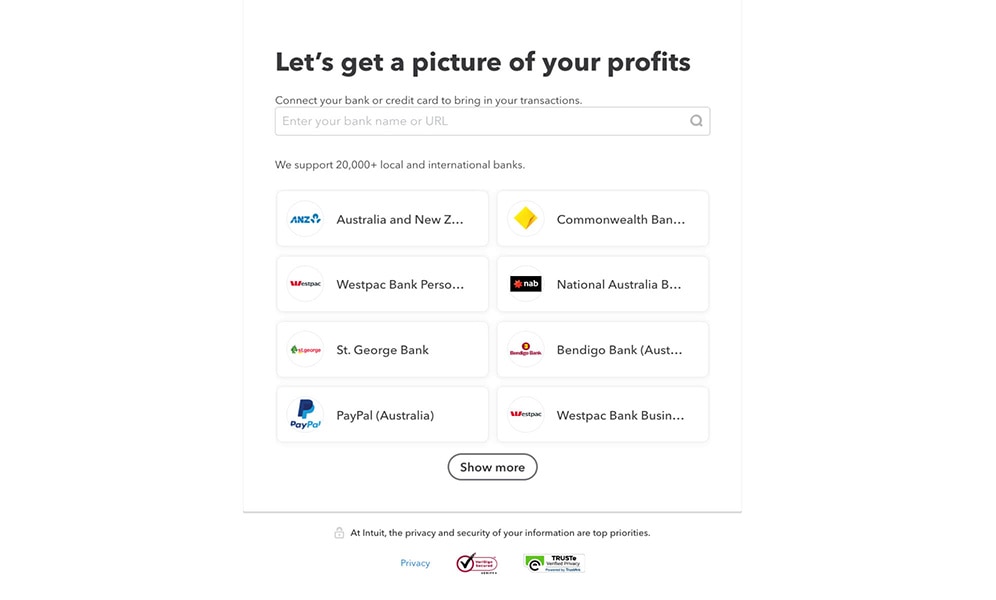
- Select your bank from the ones shown. If your bank isn't one of the options, enter the bank's name or URL in the search bar.
- A new page will prompt you to sign into your account. Click Continue.

Step 4
- Log in to your bank with your usual log in credentials.
- Select the account you want to connect to QuickBooks and click Finish.
- Your account(s) will appear in your QuickBooks Banking section. This can take a few minutes.

Step 5
- Enter the dates for the data you want to access. You can import up to two years of data for each account.
- Click Connect to continue. QuickBooks will import the required information, the green checkmark will confirm your data is ready to view.
Step 6
- Select the Banking tab from the left menu.
- All your transactions will be listed below each account.
- To make the most out of your connection, take the time to review the transactions, categorise them and action. When you're more familiar with the tool you can create rules to save even more time.
Step 7
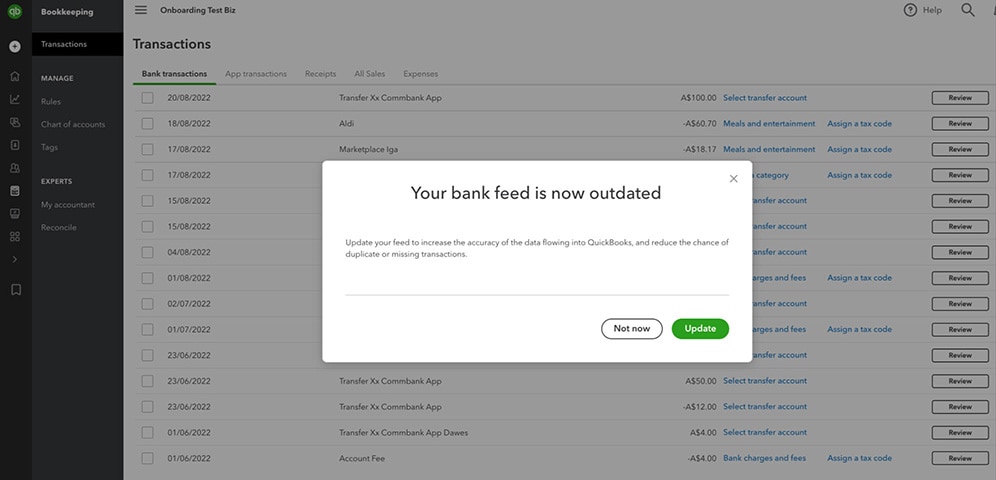
- After 24 hours you will see a pop up stating that your bank feed is outdated. This is because a direct bank connection feed is available.
- Direct feeds are more secure and stable, so we highly recommend you follow the onscreen instructions to update.
- Follow the step-by-steps instructions here.
Step-by-step guide
Standard Feeds
Standard Feeds
Step 1
- Select Transactions from the left menu.
- Select the Bank Transactions tab.
Step 2
- Select the green Connect account button.

Step 3
- Select your bank from the ones shown. If your bank isn't one of the options, enter the bank's name or URL in the search bar.
- A new page will prompt you to sign into your account. Click Continue.

Step 4
- Log in to your bank with your usual log in credentials.
- Select the account you want to connect to QuickBooks and click Finish.
- Your account(s) will appear in your QuickBooks Banking section. This can take a few minutes.
Step 5
- Enter the dates for the data you want to access. You can import up to two years of data for each account.
- Click Connect to continue. QuickBooks will import the required information, the green checkmark will confirm your data is ready to view.

Step 6
- Select the Banking tab from the left menu.
- All your transactions will be listed below each account.
- To make the most out of your connection, take the time to review the transactions, categorise them and action. When you're more familiar with the tool you can create rules to save even more time.
Step-by-step guide
Direct Feeds
Direct Feeds
Step 1
- Select Transactions from the left menu.
- Select the Bank Transactions tab.
Step 2
- Select Connect Account if this is your first time connecting. Or select Add account or Link account if you've already created one.
Step 3
- Select your bank from the ones shown. If your bank isn't one of the options, enter the bank's name or URL in the search bar.
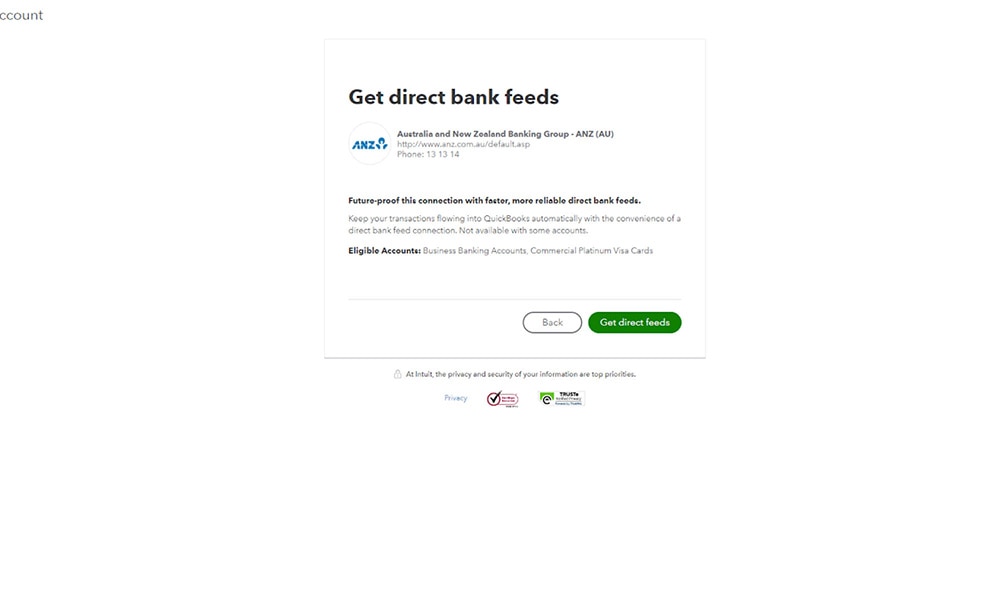
- Select your bank and relevant bank account type. Select Get direct feeds.
Step 4
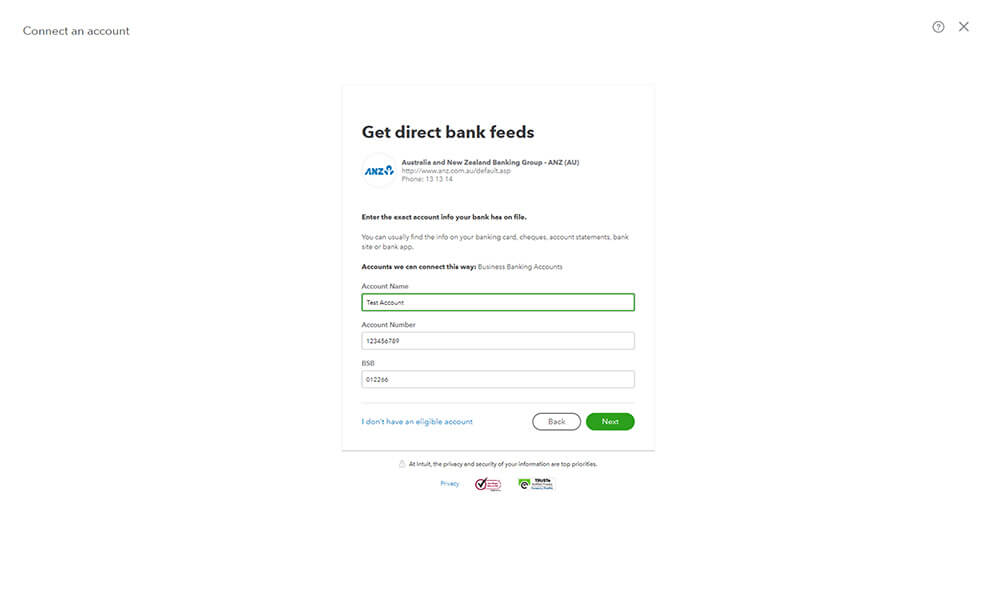
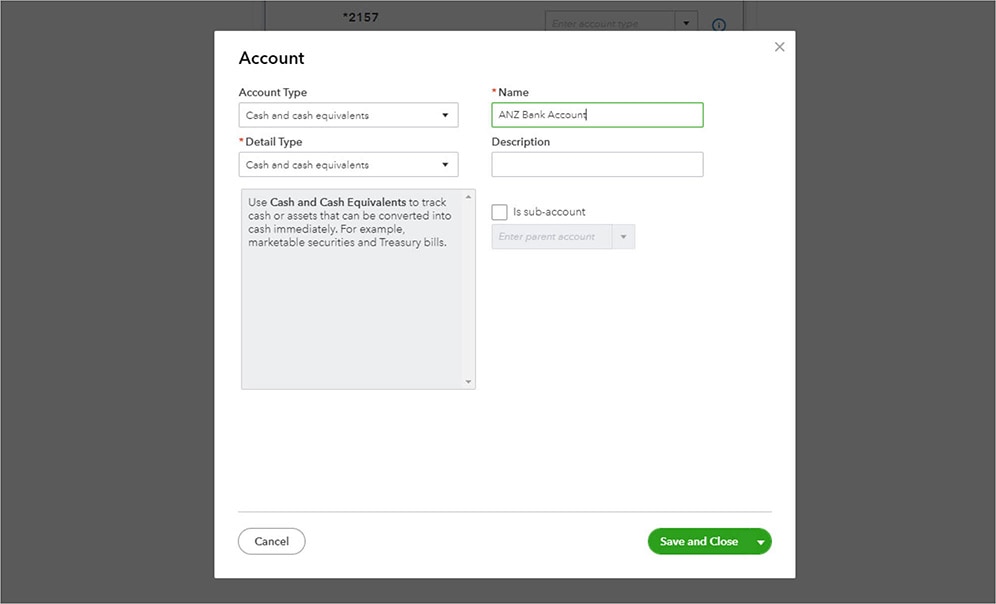
- Select your relevant bank account type and enter your bank account details. Click Next.
- Follow the on screen prompts to enter your bank account details, Click Next.
- Select the account you want to connect, edit account type to add bank account to your click Connect.
- A new page will load to confirm you have entered the correct details, Click Next.
Step 5
- Select the account you want to connect to QuickBooks and enter the account type.
- You can pull transactions from an earlier date, Select the data range you want to bring in, then click Connect.
- A new page will populate a unique reference number the bank assigned to your account. Copy the code and click Go to my bank to sign in to your account and activate new bank connect, click Done.
- You can find more information on how to activate ANZ Direct Feeds here.
Step 6
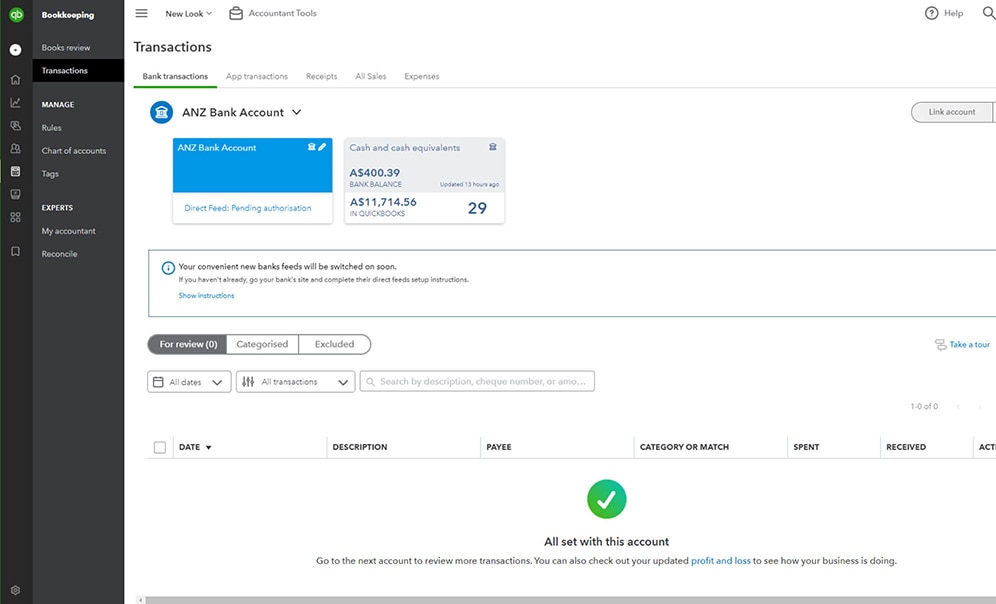
- Your account(s) will appear in your QuickBooks Banking section. This can take a few minutes.
- Select the Banking tab from the left menu.
- All your transactions will be listed below each account.
- To add your historical transactions in you can do this by importing a CSV file.
To make the most out of your connection, take time to review the transactions, categorise them and action. When you're more familiar with the toll you can create rules to save even more time.
Step-by-step guide
Direct Feeds CAF
Direct Feeds CAF
Step 1
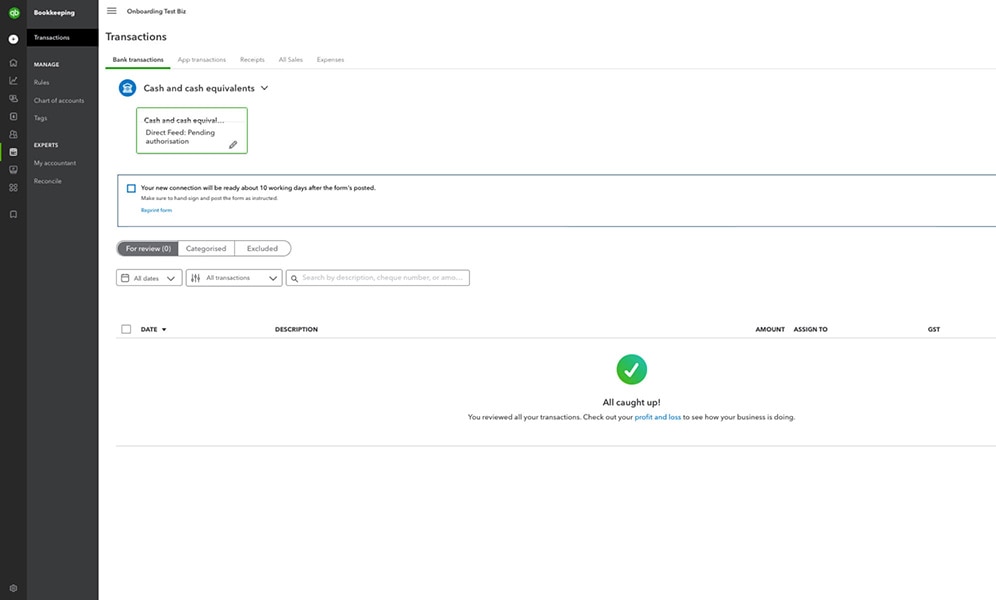
- Select Bookkeeping from the left menu. Go to Bookkeeping, select Transactions, and select Bank transactions.
Step 2
- Select Connect Account if this is your first time connecting. Or select Add account or Link account if you've already created one.

Step 3
- Select your bank from the ones shown. If your bank isn't one of the options, enter the bank's name or URL in the search bar.
- Select your bank and relevant bank account type. Select Get direct feeds.
Step 4
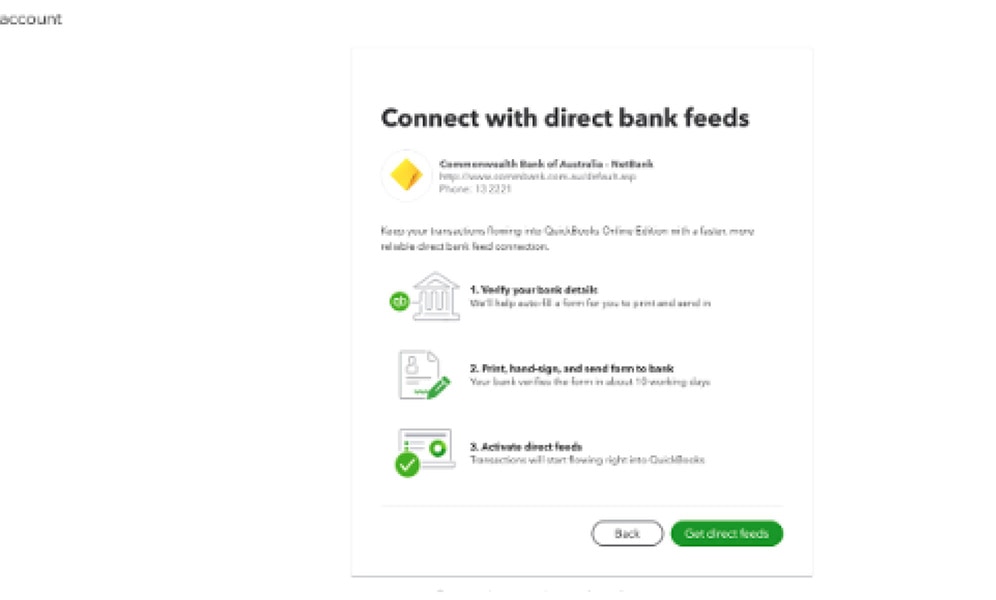
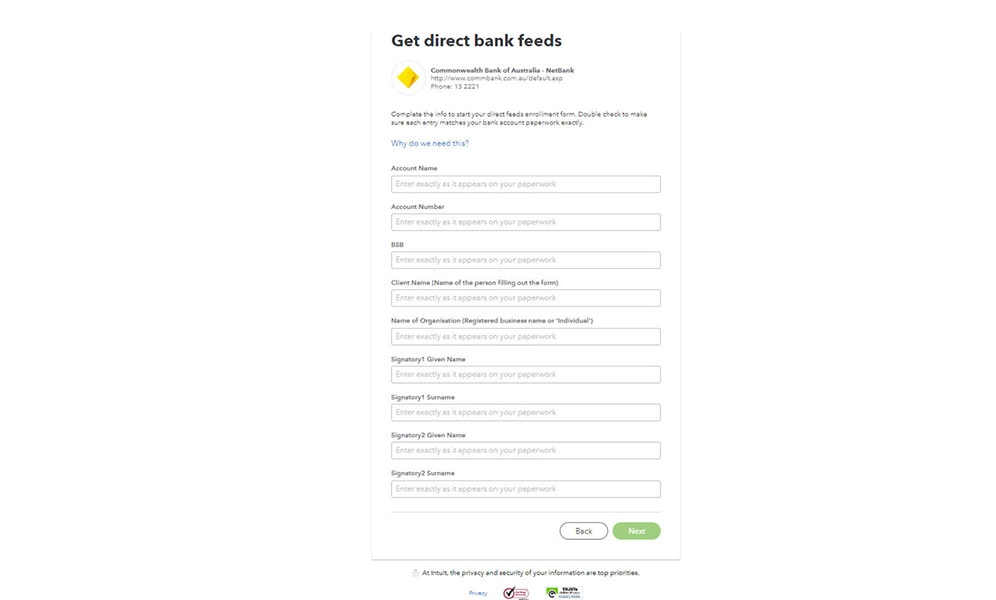
- Select Get Direct Bank Feeds.
- A new page will load with instructions, Select Get Direct Bank Feeds.
- Select the bank account you want to connect to, then select Connect.
- An authorisation form is created, select Preview form.
- Print the form and hand-sign it.
- If there are two or more signatories then all of them will need to sign the form.
Step 5
- An authorisation form is created, Select Preview form.
- Print the form and hand-sign it.
- If there are two signatories, both signatories will need to sign the form. If there are more than two, then all signatories need to sign the form.
- Email or post the form to intuitforms@siss.com.au with subject: QuickBooks Bank Feed Request.
- Or post it to: Mail: SISS Data Services Pty Ltd, Locked Bag 3060, Crows Nest, NSW, 1585.
- Banks do not accept copies so don’t deliver the form to your local branch.
- This can take up to 10 business days from receiving your form.
If you're having trouble connecting, read our FAQs.
Step-by-step guide
CSV
CSV
Step 1
- Go to the Transactions tab from the left hand navigation and select Chart of accounts or Default Chart of accounts (Take me there).
- Find the bank account you want to upload the transactions into.
- Select the arrow pointing down next to link accounts and select upload file.
Step 2
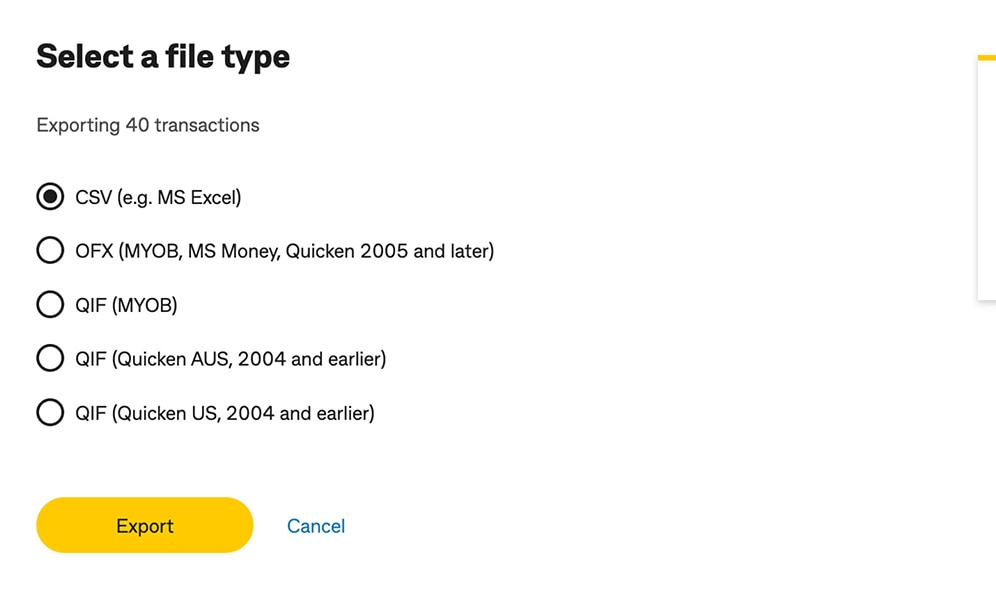
- Go to your bank or credit card's website and sign in.
- Follow your bank's instructions on how to download CSV files (every financial institution has different steps).
- Make sure the date range for the download is at least one day before your oldest transaction.
- Download your transactions and save the file on your computer.
Step 3
- Review the file format and size, the maximum file size is 350 KB.
- If your file is too big, shorten the date range and download your transactions in smaller batches.
- Ensure you have formatted the CSV file in the correct format before you upload it.
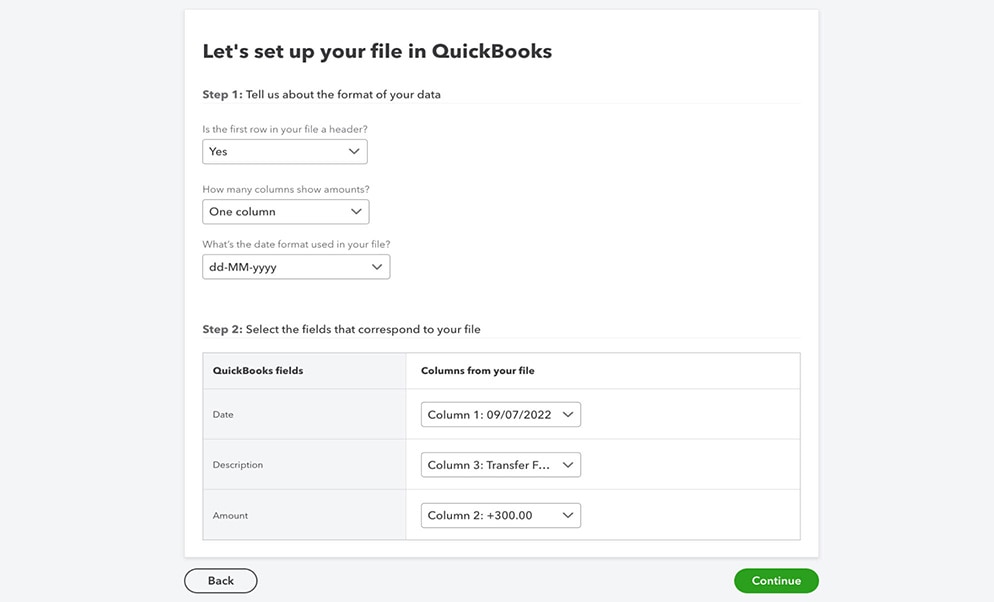
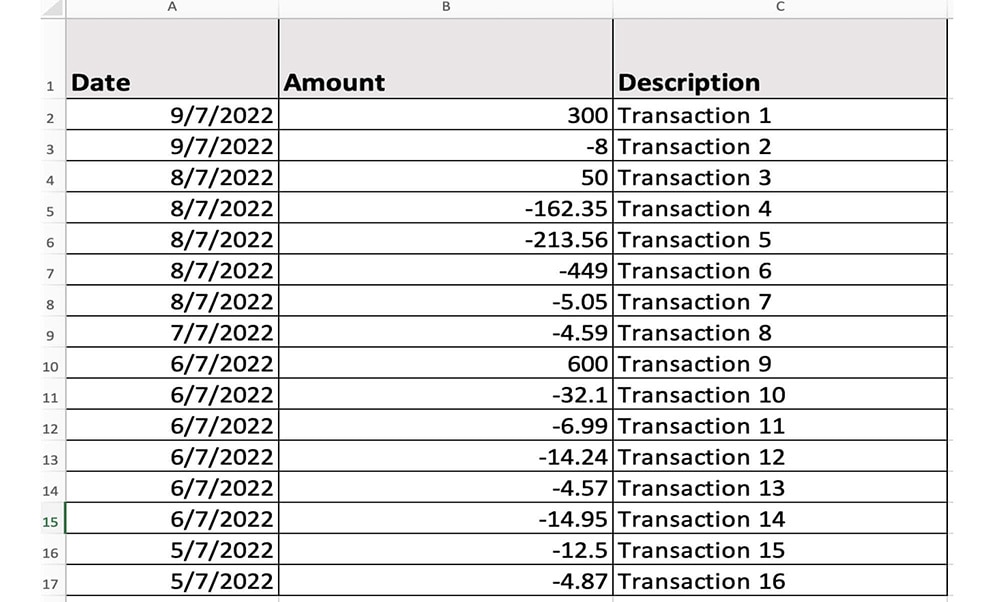
Step 4
- Go back into QuickBooks Online and drag and drop the CSV file.
- Follow the onscreen steps to match the columns on the file with the correct fields in QuickBooks and select Continue.
- Select the transactions you would like to import and select Continue.
- Accept your transactions by clicking yes and then select Done.
NEW!
FREE Business Health Check
Find out how your business is performing. Complete this short questionnaire to receive a free personalised Business Health Check report!
Related Resources


Need more help?


Intuit helps put more money in consumers’ and small businesses’ pockets, saving them time by eliminating work, and ensuring they have confidence in every financial decision they make.
Award Winning Accounting Software
