Let's work together to troubleshoot the issue you're experiencing with accessing QuickBooks Online (QBO), Squirrelinthecreek.
To begin, could you let me know if you've encountered any specific error messages when logging in to your account? If yes, please share the exact message so we can assist you better.
If no error messages appear, I recommend clearing your browser's cache to remove temporary data that may be causing the issue. After that, restart your browser and try logging in again.
If the issue persists, consider switching to a different browser to rule out a browser-specific issue.
Once your account is up and running, here are three options for creating an invoice.
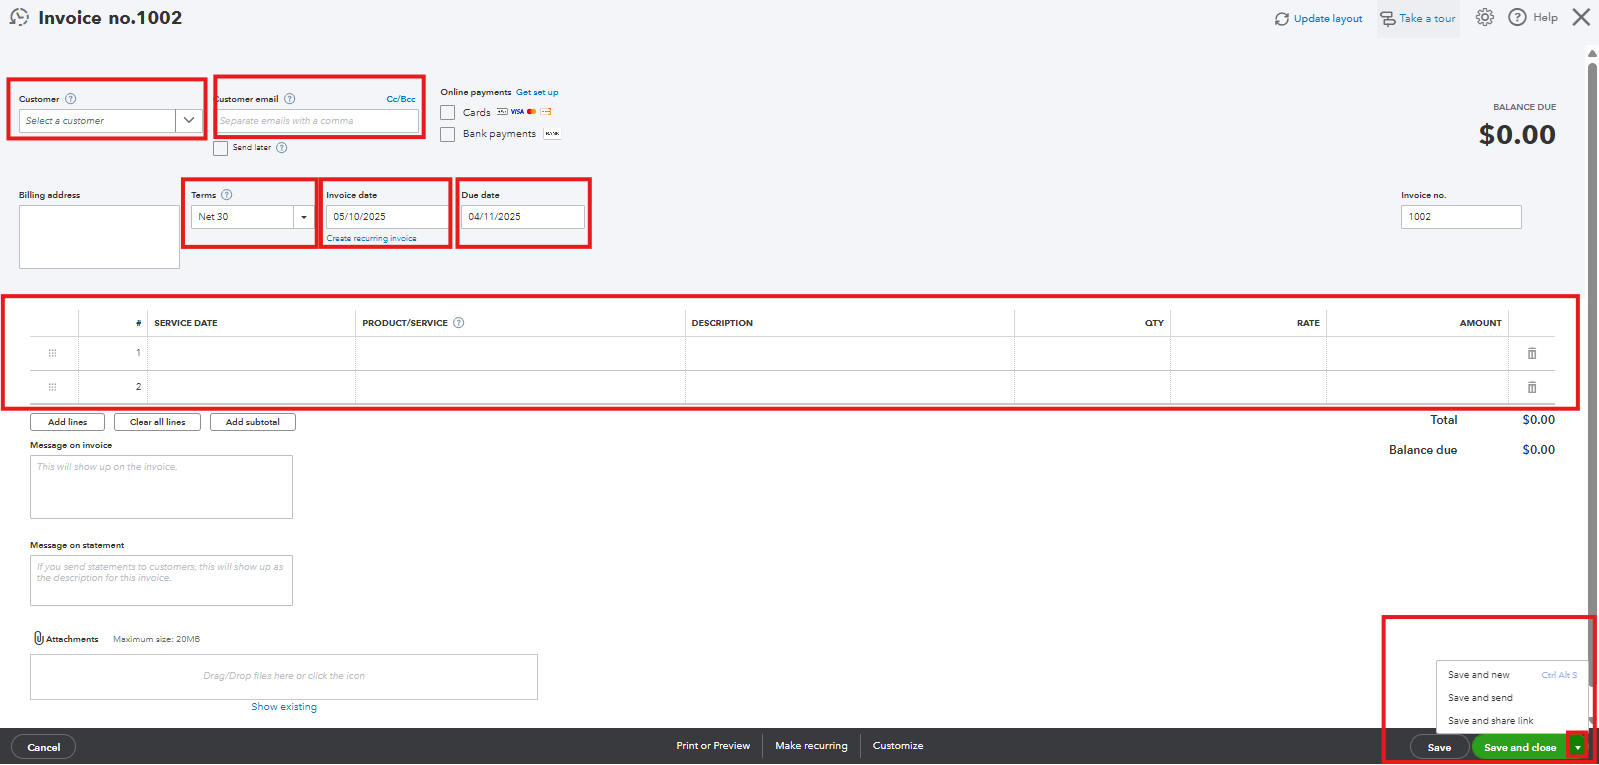
Option 1: Using the +New Button.
- Navigate to + New.
- Under the Customers column, click Invoice.
- Complete the required fields, including Customer, Invoice date, Due date, and Terms.
Tip: In the Terms field, Net refers to the number of days until the payment is due.
- For each line item, select a product or service from the dropdown. To add additional line items, select Add product or service.
- Enter the quantity (Qty) and Rate, if needed.
- Ensure all of their information is accurate, especially their email address.
- Select Save and Close. If you want to send it, choose Review and Send, then follow the on-screen prompts.
-
Option 2: Through the Sales menu.
By doing so, you can view all the invoices you have made for your customers.
- Hover over to the Sales tab, then select Invoices.
- Click on Create Invoice located above the Action column.
- Fill in all required fields, including Customer, Invoice Date, Due Date, Terms, and line items.
- Ensure all of their information is accurate, especially their email address.
- Select Save and Close. If you want to send it, choose Review and Send, then follow the on-screen prompts.
Option 3: From the Customers Page.
This allows you to view all invoices sent to that customer.
- Go to the Customers & leads tab, then select Customers.
- Select the customer to whom you want to send an invoice.
- In the upper right portion of your screen, click the New transaction dropdown, then choose Invoices.
- Fill in all required fields, including Invoice Date, Due Date, Terms, and line items.
- Ensure all of their information is accurate, especially their email address.
- Select Save and Close. If you want to send it, choose Review and Send, then follow the on-screen prompts.
Feel free to choose the method that works best for you.
If you have further questions, feel free to add a reply.


