Hi there,
Welcome to the Community! I'll be happy to give you a hand with applying a discount on customer's invoice.
You can easily discount a percentage of an invoice or sales receipt. And if you give set discounts with fixed prices, we'll also show you how to add them. Here's how to set up and give discounts in QuickBooks Online.
Step 1: Turn on the discount feature
If you haven’t already, turn on the discount feature.
- Select Settings ⚙ and then Account and Settings.
- Select the Sales tab on the menu.
- In the Sales form content section, select the pencil ✏ icon to edit it.
- Select the Discount checkbox to turn it on.
- Then select Save and then Done.
This adds the discount field to your invoices and sales receipts. QuickBooks also creates a Discount given account to track everything on your chart of accounts.
Step 2: Apply a discount
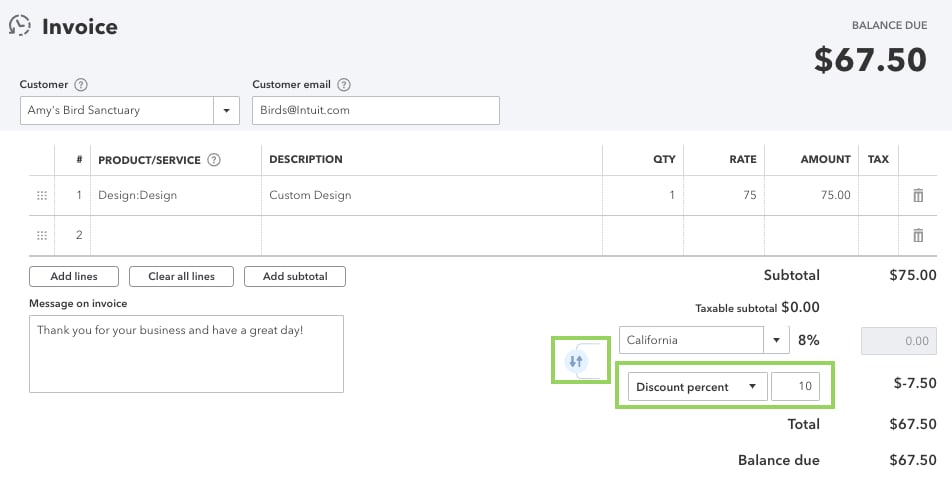
Discount a percentage or specific amount
Use the discount field on an invoice or sales receipt.
- Select the + New button.
- Select Invoice or Sales receipt.
- Add products and services. Then fill out the rest of the form.
- Select Discount percentage or Discount value to enter the discount as a percentage or a specific amount.
- Enter the amount you want to discount in the discount field.
- If you want to discount the total before you calculate sales tax, select the arrow icon next to the discount field.
- When you're finished, select Save and send or Save and close.
 ]/conditional]
Add a discount item with a fixed price
If you give set discounts for set amounts, create a new product item that you can add to invoices or sales receipts.
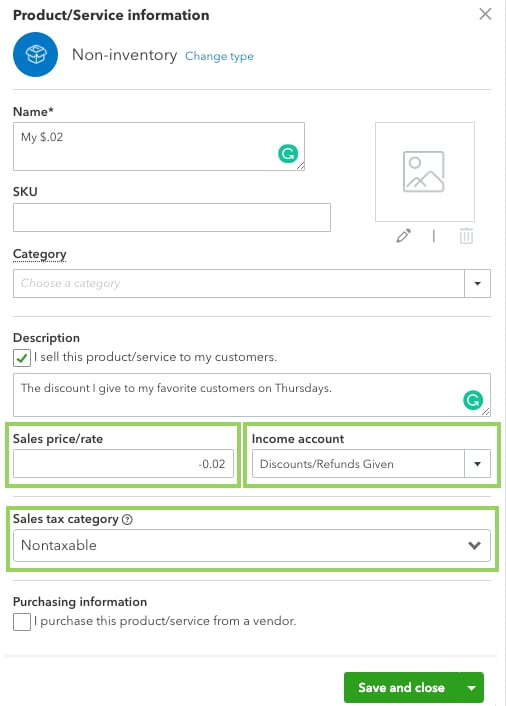
Step 1: Create a discount item
- Select Settings ⚙ and then Products and Services.
- Select New to create a new item.
- Select Non-inventory or Service for the type.
- Name the item Discount. If you want to create multiple discount items, give them unique names so they're easy to tell apart.
- In the Sales price/rate field, enter the discount as a negative amount. Keep in mind, this is a dollar amount and not a percentage.
- From the Income account drop-down menu, select the Discount given account. QuickBooks creates this account for you when you turn on the discount feature.
- From the Sales tax category drop-down menu, select Nontaxable.
- When you’re done, select Save and close.
Step 2: Add the discount to an invoice or sales receipt
- Select the + New button.
- Select Invoice or Sales receipt.
- Add products and services. Then fill out the rest of the form.
- Add the Discount item you just created. You can adjust the discount if you need to, just make sure it's a negative amount.
- When you’re ready, select Save and send or Save and new.
In case you have other questions, feel free to contact our support team using this link here.


