Generating a Part number is exclusive to the QuickBooks Desktop (QBDT) version, EJD2. I'm here to help you make this information available once printed and sent, depending on whether you're using the QBDT or QuickBooks Online (QBO) plan.
Beforehand, can you please verify where or on what part of the Purchase order (PO) you've inserted the Part number? Are you utilizing the Custom field feature in QBO to generate this detail? If so, it will not automatically be visible on the print preview and sent form.
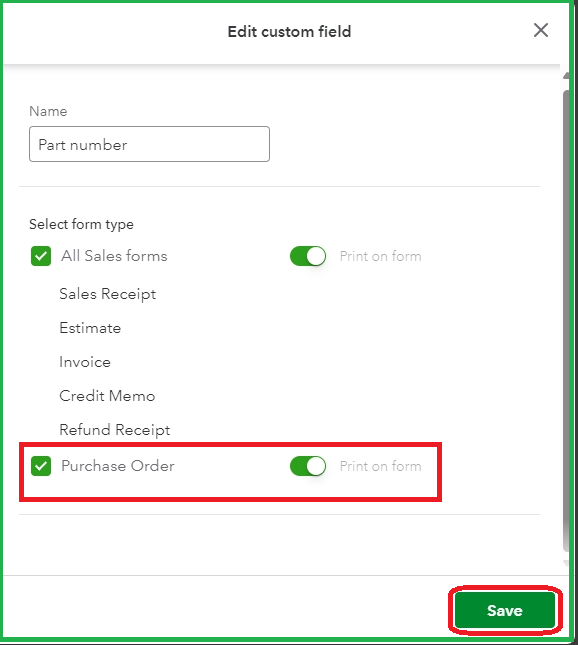
To enable this, let's turn on the Print on form option:
- Go to the Gear icon.
- Select Custom Fields and locate the Part number from there.
- Click its designated Edit option under the Action column.
- On the Select Forms section, switch on the PO's Print on form function.
- Once done, hit Save.
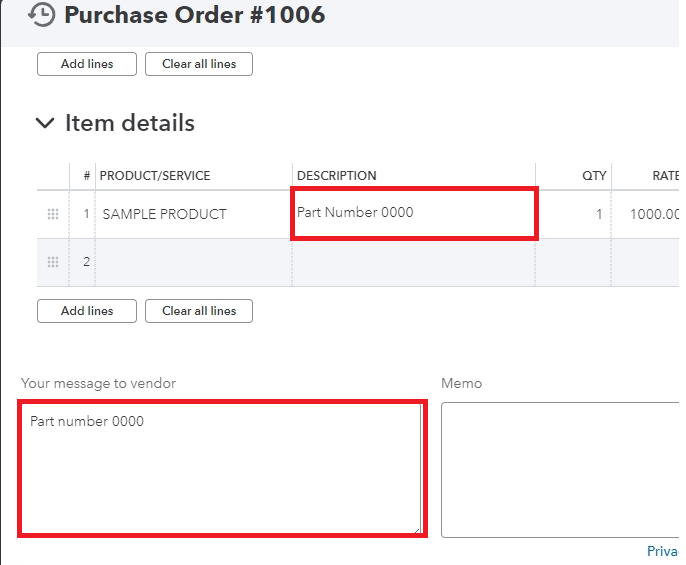
However, if you're using other PO fields, like Description or Your message to vendor, it will appear on the sent and printed PO, but the Memo is internal (will not show on your vendor's end). In this case, please ensure to enter the Part number as a Description or message to vendor.
Nevertheless, if you encounter the same result, I recommend troubleshooting your browser to narrow down the result. To start, kindly access your account using a private browser, then print and send the PO from there.
Refer to the keyboard shortcut keys below to proceed:
- Google Chrome: Ctrl + Shift + N
- Mozilla Firefox: Ctrl + Shift + P
- Microsoft Edge: Ctrl + Shift + N
- Safari: Command + Shift + N
When there's no problem while using the private session, it indicates excessive data build-up. It can impact the system's functionality but is fixable by clearing your standard browser's cache and cookies. You can also consider utilizing another supported browser if the issue persists.
Meanwhile, if you're on the QBDT version, we can enable the Part number from the PO page Formatting section:
- Go to the Vendors menu, then Create Purchase Order.
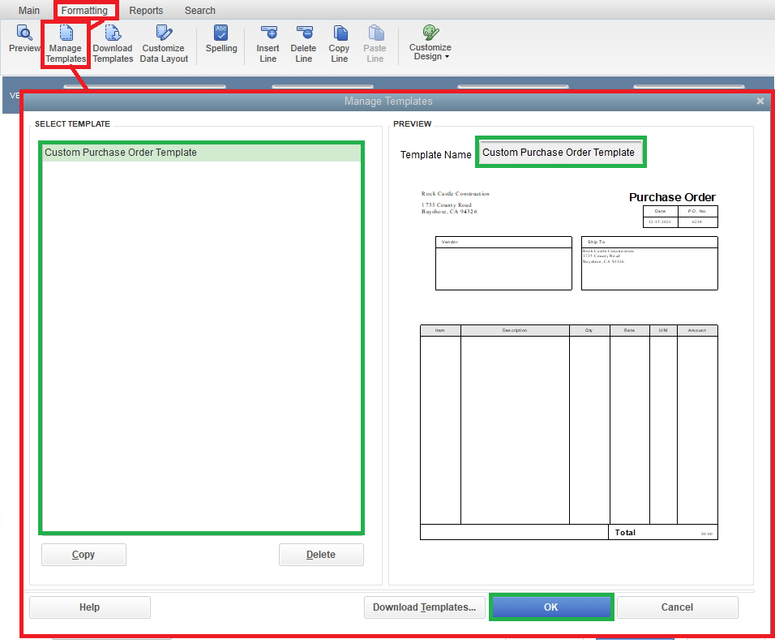
- Click the Formatting button, then Manage Templates.
- Enter a Template Name or choose your default PO template on the list and tap OK.
- Select the Additional Customization option.
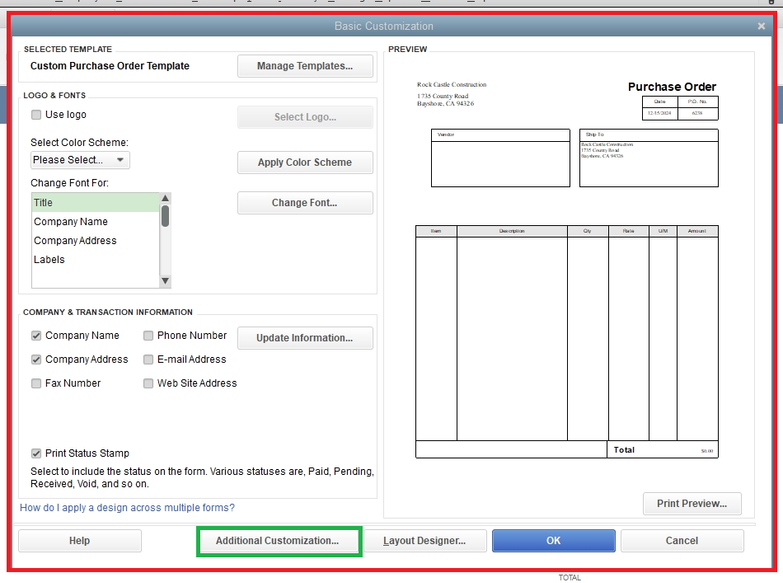
- Navigate to the Columns tab. From there, switch on the Mfr Part Number field. Then, modify the Order and Title if needed.
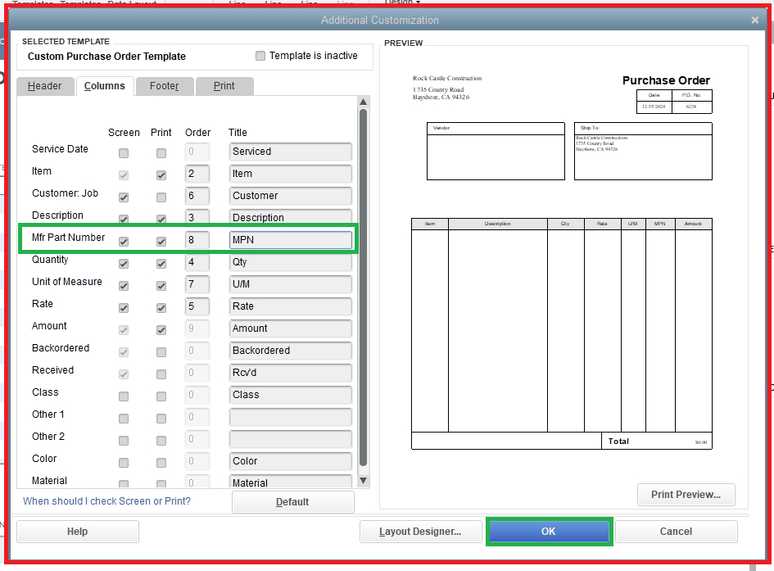
- Once done, tick OK, and once prompted to the Basic Customization page, hit OK again.
Additionally, if you need a complete view of your open PO in the platform, you may utilize these articles to guide you through the process:
If you're ready to add more details or have follow-up questions about your PO's Part number, hit the Reply button. Rest assured, I'm always here whenever needed.