I'm glad to have you here in the Community, @CaraE.
Let me help you with your sub-account transactions in QuickBooks Online (QBO).
To start with, the option to connect both parent and sub-accounts is unavailable. Since the transactions are not going through to your QBO Company, we can disconnect your parent account and connect all your sub-accounts. This way, transactions from there will be added to your banking tab to be matched and categorized.
Nonetheless, I suggest you manually add and record the transactions from your Expensify application to your Bank Register. Then, if you process the payments within QBO for these transactions, you can also exclude them from the banking tab and manually clear them in your register.
Follow these steps to connect your sub-accounts:
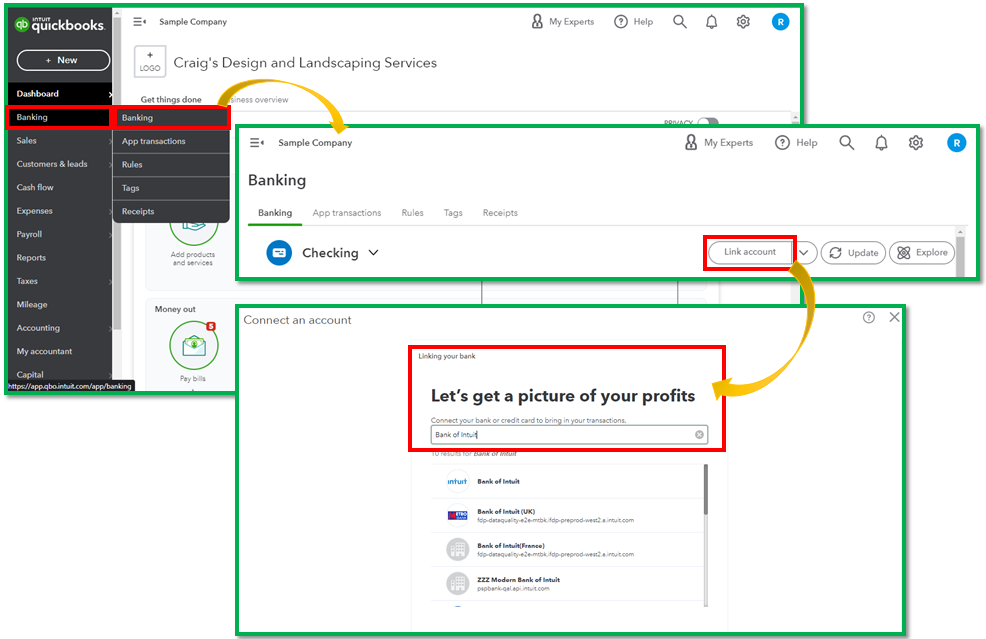
- From the left menu, click the Banking menu and select the Banking tab.
- On the Banking page, select the Link account.
- In the Search field, enter the bank's URL.
- Select your bank. If you see multiple options, you may have to repeat these steps to find the correct one.
- Enter your bank login on your bank's website, then select Continue.

Then repeat the steps above for the other accounts you need to connect. Afterward, it's time to manually add your Expensify transactions to the Bank Register. Here's how you can do that:
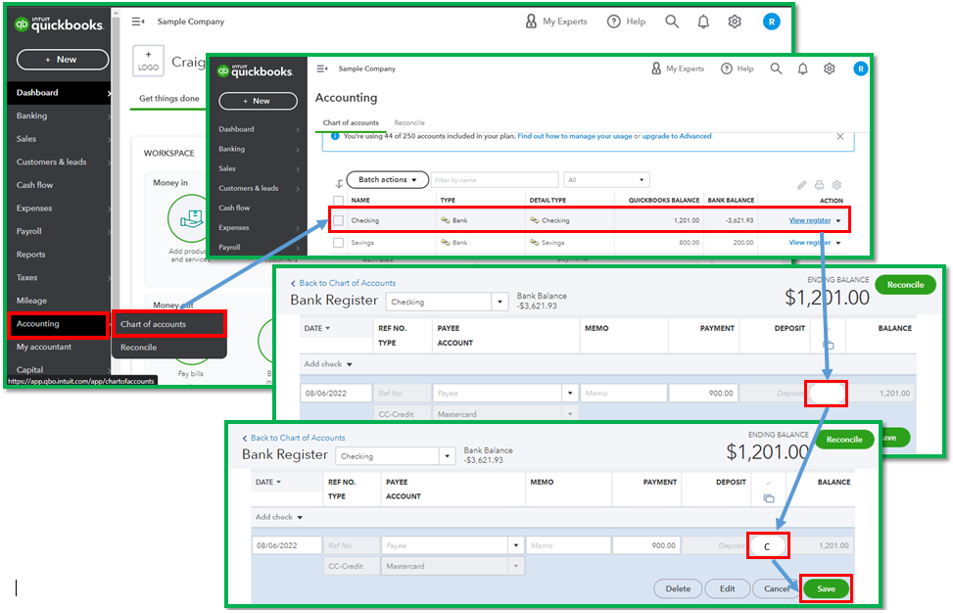
- Navigate to the Accounting menu and select Chart of Accounts (COA).
- Select the Bank Register, and click View Register under the Action column.
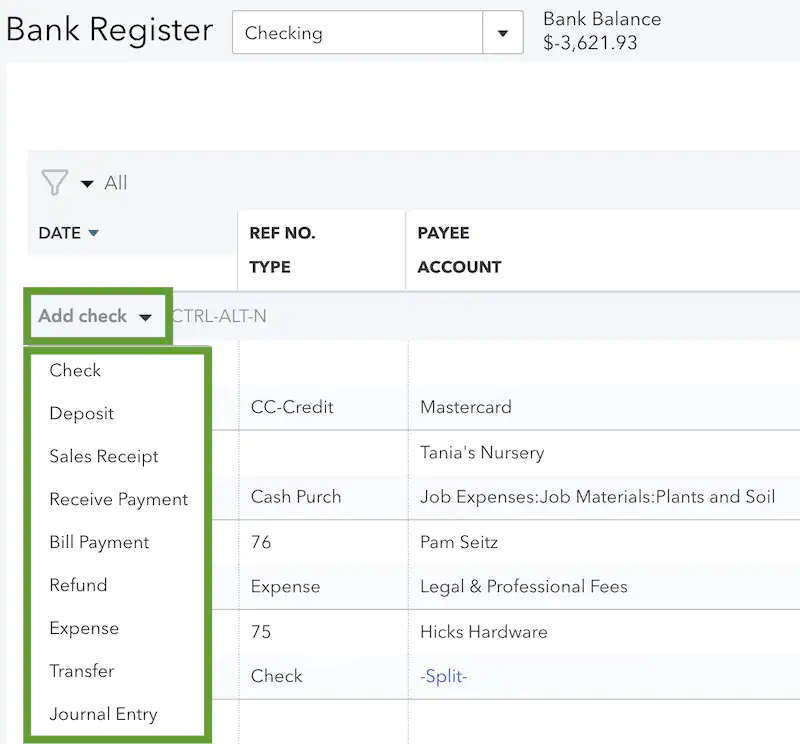
- At the top of the list, please choose what type of transactions you want to add to the account register. Either Add journal entry, Add check, or Add deposit ▼ dropdown menu.
- To finish the transaction, complete the fields.
- When finished, choose Save.

Once sorted out and the payments for the following transactions are downloaded to your QBO, you can exclude them by following the steps from this article and refer to Step 2: Exclude a downloaded transaction: Exclude a bank transaction you downloaded into QuickBooks Online.
After excluding the transaction, you can proceed with clearing this to the account register to tag this as cleared automatically.
- Go to the Accounting tab on the left panel and select Chart of Accounts.
- Pick the account you're working on, and click on View Register.
- Select the transactions you want to clear.
- Keep clicking the status field until it shows cleared (C).
- Click on Save.
- Choose Yes in the confirmation window.

For your final step, you'll want to reconcile to ensure that everything is balanced. You'll need to reconcile only the parent account since everything rolls up into it: Reconcile an account in QuickBooks Online.
Feel free to add your comment if you have more questions about your banking transactions in QuickBooks. I'll make sure that everything is being addressed. Have a good one!