Warm welcome, Victor. You can add a header on the first page of your invoice to display your company name and address. For the additional pages, we can download the transaction and manually input the details. Also, let's propose automating this process to our product engineers for review and future implementation.
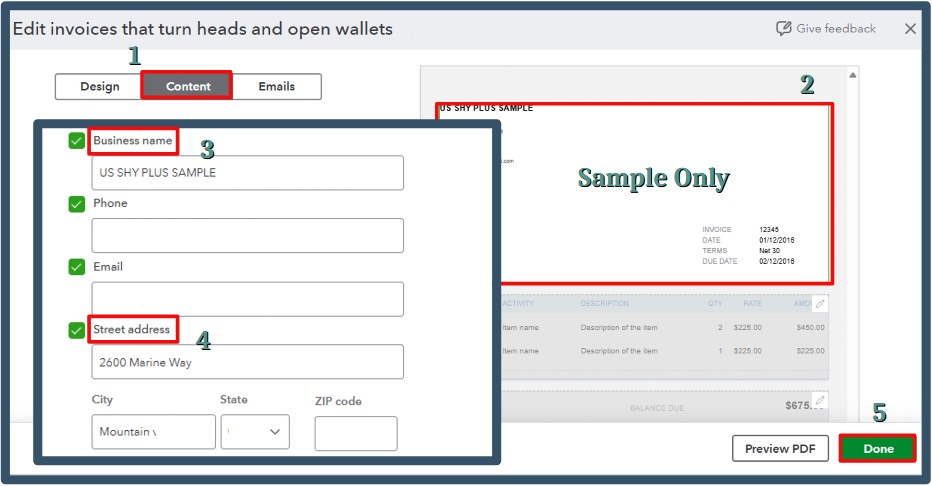
If you haven't already customized your invoice header, here's a step-by-step guide:
- Head to the Gear icon, then Custom Form Styles.
- Choose the Standard default template or click your preferred form.
- On the Content tab, click the first part of the form.
- Locate the header and tick the Business Name and Address options.
- Review and hit Done.
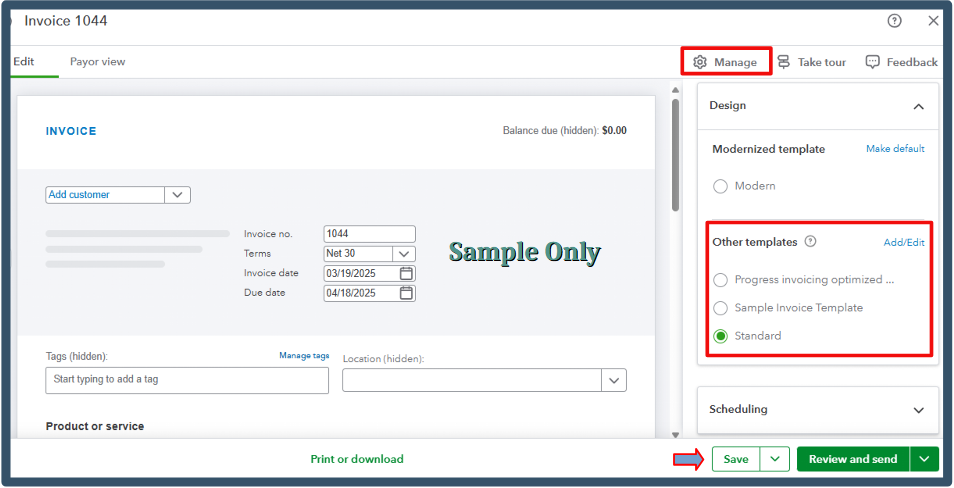
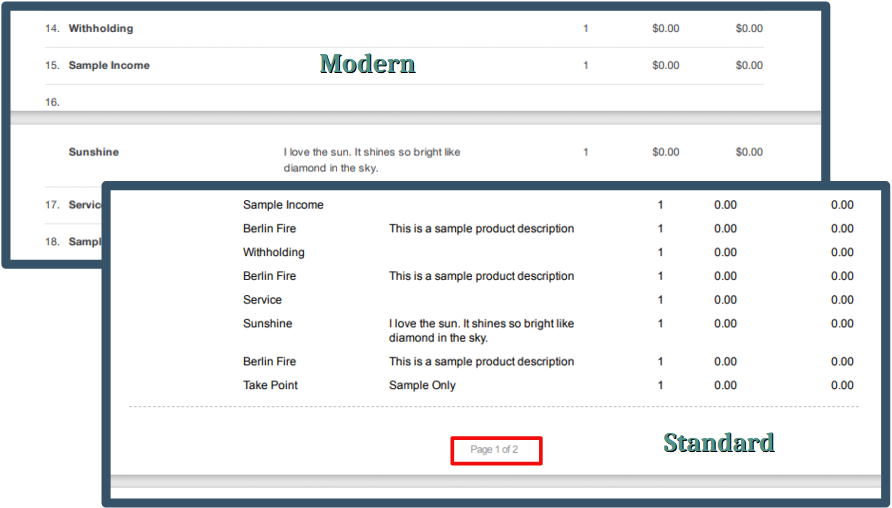
As you continue, when the initial page of an invoice fills up with the items, the system automatically generates an additional page. Ensure to choose the Standard or other template instead of the Modern one, as this will provide a clear page divider. Please see the attached screenshots below:
In the meantime, we can download the invoice, add another page, and include the necessary header information. Since manually adding a second page within the program is unavailable, I recommend sharing this idea with our product engineers. Your suggestions can influence future updates and improvements.
Here's how to send one:
- Head to the Gear icon, then select Feedback.
- Enter your ideas or recommendations in the box provided.
- Once done, submit it.
For future reference, you can visit these resources as a guide in handling your invoice payments and customer's balances in QuickBooks Online:
Sharing your thoughts with our product engineers will initiate a review process that could lead to valuable product enhancements. With the workaround, you can easily add your company name and address on the additional pages. If you have any further questions or need assistance with this setup, feel free to ask. I'm here to help.


