Applying a vendor discount is done differently in QuickBooks Online, @christa8. Let me guide you through the steps.
In QuickBooks Online, applying a vendor discount is completed manually, as there’s currently no automatic feature to apply discounts based on vendor payment terms.
To apply the vendor discount, you’ll need to set up a Service item named "Vendor Discount" and use it when recording your vendor's bill. Once created, you can manually calculate and enter the discount amount to adjust the balance due.
Here's how:
- Click the +New button.
- Select Bill from the menu.
- Choose the vendor you want to apply the discount to.
- In the Item Details section (second line), click +Add new.
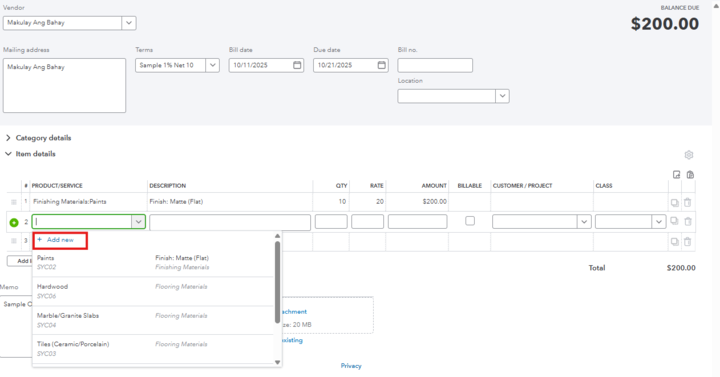
- Select Service from the list.
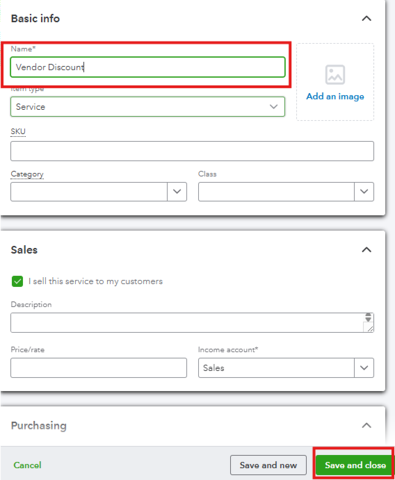
- In the Name field, enter "Vendor Discount." Then, select Save and close.
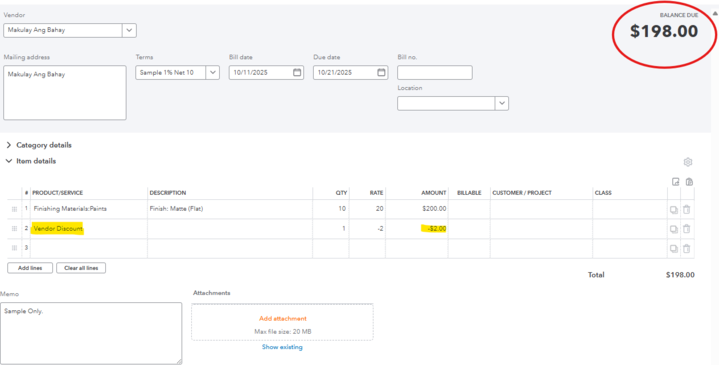
- On the Amount field, enter the discount value (manually calculate the 1% discount based on your vendor’s payment terms).
- Once the discount is entered, you’ll see the balance due automatically adjusted to reflect the reduced amount.
If you have any questions or need further clarification, feel free to reach out.


