Turn on suggestions
Auto-suggest helps you quickly narrow down your search results by suggesting possible matches as you type.
Showing results for
Get 50% OFF QuickBooks for 3 months*
Buy nowWe have added new parts to our inventory and when we print the physical inventory worksheet with BIN locations we have found that new inventory shows up on the last page not with the BIN location of items in the same bin.
For example we have BIN location GC10 (grey cabinet, cabinet number 10). We added a new part that goes in this location but this part does not show up with all the other parts in GC10, but shows up and the last page after the letter Z location.
Why does it not put this item with other items in GC10 on the worksheet?

Hello, 67FARMER.
Thanks for reaching out for support here in the Community. I'm happy to provide some info about the physical inventory worksheet in your QuickBooks Desktop account.
When printing a physical inventory worksheet with bin locations in QuickBooks Desktop, new inventory items might appear on the last page, not grouped with items in the same bin, because the bin locations are not being correctly associated with the new item during its creation or transaction.
To verify bin location settings:
1. Go to Edit > Preferences > Items & Inventory > Company Preferences.
2. Click on Advanced Inventory Settings.
3. Make sure that "Track bin Locations within Inventory Sites (row, shelf, or bin)" is checked
The following article provides additional info about setting up Advanced Inventory.
Please feel free to drop a comment below if you have any other questions. I'll be here to help.
Okay i tried what you said and nothing changed. In fact I sent up a new part and used BIN location 10. That fell into line with the others. Then I changed it to BIN location GC15 and it came at the end of the report with all the other letter locations we have added?
I appreciate your effort in performing the steps mentioned above, 67FARMER. Let's confirm the items are added to the specific BIN location. Let me show how it goes.
You can ensure that when recording a new item, it is assigned to the correct location. Please note that QuickBooks is intended for recording purposes only and will accurately reflect the data you have entered.
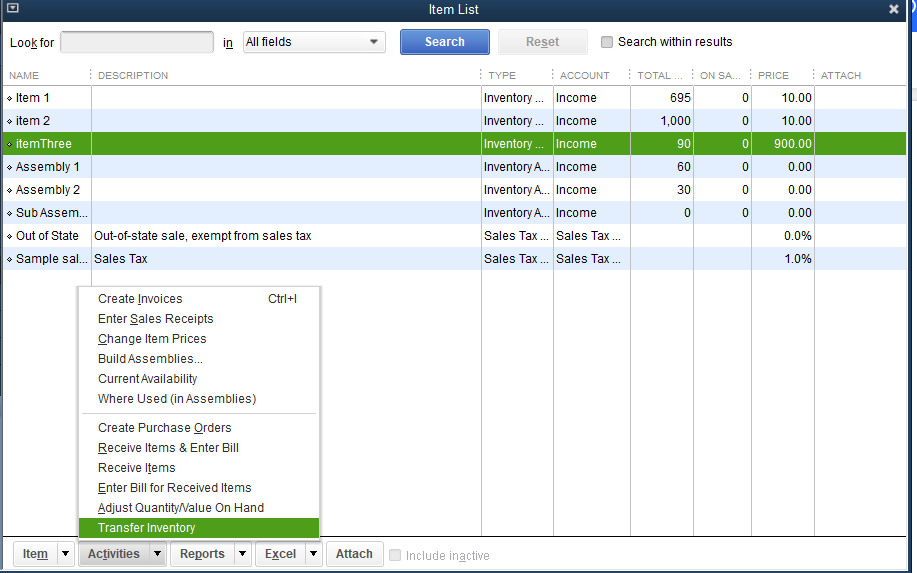
However, if you verify that the item has been posted to an incorrect BIN location, you can transfer the inventory to the correct BIN location accordingly.
Otherwise, if the item is in the correct BIN location, I recommend running the verify and rebuild the data to ensure everything is in order before you proceed with the migration. This will give you an extra layer of confidence that your data is ready to be moved without any issues.
I will also include this article to help you learn how to import or export information with QuickBooks: Import and export data in QuickBooks Desktop.
Tag me in if there’s anything else you need assistance with in managing your QBDT inventory. I’ll be around to lend a hand. Keep safe and more successful in your business.
We don't have transfer inventory when we bring this up like the screen you showed. It seems only new inventory that has a letter location goes to the end of the report. Anything numerical goes into the correct place.
I appreciate you coming back to the thread to add further details and clarification regarding the transfer inventory process, @67FARMER. With this, I'll share information.
The absence of the Transfer Inventory option may result in temporary data damage in the program, which could cause the loss of specific features. To address this, we can use the Verify and Rebuild tool.
It examines your company file for any issues contributing to the problem and initiates necessary repairs. Before doing so, ensure that you update QBDT to the latest release. To verify your company data:
Here's how to rebuild:
Note: Avoid replacing your current company file. You'll need to re-enter information into your company file from the time the backup was created.
After completing the process, make sure to activate the Track Bin Location with Inventory Sites (row, shelf, or bin) feature to guarantee that the Transfer Inventory option becomes visible. Here's how:
Additionally, consider turning reading this article to help you learn how to import or export info with QuickBooks Desktop: Import and export data in QuickBooks Desktop.
The Community is always available 24/7. Let us know if you need extra help with managing your inventory or QuickBooks Desktop in general. Your efforts are much appreciated. Stay safe, @67FARMER!
So I did the data integrity check and when I run the physical inventory report with BIN locations those parts we have added are still at the bottom. Now the parts we have added are in BIN locations starting with a letter, all number BINS fall in the correct location with the others that are in that location.


You have clicked a link to a site outside of the QuickBooks or ProFile Communities. By clicking "Continue", you will leave the community and be taken to that site instead.
For more information visit our Security Center or to report suspicious websites you can contact us here
