Yes, you can separate members by their activities in QuickBooks Online (QBO), Shuffle.
For those with QBO Plus or Advanced subscriptions, admins can use the class tracking feature to separate transactions or activities. (Users under another plan can upgrade to utilize this functionality.) Here's how to do it:
- Turn on class tracking.
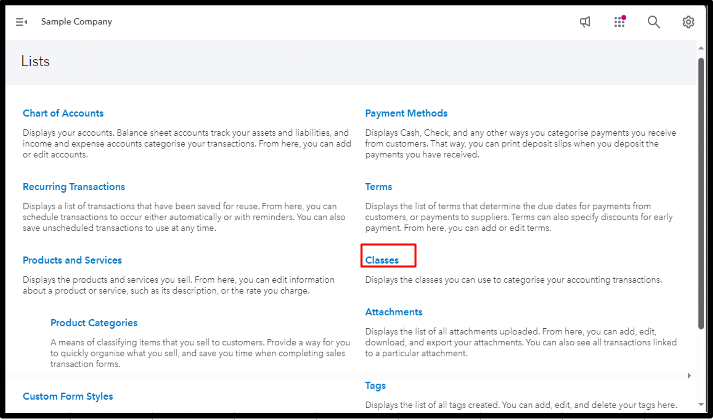
- Go to Settings and choose All lists.

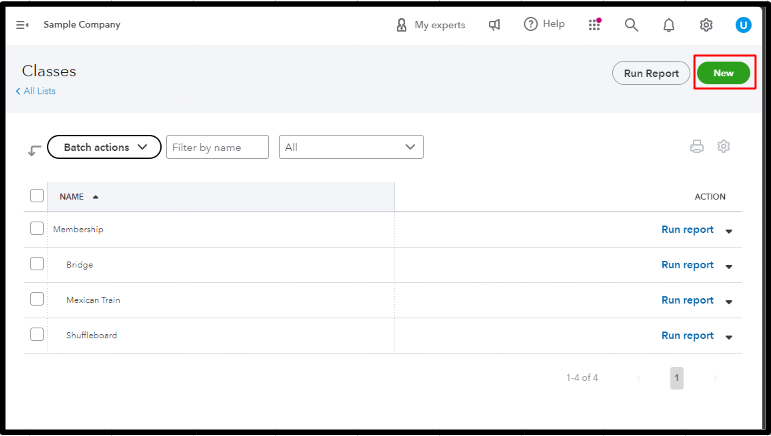
- Select Classes and Tap the green New button in the upper right.


- Enter a name for the Parent class. You can call it Memberships. Ensure the Is sub-class box is unchecked. Click Save.

- Then, add a sub-class by ticking the Is subclass box. Choose the main class you created. You can nest up to five classes.
- Hit Save.

After doing so, you can begin tracking your transactions by class.
If you set up Memberships as a parent account in the Chart of accounts, you can create subaccounts for a more detailed breakdown. Please refer to the steps below:
- Go to Transactions and click Chart of accounts.
- Tap New. Type in an Account name and choose an Account type. Then, select the Detail type.
- Tick the box for Make this a subaccount and click the Parent account (Memberships).
- Enter an opening balance and fill out the starting date if you choose a Bank, Asset, Credit card, Liabilities, or Equity account.
- Hit Save.


For further information, check out this article: Create subaccounts in your chart of accounts in QuickBooks.
Post again here if you have additional questions about creating classes or subaccounts in QBO, Shuffle. I'm here 24/7 to provide assistance.