Turn on suggestions
Auto-suggest helps you quickly narrow down your search results by suggesting possible matches as you type.
Showing results for
Get 50% OFF QuickBooks for 3 months*
Buy nowWe have a loan payment we are paying back to one of the owners of the company. The last bookkeeper had all those payments set up to go into his vendor account that is set up for 1099 (we rent equipment from him so that is the reason for the 1099 on this one). This obviously is not an income, so we made another vendor labeled the same, but as "loan" so next year it does not hit the 1099 report. We all the bills to the "loan" vendor, but the bill payments are stuck in the old vendor. I for the life of me can't figure out how best to clear these up so the balance is $0 and no longer shows on the aging for either account.
Solved! Go to Solution.

Hi there, HilW19.
I'm here to walk you through the process of writing off a negative vendor balance so you can zero out balances on your Accounts Payable (A/P) account.
In QuickBooks Desktop, we'll use a temporary clearing account to transfer available credits from one vendor to another.
First, let's set up a clearing account to move the existing credit from the vendor. Here's how:
Then, create a Journal Entry to move the credit from the existing vendor to the clearing account.
After, apply the credit to the Journal Entry created as an unpaid bill.
Then, create a Journal Entry to move the credit from the clearing account to the vendor.
Once done, the balance on the old vendor will clear up and will no longer show on the aging report.
You can refer to this article: Transfer and apply credit from one vendor to another. It contains screenshots to guide you in the process.
You can also customize reports in QuickBooks to get specific information. A detailed guide can be found in this article: Customize reports in QuickBooks Desktop.
Please let us know if you have any further questions regarding writing off vendor balances in QuickBooks. We're always here to help and support you. Keep safe!
Worked perfectly! Thank you!
Good day, @HilW19.
I’m glad to know that the information provided by my colleague above has helped you to figure this out. Also, you'll want to filter the correct dates in the Unpaid Bills report since it will default to show bills dated today and earlier.
Please note that if you have made a partial payment on a bill, only the outstanding amount due will be displayed under the Open Balance column. This amount is not due, so we will need to clear it out of our Accounts Payable account. To clear this out, follow the steps shared by my colleague above.
I'm also adding these articles that can help guide you in your future tasks:
If you have any other concerns about running reports in QuickBooks count me in. I'll surely get back to you. Take care.
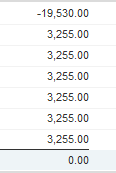
With today's date 2/19 it still shows them all. See screenshot...
Hello, @HilW19.
I can help you account for the bills when you run the Unpaid Bills Report in QuickBooks Desktop (QBDT).
Please take note that you can take specific actions to address the issue and ensure that the Unpaid Bills report accurately reflects the status of your transactions.
Moreover, since the transactions were indeed paid bills from the screenshot you've provided, you should connect them to the bill to ensure it doesn't stay unpaid. Here's the process:
I'll include this article that discusses more on how to track vendor transactions in QuickBooks Desktop: Accounts Payable workflows in QuickBooks Desktop.
If you have further questions about bills, you can comment below, and we'll respond to you as soon as possible.
Oh my goodness....thank you so much! I thought I had already done that step that is why I was wondering why it was still there. I did it on one end and not the other apparently. Thank you all very much again for helping me with this little hiccup I had in my brain. LOL
Thanks for coming back to the thread, @HilW19.
I'm glad to hear that the solution my colleague has provided was able to help you. Our main objective is to provide you with the necessary support to increase your satisfaction.
I'll keep this thread available if there's anything else you need further assistance in QuickBooks Desktop. I'm just one click away. Keep safe!


You have clicked a link to a site outside of the QuickBooks or ProFile Communities. By clicking "Continue", you will leave the community and be taken to that site instead.
For more information visit our Security Center or to report suspicious websites you can contact us here

