Assigning transactions to correct accounts is crucial for accurate recording, @megcraft. I know that learning to create categories that are aligned with farming business, along with its taxes, is important. Allow me to provide you with the steps to achieve and direct you to the person who can advise you on what exact category you should list it in.
On the Transactions page, add, edit, and hide them to customize the list you see. Keep in mind also, you can only add up to 180 categories, which includes the built-in one. If you reach the limit, you will need to hide or delete any unused accounts you manually created.
Before we proceed to the steps, I recommend reaching out to an accountant to advise on which exact category your expense transactions need to choose that is aligned with your business type and taxes.
Here's how to add a category:
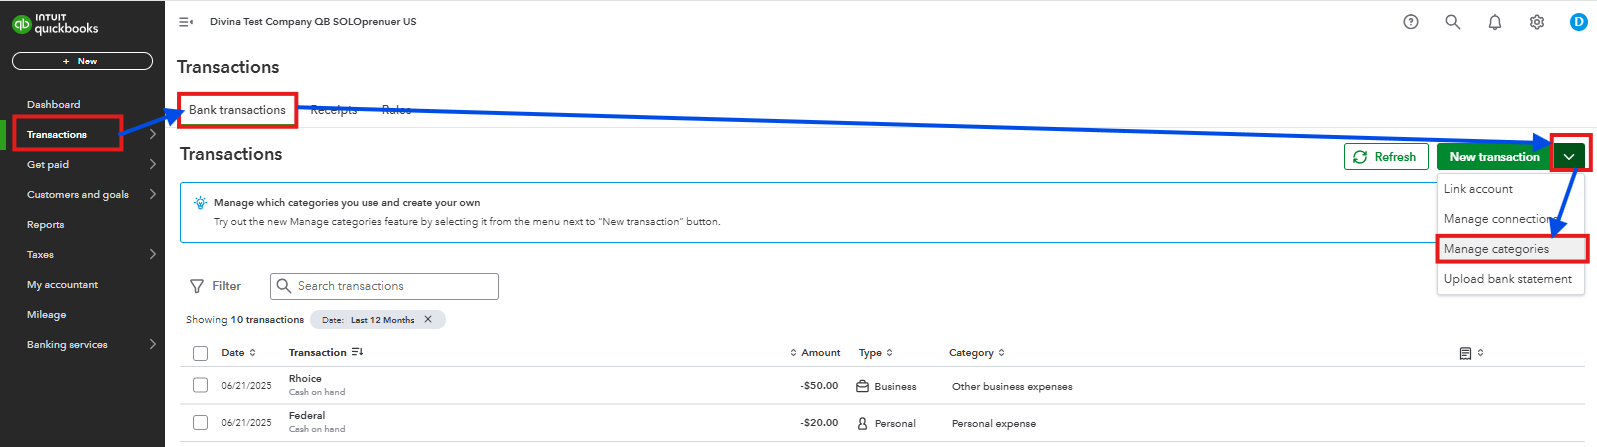
- Go to Transactions.
- Click the dropdown next to New transaction.
- Choose Manage categories.
- Select the appropriate Expense type.
- Pick the Add category.

- Create a name for the category and add a description.
- Select Save.

You can also read this article to learn what the available expense categories are in QuickBooks Solopreneur and help you choose the correct one based on your transaction, with the guidance of your accountant: Schedule C and expense categories in QuickBooks Solopreneur and QuickBooks Self-Employed.
Our ultimate goal is to make sure that your book of accounts is balanced and correct every time you file taxes to avoid penalties. For additional questions about adding expense categories in QuickBooks, you can leave a comment below.


