I'm here to assist you in adding the sales location to your invoices, install.
In QuickBooks Online, your sales forms use the address details in your company settings by default. To enter custom locations of your sales, let's turn on the Location tracking feature. Beforehand, please note this functionality is only available for QuickBooks Online Plus and Advanced.
You can follow these steps to turn on the feature:
- Go to the Gear icon and then select Account and settings.
- Click Advanced.
- In the Categories section, select the Edit icon.
- Toggle the Track locations button.

- Choose Save, then Done.
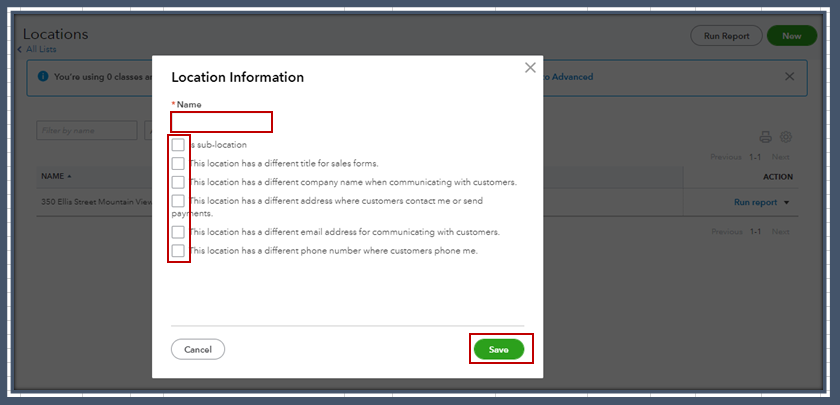
Once done, we can now add locations:
- Select the Gear icon and choose All Lists.
- Choose Locations.
- Select New at the top.
- Enter the location. Then, choose and customize the following options if needed:
- Is sub-location
- This location has a different title for sales forms.
- This location has a different company name when communicating with customers.
- This location has a different address where customers contact me or send payments.
- This location has a different email address for communicating with customers.
- This location has a different phone number where customers phone me.
- Click Save.

For more details, please see this article: Customize Sales Forms by location in QuickBooks Online.
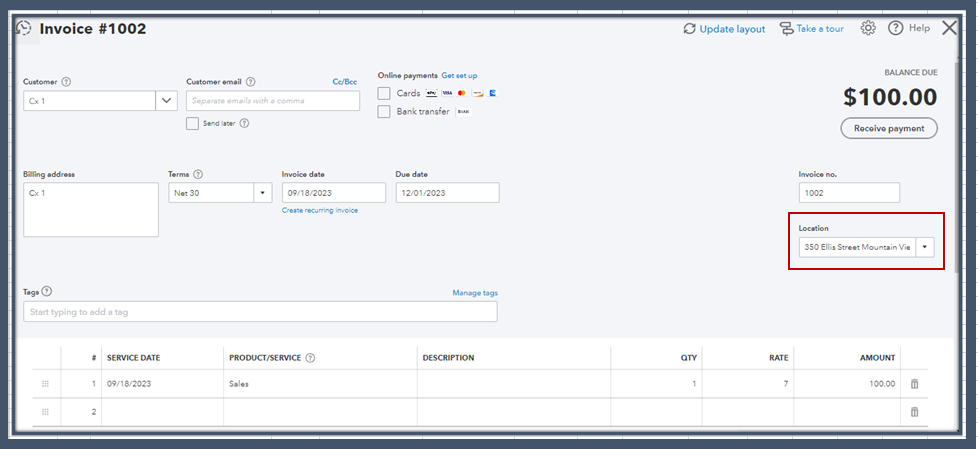
Once done, you can import your invoices. For visual reference on how the imported transaction looks like, please see the screenshot below.

Moreover, you can run and customize the Sales by Location Detail report to ensure all your transactions have the correct sales address. Here's how:
- Go to the Reports menu.
- Type in Sales by Location Detail in the Search field.
- Open the report and then click Customize.
- Modify the filters to ensure the data is correct.

Please keep us posted if you need additional assistance managing or importing your invoices. We're always here to help you out.