Good to see you here in the Community, dianneschofield-.
QuickBooks provides an easy-to-use method for configuring location tracking, allowing you to get up and running quickly. Locations are used to track multiple addresses, offices, regions, or outlets of the same company (Only available in QuickBooks Online Plus).
To turn on this feature, here's how:
- Click the Gear icon at the upper right corner and choose Account and Settings.
- Select the Advanced tab on the left.
- In the Categories section, click the pencil icon to edit.
- Select to Track locations and set the Location label to "Location."
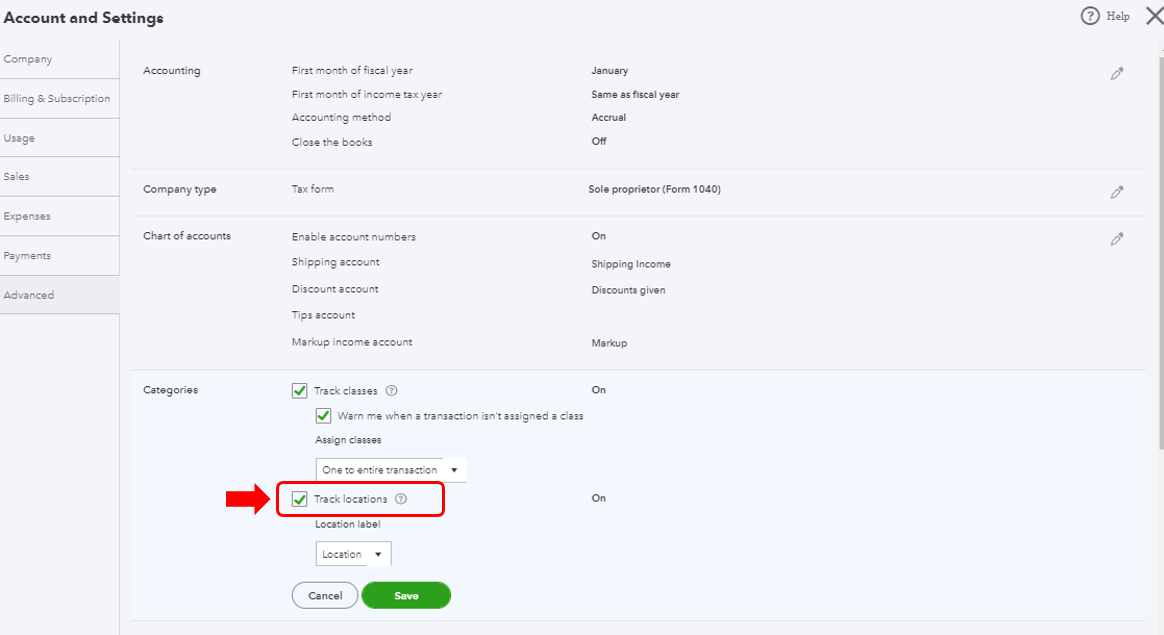
- Click Save.
- Hit Done.
Once you have Locations enabled, the next step is to enter your different addresses:
- Click the Gear icon at the upper right corner and choose All Lists.
- In the Lists page, click Locations.
- Click the New button in the top right corner.
- Enter the Name and check the box "This location has a different address where customers contact me or send payments."
- Enter the customer's address.
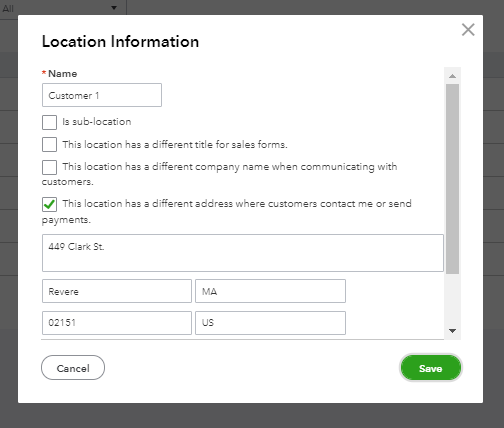
- Hit Save.
We can learn more about location or class tracking in QuickBooks by reading the following articles:
Get started with class tracking in QuickBooks Online
Turn on class tracking in QuickBooks Online.
If you have anything else you'd like to go over, feel free to reach out to me here in the Community. I'd be glad to help.


