It's delightful to have a fresh presence joining our QuickBooks Community forum. I'm excited to provide my assistance to you, North, and share our collective knowledge and experiences. Let's work side-by-side to ensure you can record a refund for your returned products.
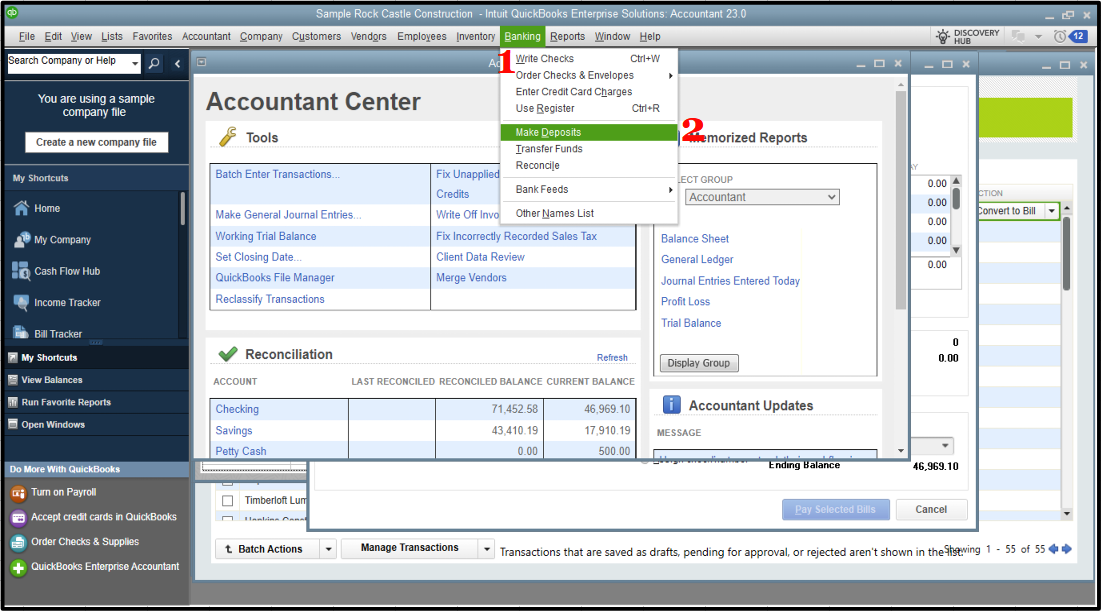
Since the bill has already been paid, we can account for the refund by recording a deposit. I'll show you how:
- Locate to the Banking menu at the top.
- Choose Make Deposits.
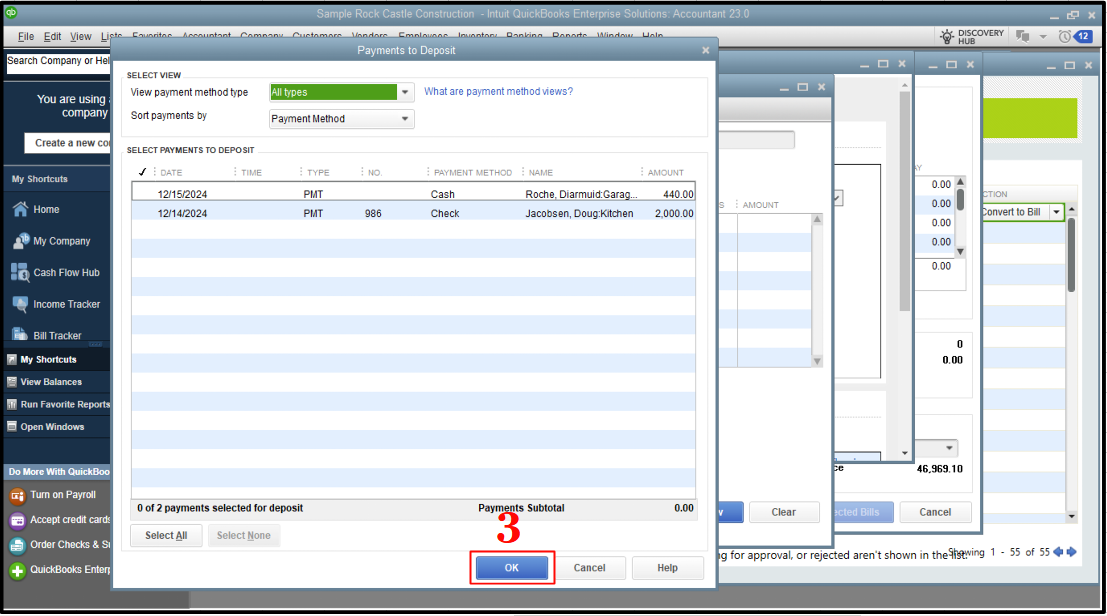
- If the Payments to Deposit window appears, hit OK.
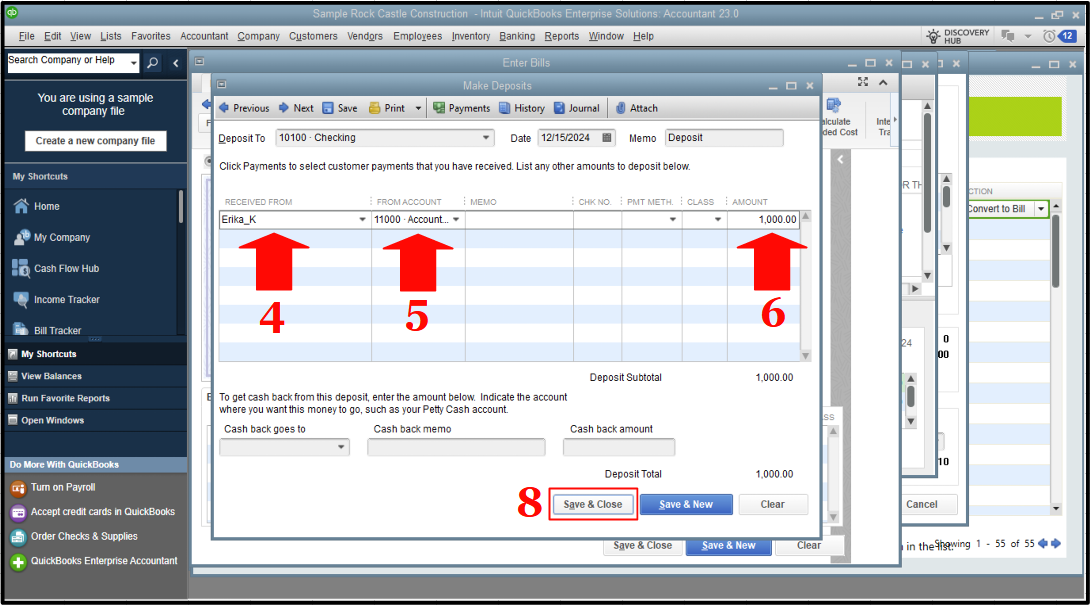
- In the Make Deposits window, select Received from the drop-down and choose the vendor who sent you the refund.
- In the From Account drop-down, determine the appropriate Accounts Payable account.
- In the Amount column, enter the actual amount of the Vendor check.
- Enter the remaining information in the Deposit.
- Once done, click Save & Close.
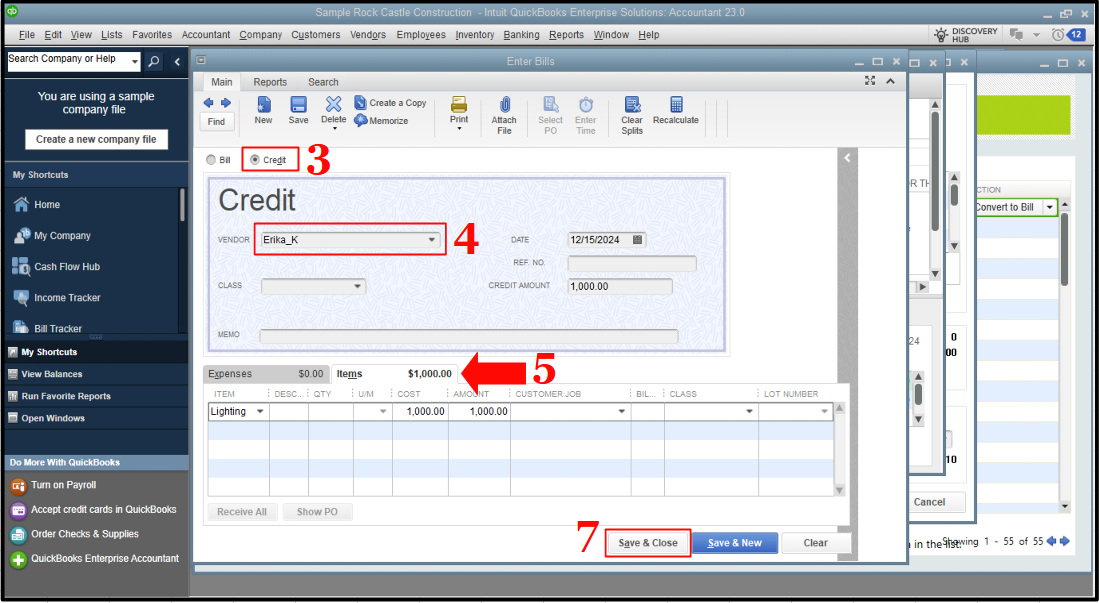
Afterward, we can record a Bill Credit. This way, we can account for the returned items. You can refer to the outlined steps:
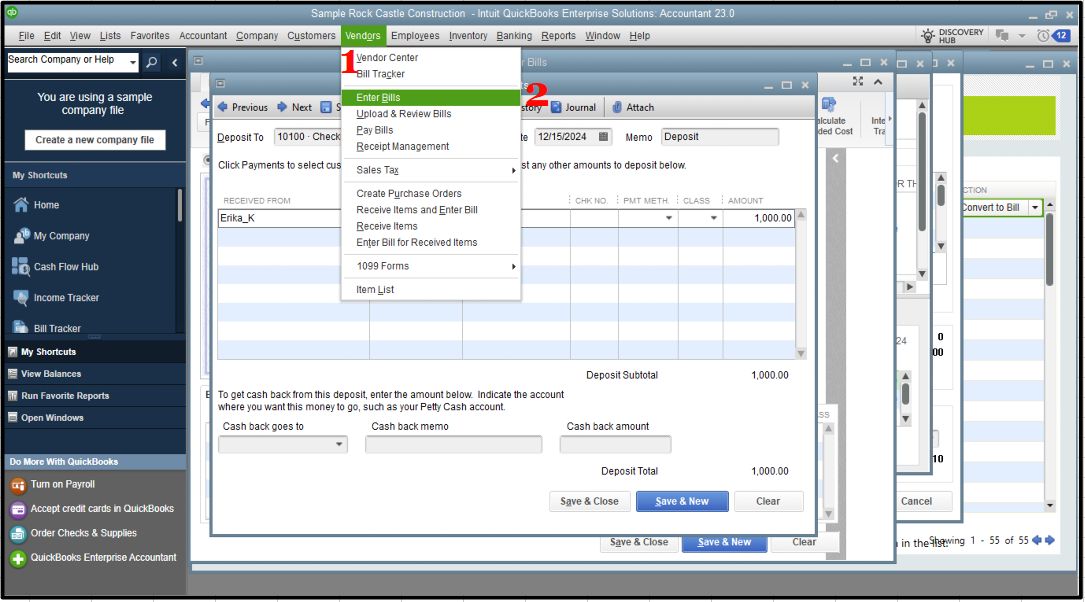
- Go to the Vendors menu at the top.
- Choose Enter Bills.
- Select the Credit radio button to account for the return of goods.
- Enter the Vendor name.
- Click the Items Tab.
- Enter the returned items with the same amounts as the refund check.
- Hit Save & Close.
Then, we link the deposit to the bill credit. Here's how:
- From the Vendors menu, select Pay Bills.
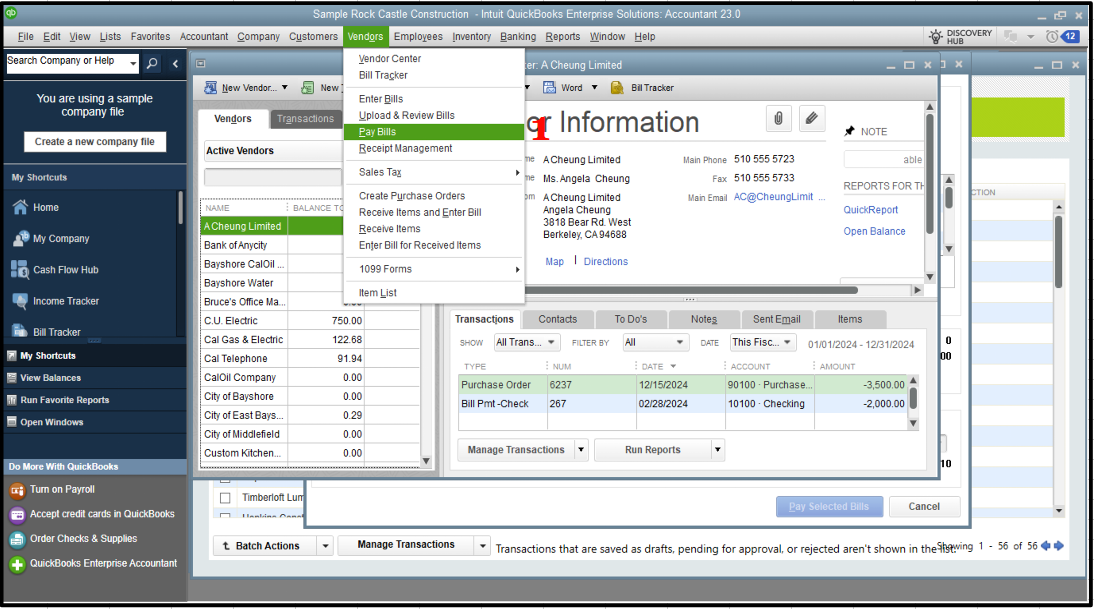
- Check the Deposit that matches the Vendor check amount.
- Select Set Credits, and apply the Bill Credit you created earlier, then click Done.
- After that, Pay Selected Bills, then hit Done.

I've included this guide to help you with managing refunds in QuickBooks:
Record a vendor refund in QuickBooks Desktop.
As always, you can comment below if you have additional questions about refunds or handling returned items in QuickBooks, North. In the meantime, we look forward to your contributions and hope you find our forum a valuable resource for all your QuickBooks-related queries and insights. Have a great rest of the week!