Turn on suggestions
Auto-suggest helps you quickly narrow down your search results by suggesting possible matches as you type.
Showing results for
Get 50% OFF QuickBooks for 3 months*
Buy nowNone of our inventory was previously assigned a bin location. It was all under "unassigned" for a bin location. I went through and added default bin locations to many of the items. How can I transfer the items from "unassigned" to their respective default bin locations? Also, is there a report that will show what the default bin locations are for each item that has one, or will it only show the current location the items are in?

You're on the right track, @dmk475. Let me help you transfer the items from unassigned to the default bin location in QuickBooks Desktop (QDBT).
To assign a bin location to an item, you can use the Transfer Inventory feature to transfer your inventory from one bin to another bin location. You can follow these simple steps:
Once done, you can run the Items by Bin Location report and customize it to add the bin location column. This way, you can see where the product was invoiced from.
Follow these steps:
I've added an article that'll help you track your inventory at different locations in QuickBooks: Multiple Inventory Sites.
For additional information on how to customize the data, delete columns, and add or remove information on the header/footer, refer to this article: Customize reports in QuickBooks Desktop.
If you need further assistance in managing your inventory, please don't hesitate to let me know by commenting below. I am always happy to assist you, @dmk475. Have a great day!
Ok. Thanks! How do I assigned default sales and purchase bins? I went into add/edit multiple items and added the needed columns. But I can't do anything with those two cells. There's a drop down arrow in the cells, but it doesn't do anything. I can't type anything in them either.
Sorry! I got it. I didn't have the site selected.
im trying to set up default bin locations but can't find where to do i've tried in site location (advance) while in single user /and admin but the drop down for making them a default doesn't show any help?
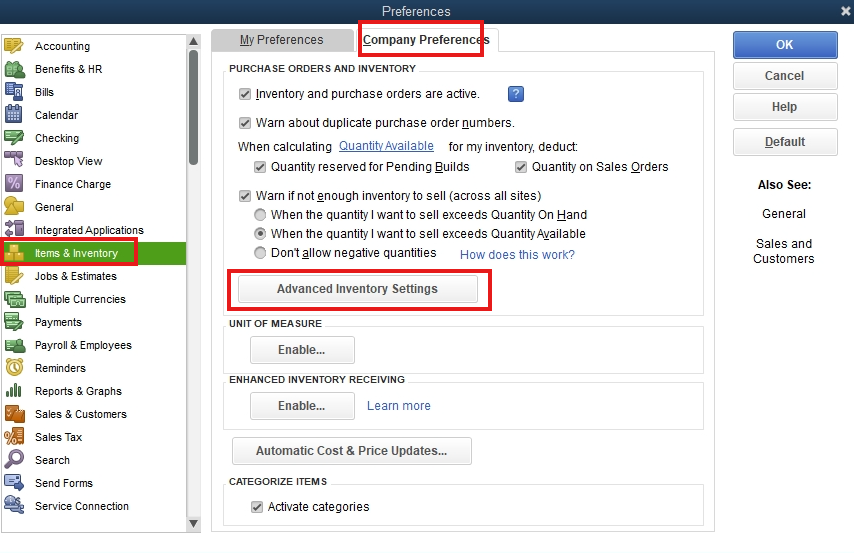
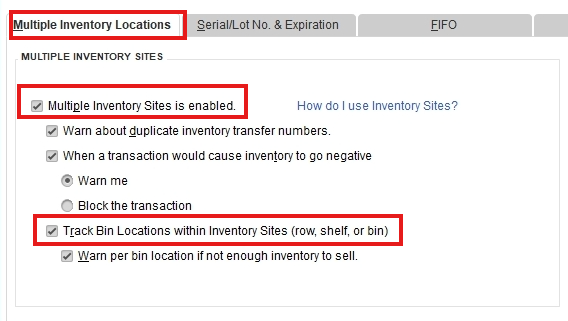
Hi, mary80132. You'll need to turn on the Multiple Inventory Sites is enabled and Track Bin Locations Within Inventory Sites' (row, shelf, or bin) options in your QuickBooks Desktop company's Preferences before you can set up bin locations.
Here's how:
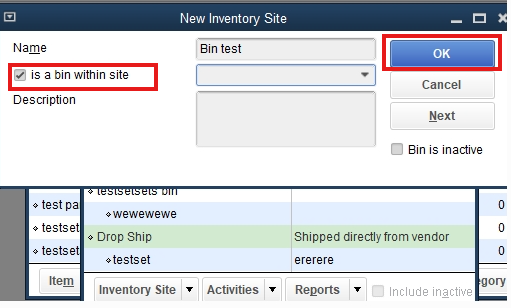
After that, you can now create new bin locations.
Here's how:
After setting up bin locations, you’ll be able to assign them to specific inventory items.
If you have additional concerns, please feel free to add a reply below.


You have clicked a link to a site outside of the QuickBooks or ProFile Communities. By clicking "Continue", you will leave the community and be taken to that site instead.
For more information visit our Security Center or to report suspicious websites you can contact us here
