Limited time. 50% OFF QuickBooks for 3 months.
Buy now & saveAnnouncements
Get unlimited expert tax help and powerful accounting in one place. Check out QuickBooks Online + Live Expert Tax.
- US QuickBooks Community
- :
- QuickBooks Q & A
- :
- Other questions
- :
- Re: Scheduling Automatic Local backup
- :
- Reply to message
Reply to message
Replying to:
- Mark as New
- Bookmark
- Subscribe
- Permalink
- Report Inappropriate Content
Reply to message
Hi there, scraig1024.
Thanks for stopping by the Community this afternoon. I'm happy to provide you with feedback on the backup process in QBDT. Below is the process you can follow for setting up automatic backup. You shouldn't encounter any issues with running multiple backups at the same time and I recommend keeping the product running throughout. Follow along below:
Step 1: Create a backup company file:
Backup company files save everything currently in your company file. This includes your accounting data, templates, letters, logos, images, and related files (QuickBooks Statement Writer, Cash Flow Projector, Business Planner, and Loan Manager). However, it doesn't back up your payroll forms. We'll show you how to do that later on.
There are two ways to back up your data. You can either back up your data automatically or do them manually.
Schedule automatic backups:
Instead of manually backing up your company file, let QuickBooks do it automatically.
- In QuickBooks, go to the File menu and select Switch to Single-user Mode.
- Go to the File menu again and hover over Back up Company. Then select Create Local Backup.
- In the window, select Local Backup and then Next.
- In the Local Backup Only section, select Browse and select where you want to save your backup company file.
- Set the number of backups you want to keep. This is optional.
Tip: No need to pencil it in on your calendar. Use the options in the Online and Local Backup section to set backu reminders.
- In the Online and Local Backup section, select Complete verification. This runs a test to make sure your backup file is in good shape before you save.
- When you're ready, select OK.
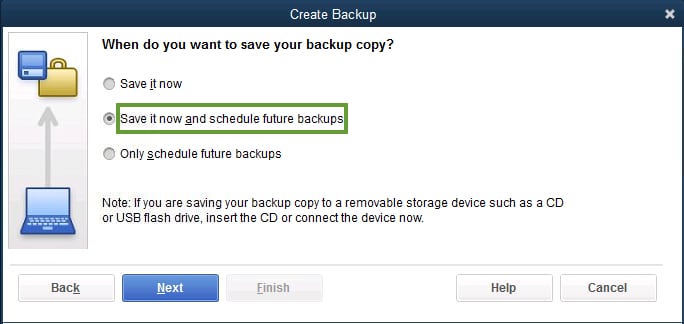
- Select Save it now and schedule future backups and then Next. Or if you don't want to save a backup now, select Only schedule future backups.
- Select the Save backup copy automatically when I close my company file checkbox. Then select the number of times between backups.
- To create a schedule, select New. Fill out the data fields to create a backup schedule. You can set a specific time or day of the week.
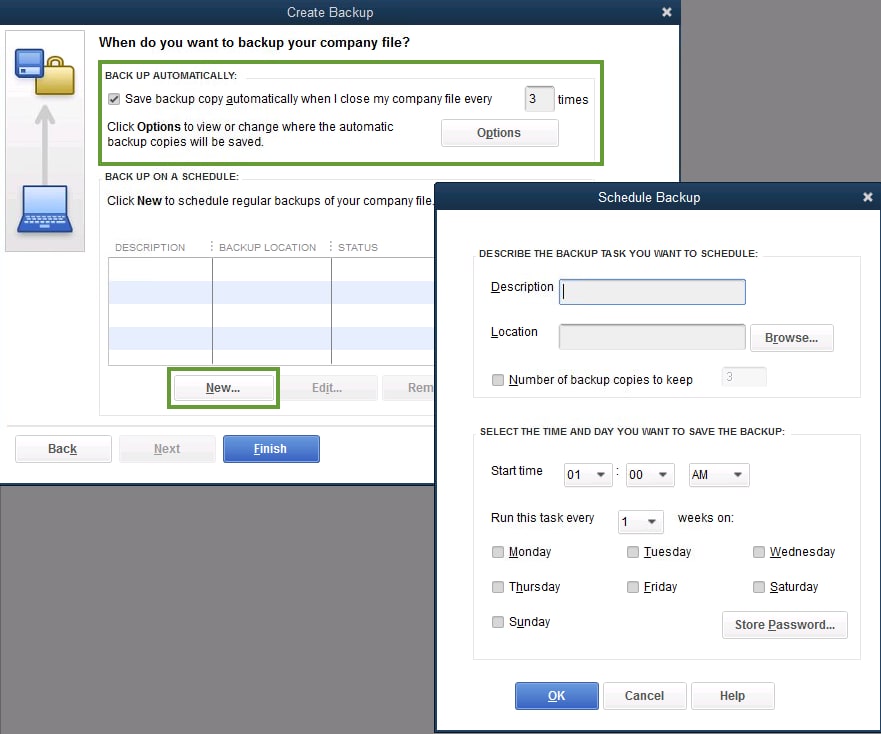
- After you set your schedule, select OK. QuickBooks asks you to enter your Windows sign-in password. This gives QuickBooks permission to run the scheduled backup.
- When you're ready to create your backup, select Finish.
QuickBooks creates a backup and schedules your future backups at the same time. When it's done, you get a confirmation message.
Next steps: Restore your backup:
Now you have a backup company file you can use to restore your company file. This file has a .qbb extension at the end of the file name.
Important: If you keep your backup company files on an external device or a hosting service like Box, you'll need to move them to your local hard drive first before you restore.
Should you encounter any issues and want to backup your files manually, you can find the steps to do so as well as the ones provided above in the following link: Back up your QBDT file.
If you have any other questions, feel free to post them here whenever you need help. Thank you and have a lovely Thursday.
