Turn on suggestions
Auto-suggest helps you quickly narrow down your search results by suggesting possible matches as you type.
Showing results for
Get 50% OFF QuickBooks for 3 months*
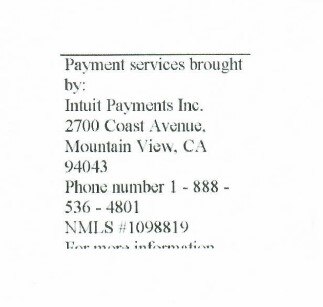
Buy nowToday I updated to Quickbooks Desktop V31.0 R12. It has changed how receipts are printing (but only credit card receipts). It is now adding an additional page with "Payment services brought by: Intuit Payments Inc." details at the bottom of my preset template. The template still works for cash transactions and the top of the credit card transactions. Where can I remove the printing of this new "page 2?
There is nothing in the template customization to remove this new printing of Intuit details at the bottom. Nor does it show up in the template preview.
Images what is now printing is attached.
Hi there, @GRTac. Allow me to share additional troubleshooting to sort out any damage in the file and resolve it.
You can run the Verify/Rebuild tool. Verify data will detect any damaged file. Rebuilding will attempt to fix the damaged data detected. It also allows your QuickBooks software to refresh the data inside the company file. Make sure to create a backup copy of your company file before doing the Verify and Rebuild process. Having a backup copy allows you to restore it to undo the changes if there are changes that occurs,
Follow the steps below on how to verify data:
Next, here's how to rebuild data:
Then, update your QuickBooks Desktop to its latest release. Follow these instructions:
If the error continues, I recommend reaching out your Technical Support Team. An agent can take a closer look at it and escalate this issue to a higher tier for further investigation if needed.
I'm also linking these articles to guide you on how to fix web connect and renaming rules errors:
You can always come back here in this thread if you need more help with managing your credit card receipts.
You appear to have answered some other question here.
Rebuild will not change how any form prints in QuickBooks. Which you should know.
It certainly will not remove the text seen on the OP's attached image, which Intuit obviously added to the printout. Which you should know.
Thank you, BigRed.
I assume all other Quickbooks Desktop merchants with Quickbooks Credit Card Processing are also experiencing this new problem with the latest update. I have not found anything in preferences or templates where this new "quickbooks" text is stated and auto being added.
Yea, seems like a lame change to me - especially that it hogs a whole piece of paper, which you'll just throw away. One wonders...
The only think I can think of to help is - if you have a printer that can print on both sides of the paper - to change the printer setup for the receipt to do that. At least you won't waste paper that way.
We have the same issue and we have set up the receipts to print front to back. I noticed today that the transaction dollar amount printed on the along with the sales receipt is the pretax amount instead of the actual amount charged. We had a customer who was confused why it showed a different amount than what was charged. Has anyone else noticed this?
I can guide you through some troubleshooting steps to help resolve the error you're having when trying to print your sales receipt,
Let's run the verify and rebuild tool in your company file. The Verify tool will find the issue within your company file and the Rebuild tool will fix it.
To verify your company data in QuickBooks Desktop, follow these steps:
To rebuild your company file data, follow these steps:
Refer to this article for step-by-step instructions on verifying and rebuilding tools in QuickBooks Desktop to ensure the data in your company file is accurate and error-free. It also provides additional resources for fixing any errors that can be found: Verify and Rebuild Data in QuickBooks Desktop.
If you're still having trouble deleting the transaction, refer to this article for detailed instructions on using Quick Fix my File and QuickBooks File Doctor from the QuickBooks Tool Hub. The article will guide you through the process of downloading and installing the tool hub: Fix company file and network issues with QuickBooks File Doctor.
Feel free to post a reply in this thread if you have any additional concerns. I'll be here to help. Have a good one!
I know this post is quite old, but did you ever find a solution for this? We just recently set up QB payments and now it's printing this second page on our credit card cash sales. Don't want or need this!
I see what you're going through with the additional page printing on your payments set up for credit card transactions, GRTac. You can modify the print settings directly in your QuickBooks account. I'll be guiding you on how to perform it.
Here's how:
We understand that every company has its own needs, and I recognize how this feature could empower your business. At Intuit, we are dedicated to addressing the needs of QuickBooks users everywhere and ensuring you have a fantastic experience. As we work on improving our services, I suggest contacting our product team with your feedback, as it plays a vital role in helping us enhance our features.
To submit feedback, follow these steps:
As you continue to manage your account and transactions, check out this article for additional insights and guidance: Fix printing issues in QuickBooks Desktop. It provides helpful tips.
Additionally, you can refer to this article in utilizing the tool to fix any related concerns: Fix common problems and errors with QuickBooks Desktop Tool.
If you need further clarification, please feel free to reach out again. We're dedicated to ensuring your experience is smooth and beneficial. We wish you continued success in your financial management and look forward to serving you again soon!


You have clicked a link to a site outside of the QuickBooks or ProFile Communities. By clicking "Continue", you will leave the community and be taken to that site instead.
For more information visit our Security Center or to report suspicious websites you can contact us here