Space for pervasive banner when authenticated

Set or change the closing date and password in QuickBooks Desktop


Learn how to stop changes to entries before a specified date with a closing date and password.
In QuickBooks you can use a closing date and password to stop changes that can affect your reports. We recommend you close your books when a new year starts. Here’s how.
Set a closing date and password in QuickBooks Desktop for Windows
Open QuickBooks and sign in as the admin.
Go to Company, and select Set Closing Date.
Enter a Closing Date and Closing Date Password.
Select OK.
Note: If you void a check dated before the closing date, with an expense account, you’ll see this message: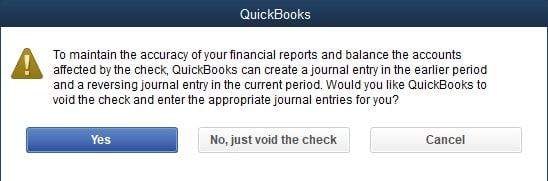
Note: If you void a check dated before the closing date with an expense account, you'll see the following message:
Select Yes for QuickBooks to create two journal entries to balance the accounts affected by the check. Creating journal entries is optional. You can still void the check, if you need to.
Set a closing date and password in QuickBooks Desktop for Mac
Go to Company and select Users and Passwords.
Select Set Closing Date.
Enter a Closing Date and Closing Date Password.
Select OK.
Sign in now for personalized help
See articles customized for your product and join our large community of QuickBooks users.
Call Sales: 1-800-365-9606




